How to Fix Windows 11 Audio Crackling and Sound Problem. When your system sound began to distorted with both the sound system either inbuilt or external speaker, it means problem with your Sound driver or incorrect sound settings. To fix this issue, you may apply windows 11 inbuilt tool troubleshooter, update sound driver, reinstall sound driver, change audio settings Windows 11 / 10 as described below in this article.
How to Fix Windows 11 Audio Crackling and Sound Problem
For clear audio, your connection of audio devices to the PC must be in proper manner. You must check the connection settings before applying other fixes. Here are the various fixes of Windows 11 Audio crackling and sound problem.
Ways-1: Establish proper connection of External Speaker
At first, check your connection, if you are using external speaker. Any faulty cable or lid may be a cause of this error. To do so, apply these steps: –
- First Remove all external connections.
- Clean the USB Port as well as Cable lid.
- Again connect external speaker to the Windows 11 PC.
- Check whether the problem is resolved or not.
Ways-2: Go through Windows 11 Audio Troubleshooter
- Press Win +I shortcut key.
- It will open Windows settings page.
- From the left pane, select System.
- From right pane, scroll down and choose Troubleshoot.
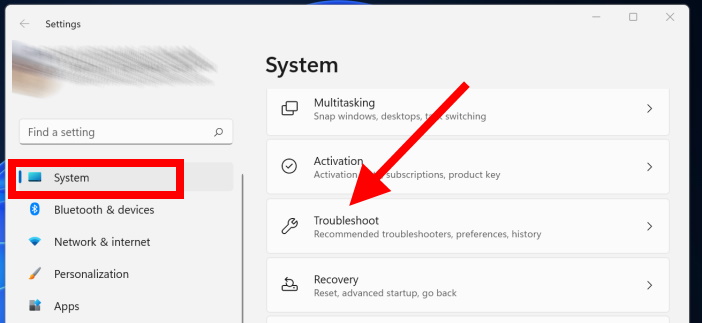
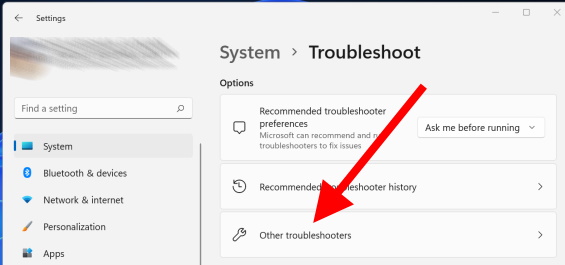
- Thereafter choose Other Troubleshooters.
- Here click on Run button against option Playing Audio Troubleshoot.
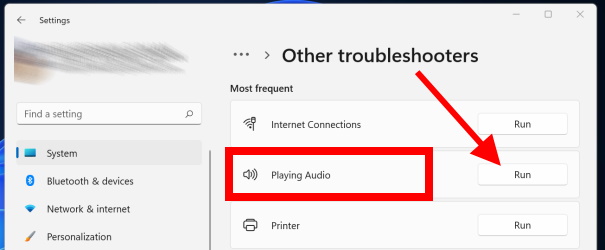
Let the window detect the issue regarding audio problem, It will not only detect the issue, but also fix them accordingly.
Ways-3: Update Audio drivers to Fix Windows 11 Audio Crackling and Sound Problem
- Go to Start button.
- Apply a right click on it and choose Device Manager.
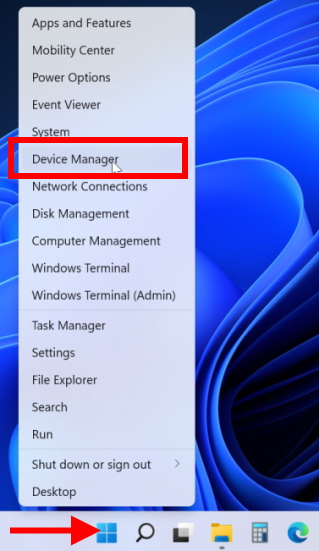
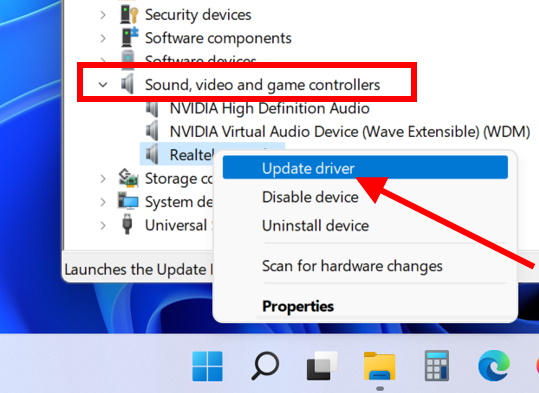
- Expand the section Sound, video and game controllers.
- Apply a right click on your external or internal speaker.
- Choose Update driver.
- Here choose first option Search automatically for drivers.
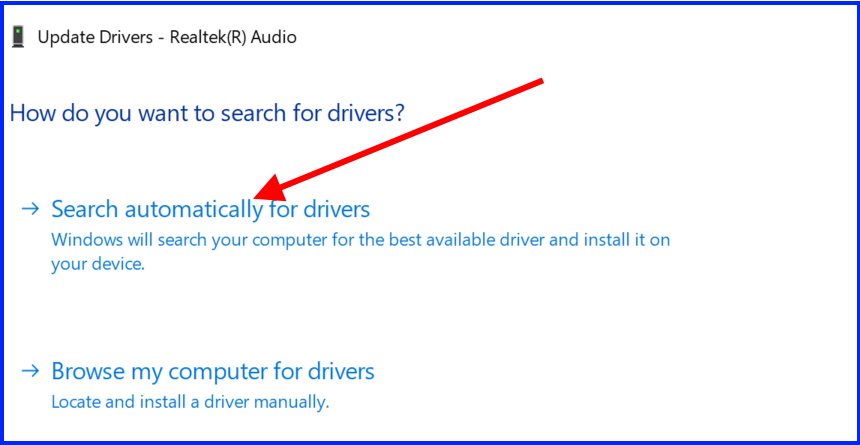
Windows will now search for best audio drivers compatible with your windows 11 system.
- Rather install it.
Ways-4: Change Sound Settings
- Apply a right click on Start button.
- Choose Settings.
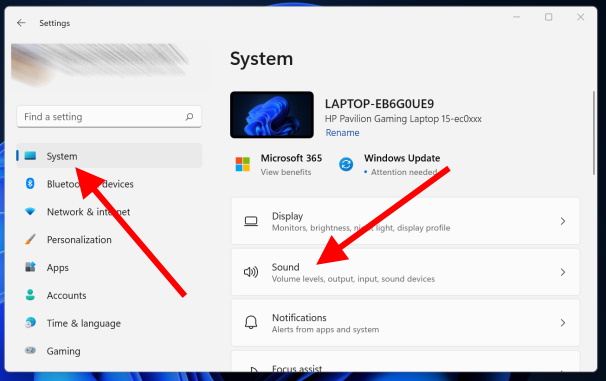
- Go to System Settings from the left pane.
- Thereafter go to right side, choose Sound option.
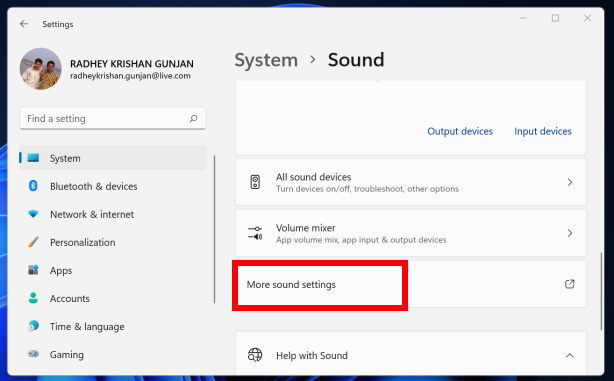
- Click on More Sound Settings.
- In new Window box, right click on your audio device and choose Properties.
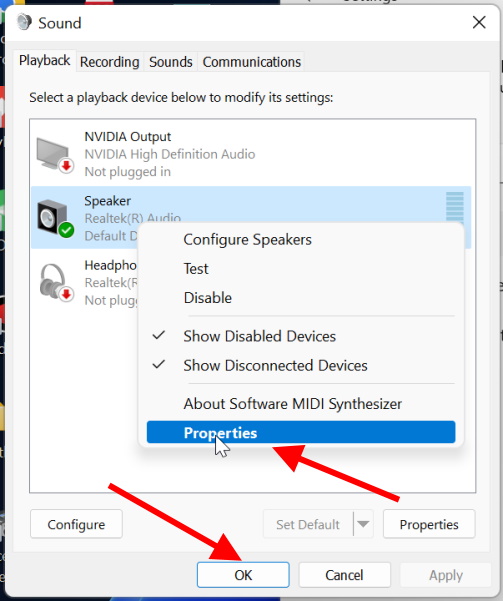
- Sound device Properties Window will open now.
- Go to the Level option from the top menu bar.
- Here, slide the slider upto the extreme right.
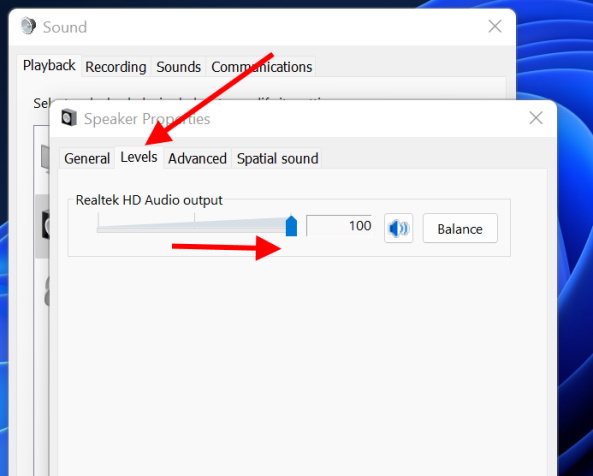
- Thereafter again go to Speaker properties window.
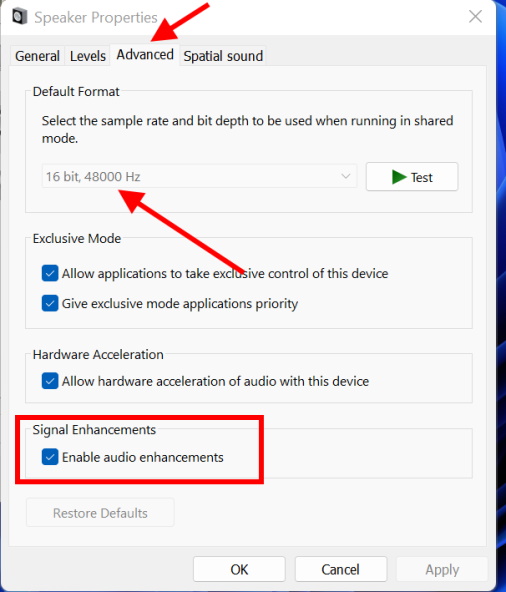
- From the top menu bar, go to Advanced tab.
- Under Default format, change format and check whether sound distortion resolved or not.
- Also scroll down and to the Signal enhancements section, uncheck the box against option Enable audio enhancements.
Ways-5: Start Sound Services to Fix Windows 11 Audio Crackling and Sound Problem
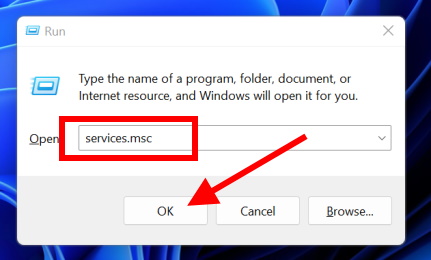
- Press Win + R to launch Run command window.
- Type services.msc and press Ok button.
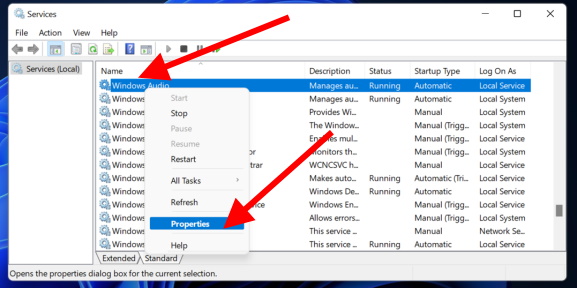
- Find out Windows Audio services option.
- Apply right click on it and choose Properties.
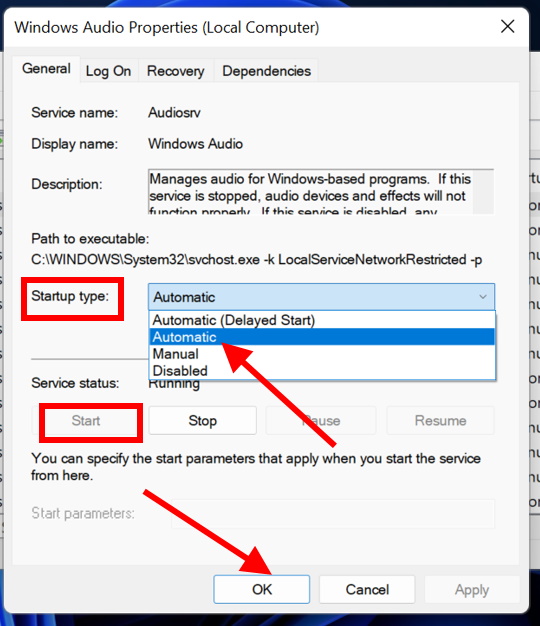
- In Windows audio services window, go to Startup type section.
- Click on small arrow and select the option Automatic.
- Then click on Start button.
- Finally click on Apply and then Ok button.
That’s all.
