How to Fix Windows 10 failed to go Sleep mode settings Automatically. Most of the users occasionally reported that Computer not going to sleep. Although Excess power consumption is the main cause of Computer won’t go to sleep in Windows 10. But sometimes Interference of a third party software, incomplete sleep mode settings, and device driver also prevent the windows 10 to go sleep mode.
These are the various queries regarding Sleep mode issue which users raised: –
- Sleep Option not available in Windows 10.
- Windows 10 sleep mode not working in Windows 10.
- Windows 10 keep wake up
How to Fix Windows 10 failed to go Sleep mode Automatically
If you are also facing Windows 10 failed to Sleep Mode Automatically, here in this article you will find various suitable workaround and sleep mode settings to fix this issue.
How to Stop from Sleep Mode in Windows 10
Tips-1: Enable Sleep Mode in Windows 10
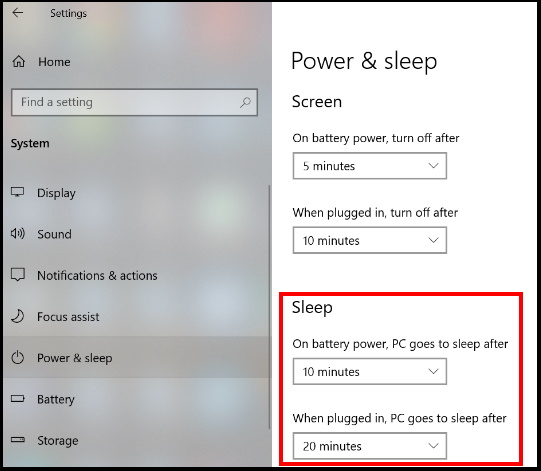
Sometimes, after installing windows update, there is a possibility of Sleep mode in disable mode. If you have recently installed Windows latest update, you should make ensure that Sleep mode settings has not been changed. Follow these steps: –
- Press Win + I shortcut key conjointly to open Windows setting app.
- Go to the System option.
- Now from the left pane, click on the option Power & Sleep.
- Thereafter go to the right side of page.
- Under Sleep section, choose the appropriate value.
Tips-2: Restore Advance Power Settings to fix Sleep Mode issue in Windows 10
- Open Windows setting by pressing Win + I shortcut key.
- Go to the system option.
- Now from the left pane of setting window, choose the option Power & Sleep.
- Thereafter from the right pane, click on Additional Power settings.
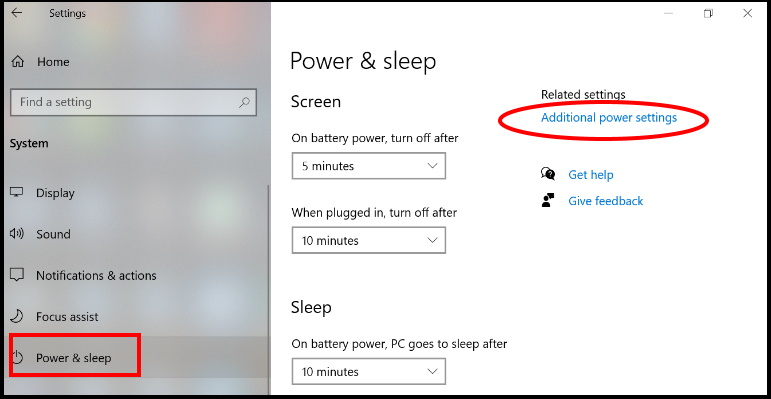
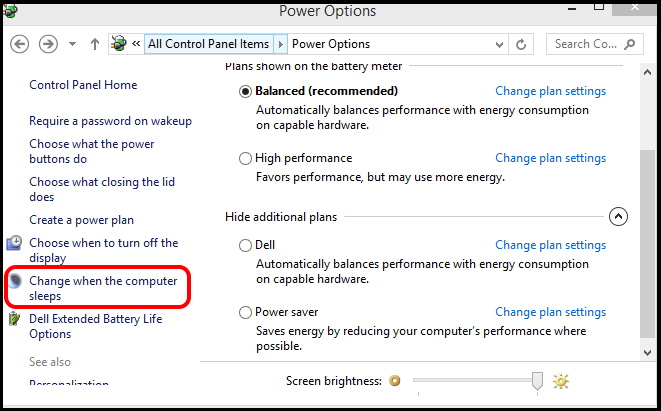
- A new Power option Window will open.
- From the left side, click on Change when the computer sleeps option.
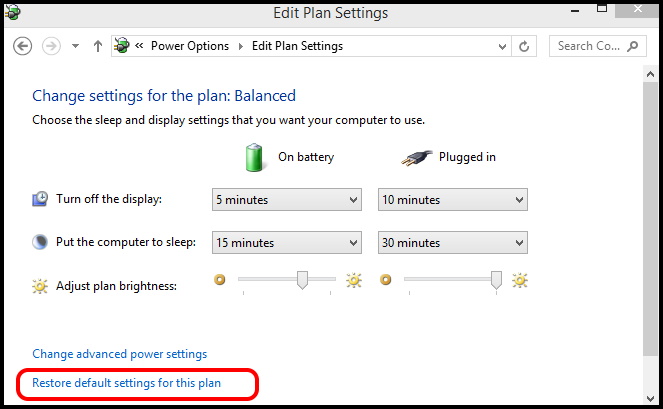
- Now from the new page, click on the option Restore default settings for this plan.
- Finally click on Save changes button.
Tips-3: Change Power settings to Disable Wake Timers in Windows 10
The issue regarding Windows 10 failed to go in Sleep mode may be due to enable mode of Wake timers in Windows 10. You should either extend the wake timers or permanently disable it to resolve this issue. To disable Wake timers in Windows 10, follow these steps: –
- Go to Windows search.
- Type cp in it.
- Control Panel window will open now.
- Under available list, find out the Power option.
- Make a click on it to open.
- Thereafter choose the option change Plan setting.

- Thereafter click on Change Advance Power Setting option.
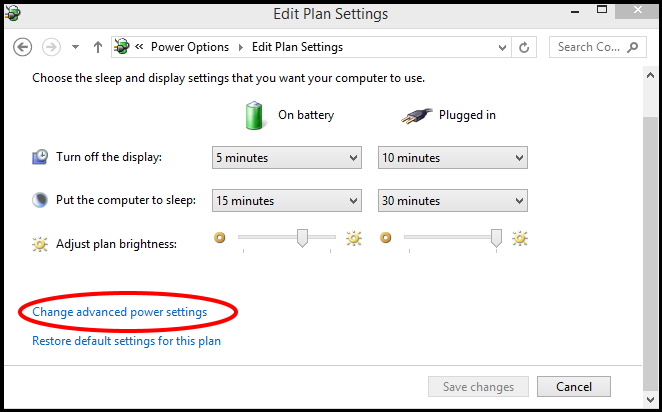
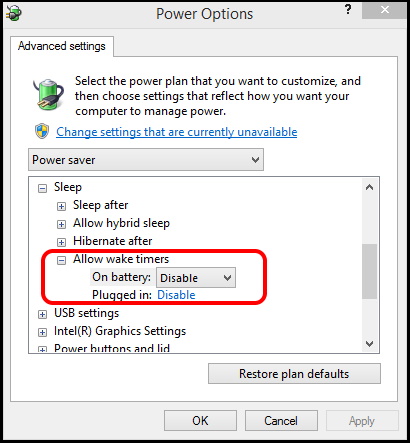
- Then under power saver option, navigate the option Sleep.
- Make a click on it to expand.
- Under Allow wake timers section, make a click on it and choose the option Disable.
Tips-4: Apply Full Scan your Windows 10 system
- Open Settings App.
- Choose the Update & Security section.
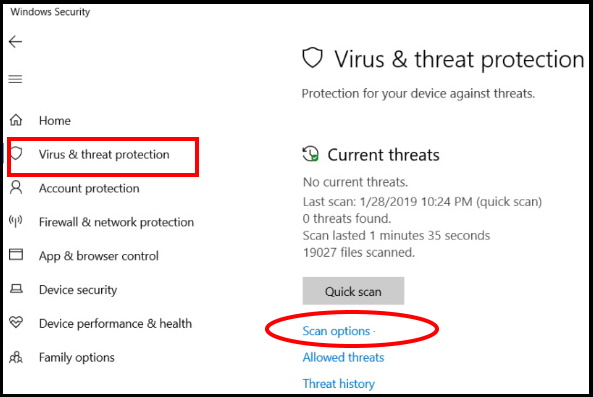
- Now from the left pane of page, click on Virus & Threat Protection.
- Thereafter go to the right side of page and click on the option Scan now.
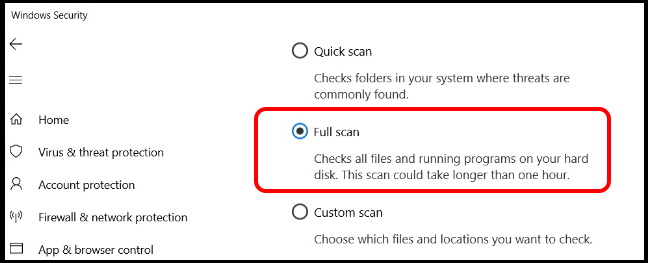
- Make a check on Full scan radio button.
- Finally click on Scan Now option.
- Restart your system.
Tips-5: Disable Hybrid Mode to Fix Windows 10 failed to go Sleep Mode
Hybrid mode resembles hibernation power saving traits while keeping the loading speed of sleep mode in Windows 10. There is a possibility of your windows 10 won’t going to sleep mode due to enabling of Hibernation mode. You should disable Hybrid mode by following these steps: –
- Open Windows setting by pressing Win + I shortcut key.
- Select the system option.
- Now from the left pane of setting window, choose the option Power & Sleep.
- Thereafter from the right pane, click on Additional Power settings.
- Now under your Recommended power plan, click on Change Plan Settings.
- In this window, select the option Change Advance Power Settings.
- Thereafter go to the sleep section.
- Make a click on it to expand.
- Here you will find the option Allow Hybrid sleep.
- Turn off the feature.
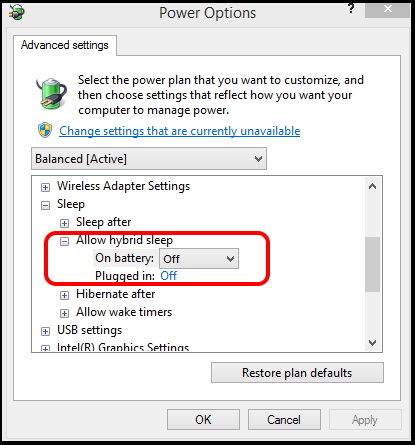
- Finally click on Apply and Ok button to save the changes you made.
Tips-6: Restore Default Power Settings through Command Prompt
- Go to Cortana Search option.
- Type cmd in search field.
- Command prompt option will appear on top as best Match.
- Thereafter go to the right side, choose the option Run as Administrator.
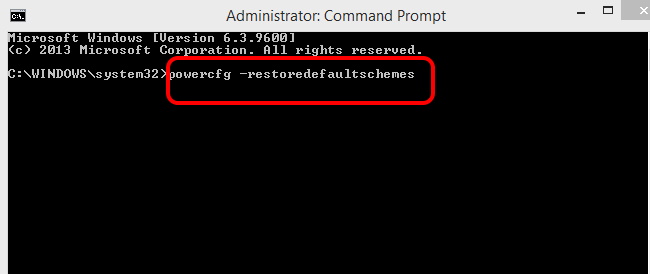
- Now type the following command followed by Enter key: –
- powercfg -restoredefaultschemes
Tips-7: Change Multimedia settings to fix Sleep Mode issue in Windows 10
- Go to Windows search.
- Type cp in it.
- Control Panel window will open now.
- Under available list, find out the Power option.
- Make a click on it to open.
- Thereafter choose the option change Plan setting.
- Thereafter click on Change Advance Power Setting option.
- Then under power saver option, navigate the option Multimedia settings.
- Make a click on it to expand.
- Under When sharing media section, make a click on it and choose the option Allow the computer to sleep.
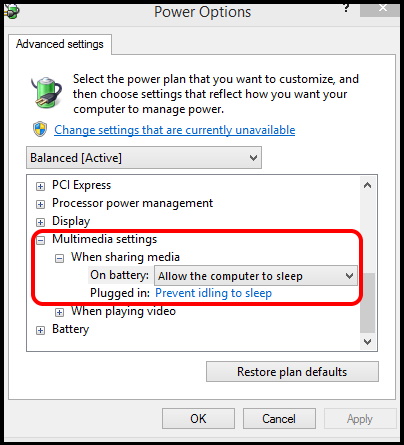
- Finally click on Apply and then Ok button to save the changes.
Tips-8: Apply Power Request to check the faulty components
Windows 10 having an option to know which component or process is restricting Windows 10 to go in Sleep mode through Command Prompt. Once you well aware about that process, it will easy to remove or disable it. If you want to know, follow these steps: –
- Open Run command box by pressing Win + R shortcut key.
- Type cmd in it and press Ok button.
- In command prompt window, type the following command and press Enter: –
- powercfg /requests
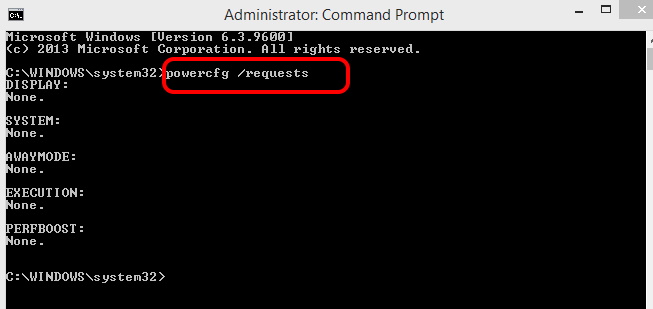
- If you want to know which recently open program interrupting the windows 10 to go in sleep mode, Execute the following command and press Enter: –
- powercfg -lastwake
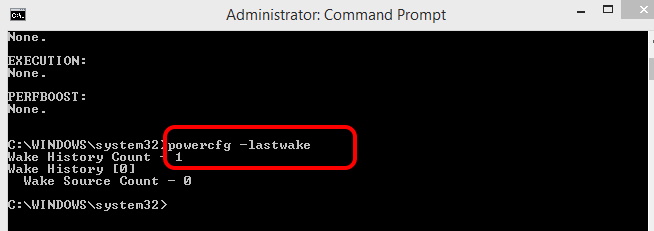
- If you want to know which devices are waking up your computer and stop the windows 10 to go in sleep mode, Execute the following command and press Enter: –
- powercfg -devicequery wake_armed
- powercfg -devicequery wake_armed
Tips-9:Run Windows Power Troubleshooter to fix the Sleep Mode issue
- Press Win + I shortcut key.
- Windows setting will open.
- Here select the option Update & Security.
- Now form the left pane of setting window, click on the option Troubleshoot.
- Thereafter go to the right side and find out the Windows update Troubleshoot.
- Make a click on it to expand.
- Click on Run the Troubleshooter.

- Windows will now detect the issue and resolved them accordingly.
Tips-10: Enable Allow the computer to turn off this device to save power
First you should check which device is waking up your system and stop to be in sleep mode. For this, follow these steps: –
- Go to Windows Search option.
- Type cmd in it.
- Command prompt option will appear on top as best Match.
- Thereafter go to the right side, choose the option Run as Administrator.
- Now type the following command followed by Enter key: –
- Powercfg -devicequery wake_armed

Now you will find a list of all such devices that are receiving power from the computer even when it is sleeping.
Thereafter, follow these steps for every such devices. For example, we will see for USB device.
- Open Run command box.
- Type devmgmt.msc in it and press Ok button.
- Device Manager Window is open.
- Here navigate the option Universal Serial Bus controllers.
- Make a right click on first USB device.
- Select the option Properties from the drop down menu.
- A new window box will open now.
- Now go to the Power Management tab from the top menu bar.
- Here You will find the option Allow the computer to turn off this device to save power.
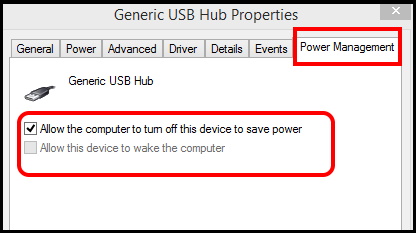
- Make a tick against this option.
- Thereafter click on Ok button.
- This process will applied for each USB device in your Windows 10 system.
- You can also apply this process to other hardware devices also.
That’s all.
