How to Disable turn off AutoRun or AutoPlay Feature in Windows 10. A small Autoplay window popup on your screen as soon as you insert a disk/CD/DVD/Memory card into the Windows system. Autorun or Autoplay feature detects the disk you inserted and provide a n action menu on the screen. But sometimes users don’t want AutoRun or AutoPlay feature appearance on their screen when they insert any type of CD or DVD or Memory card.
How to Turn Off AutoRun or AutoPlay Feature in Windows 10
Users also don’t want to play any movies or music automatically, when they insert CDs or DVDs into their windows 10 system. Here, in this article, we will discuss how to disable or turn off AutoRun or AutoPlay feature in Windows 10 through autorun settings.
Ways-1: Turn Off AutoRun through Control Panel in Windows 10
You can disable Autoplay feature through Control Panel in your windows 10 system. Go through these steps: –
- Go to the Windows Search.
- Type cp in it.
- Choose the option Control Panel from top result.
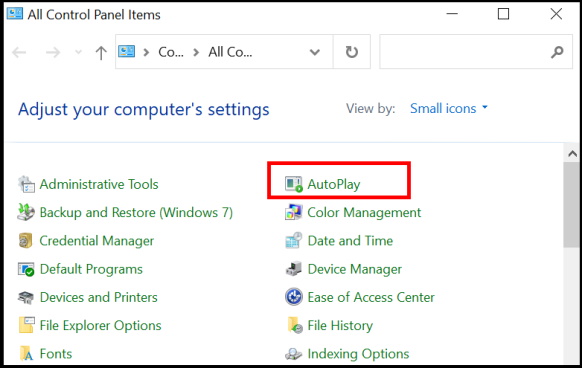
- Now find out the option AutoPlay.
- Apply a double click on it to open.
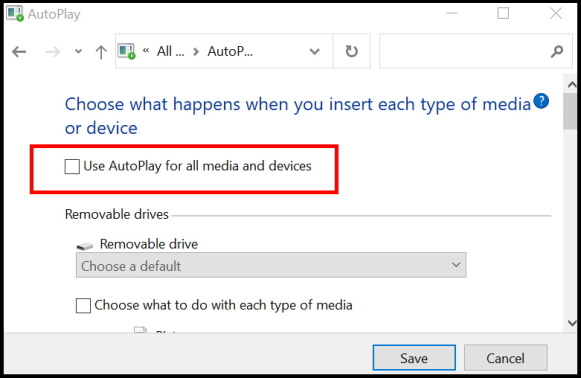
- Here you will asked to choose what happens when you insert each type of media or device.
- Uncheck the box against option Use AutoPlay for all media and devices.
Ways-2: Go through Registry Editor
Before making changes in your Registry, you must create a full backup of Registry. Thereafter go to the following steps: –
- Open Run dialog box by pressing Win + R shortcut key.
- Type regedit in it and press Ok button.
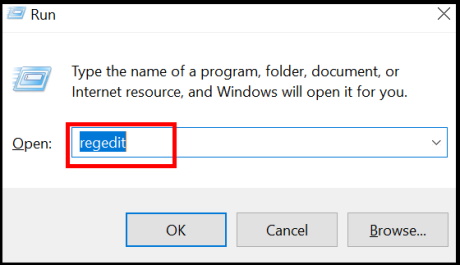
- Registry Editor window will open now.
- Now navigate the following path in Registry window: –
- HKEY_CURRENT_USER\Software\Microsoft\Windows\CurrentVersion\Policies\Explorer
- Thereafter go to the right side of page and apply a right click on blank space.
- Create a new DWORD value and rename it as NoDriveTypeAutoRun.
- Then, apply a double click on this value.
- Now set the value in it.
- The following are the description of value, you should choose it as per your requirement: –
- FF – To disable AutoRun on all drives
- 20 – To disable AutoRun on CD-ROM drives
- 4 – To disable AutoRun on removable drives
- 8 – To disable AutoRun on fixed drives
- 10 – To disable AutoRun on network drives
- 40 – To disable AutoRun on RAM disks
- 1 – To disable AutoRun on unknown drives
Ways-3: Turn off AutoRun or AutoPlay through Group Policy Editor
You can also disable AutoPlay feature through Group Policy Editor. Follow these steps: –
- Go to start.
- Type gpedit.msc in it.
- Group Policy Editor option will appear on top result.
- Make a click on it to open.
- In Group Policy Editor window, navigate the following path: –
- Computer Configuration > Administrative Templates > Windows Components > AutoPlay Policies
- Thereafter go to the right side of page and apply a double click on the option Turn Off AutoPlay.
- It will disable this feature.
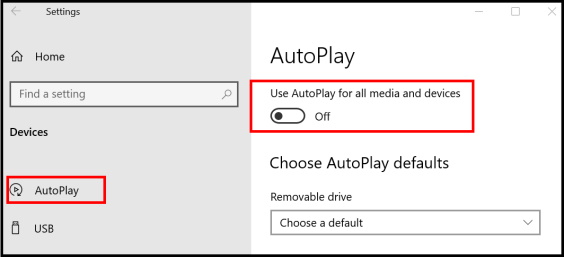
Ways-4: Use Windows Settings
- Press Win + I shortcut key to open Settings App.
- Go to the section devices.
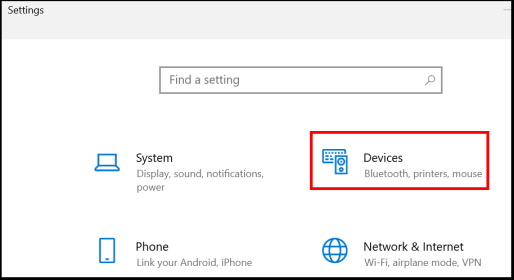
- Now from the left pane of settings window, choose the option AutoPlay.
- Thereafter go to the right pane and turn the toggle button off against option Use AutoPlay for all media and devices.
That’s all.
