How to Clear Cache Windows 10 to make Computer fast. At first we will see, what is cache and its effect on your system. Every operating system keeps or generate caches which is known as temporary files. Even these caches help the operating system in completing their task, but sometimes caches become corrupt and useless. They fill the system memory with un-necessary temporary files and becomes useless. As a result, your computer may be slow in function and restrain in performing a job.
Various types of caches exist in your system. They are as under: –
-
Temporary files Cache
-
File explorer History Cache
-
Browser Cache
-
Operating System Cache
-
Windows Store Cache
-
Location History Cache
-
Start Menu Cache
-
Outlook Cache
Methods to Clear Cache Windows 10
Temporary Files Cache
Temporary files cache release while you perform any task in windows 10. These caches are in form of Thumbnails, temporary internet files, error reporting files etc. You must clear these caches so that your windows 10 operating system could function smoothly. Here the complete methods to clear temporary files cache in windows 10.
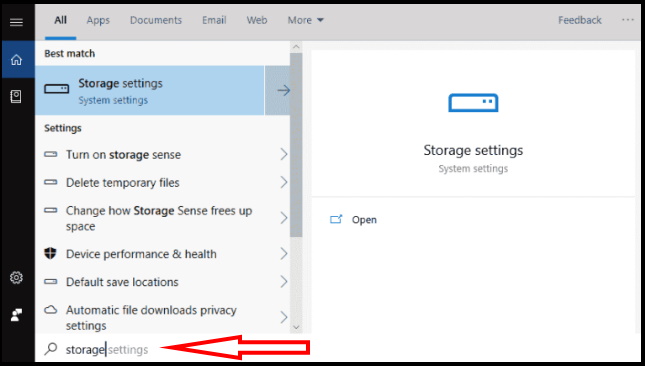
- Press Windows key, type Storage and hit Enter.
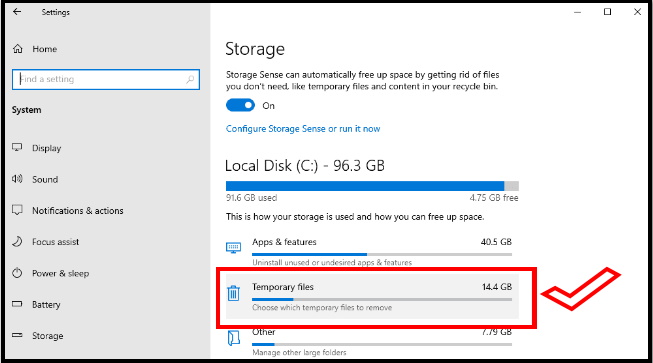
- Click on Temporary files from the right side of the page.
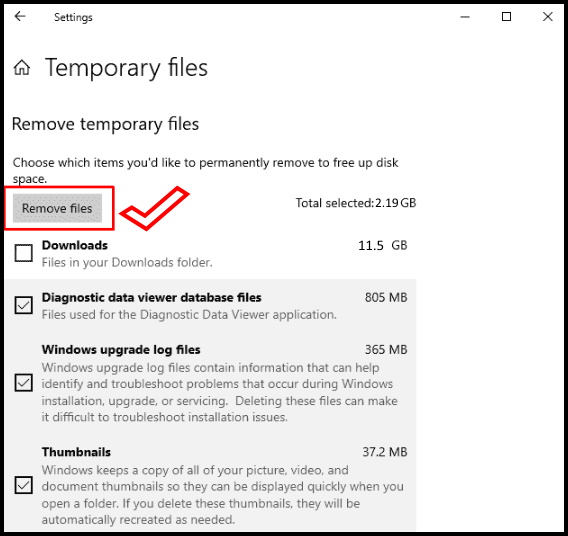
- Select the items as per your preference and click on Remove files.
Methods to Clear File Explorer History Cache in Windows 10
File Explorer keeps the history of items you’ve recently opened using the address bar and also keeps the history of files and folders you’ve used. Clearing the File Explorer history, will remove anything file explorer has ever saved.
- Click File Explorer icon on the taskbar.

- Now click on View menu at the top.
- Then go the Options icon on the extreme right on the ribbon.

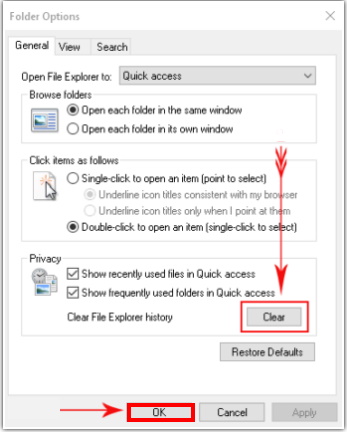
- A Folder Options wizard will appear on your screen.
- Go to the down and click Clear button.
Browser Cache
1. Clear Internet Explorer Browser Cache in Windows 10
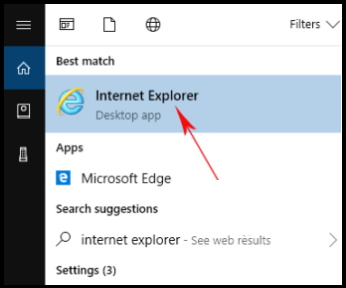
- Open Cortana and write down Internet Explorer in the search space.
- Now Internet Explorer will appear on search result.
- Make a click on it.
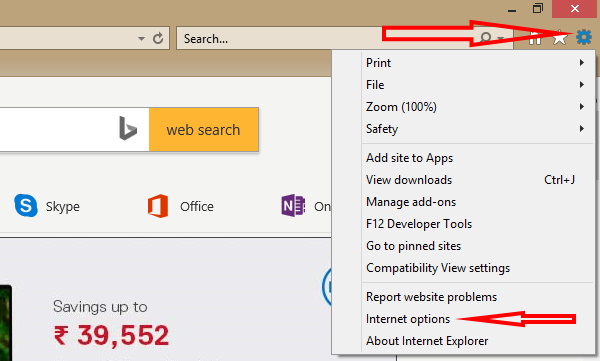
- Once the browser opens up, click on the Tools button at the extreme top right.
- A menu will appear with various choices.
- Click on Internet options.
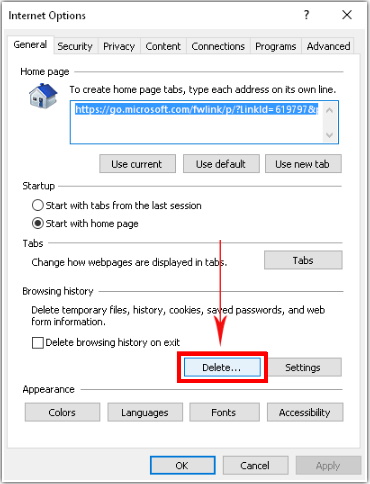
- Internet Properties box will pop up.
- Proceed to the General tab and locate the section that reads as Browsing history.
- Finally, click the Delete button that appears in the section.
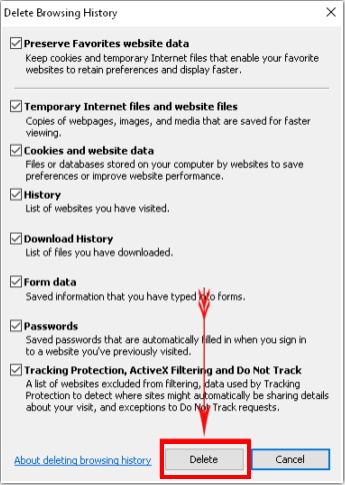
- Here another pop-up box will display on your screen.
- Various options with check boxes are listed out.
- Hence, select all the boxes and then as the last thing, click on Delete.
2. Clear Microsoft Edge browser Cache in Windows 10
- Open Edge browser from either taskbar or Start menu.
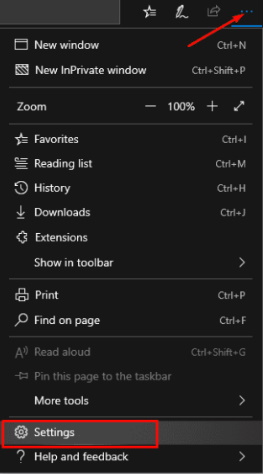
- Press 3 dots in a horizontal line from the top right portion. Alternatively, you can use Alt+X hotkey.
- Select Settings from the drop down.
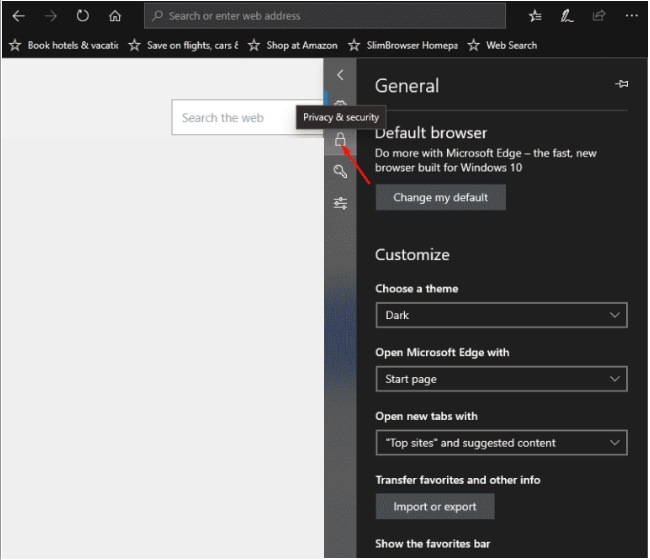
- Click on “Privacy & Security” from the left-hand side of the Settings pane.
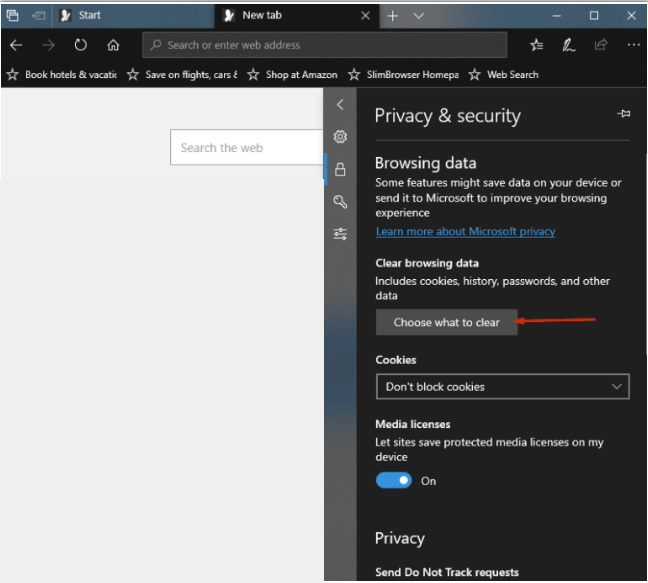
- Choose What to clear button.
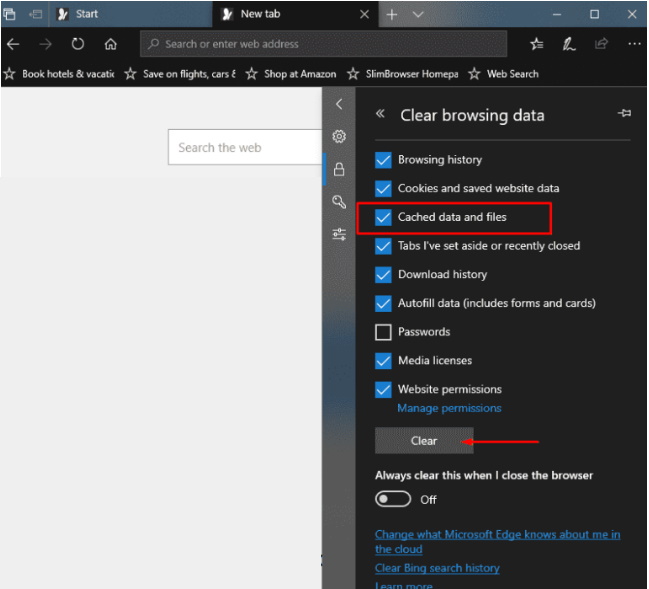
- Check the box that refers to Cache data and files.
- Click on Clear.
How to Clear Cache of Operating System in Windows 10
There are large numbers of Caches exist in windows 10 operating system. Such as Desktop app cache, Windows Store cache, File Explorer History, Location History.
Clear Desktop Apps Cache in Windows 10
There are two ways to clear Desktop app cache: –
1. Through Ccleaner
You may clear cache in Windows 10 through CCleaner software which wipes out browser cache, thumbnail cache, font cache, DNS cache and many more on applying only a single click. Instead of doing it manually one by one, you can simply Clear Cache in Windows 10 using CCleaner at once.
Download CCleaner software by visiting the below mentioned link free of cost.
2. By Disk Cleanup
By this method, you may clear cache in Windows 10 manually. You can use Disk Cleanup instantly to clear the thumbnail, temp files and all type of recyclable cache.
- Open Disk Cleanup.
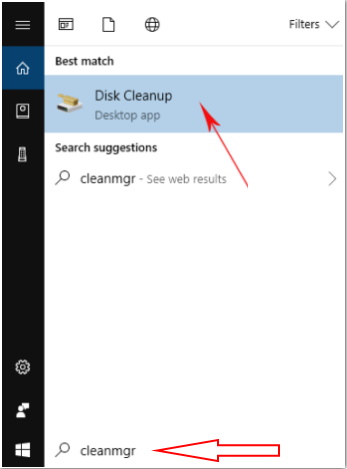
- Type the text cleanmgr in the Cortana search box.
- Now, Disk Cleanup wizard will appear.
- You can now scan your files as you want in different drives on your PC.
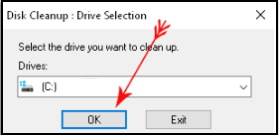
- Select drive one by one and click OK button.
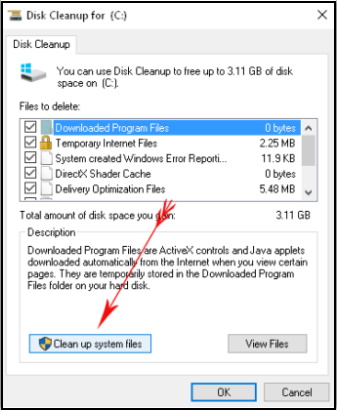
- Check all boxes and press Clean up System Files after scanning the files.
- In the next window select the drive in which you have stored your system files and click OK.

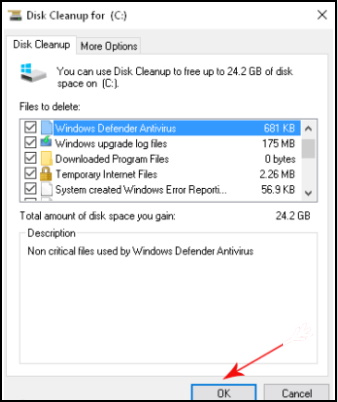
After a short span of time, the utility will calculate which are the files you can delete and a window like below screenshot will present.
- Check all the boxes and click OK.
Sometimes, you need to flush DNS cache while you will find browsing problems. To do this, open command prompt through search box below start menu and copy the following command and paste in it.
ipconfig /flushdns
- Press Enter.
Clear Windows Store Cache
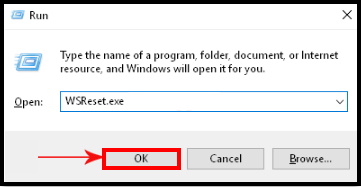
- At first, open the run dialog box.
- Copy and paste the following command in the run box.
WSReset.exe
- Press Enter.
Ways to Delete Location History Cache in Windows 10
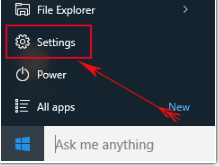
- Click to go into the Settings app.
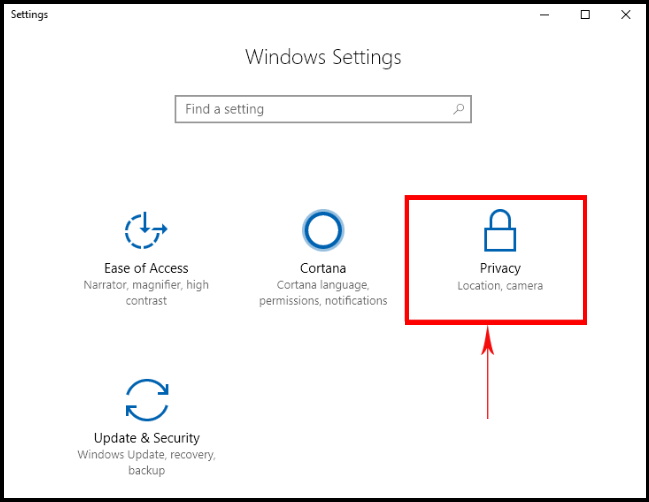
- Choose Privacy.
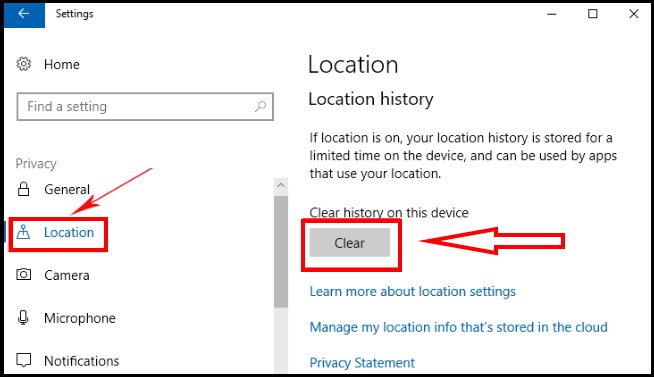
- Click Location in the left sidebar.
- Press Clear button under Location History.
How to Clear Start menu live tile cache in Windows 10
- Click on Windows logo key.
- Write regedit.exe and press Enter.
- Select Yes to give your consent when a UAC dialog prompts up locking your screen.
- Navigate to the path
HKEY_CURRENT_USER\Software\Microsoft\Windows\CurrentVersion\ImmersiveShell\StateStore- You will find here 2 DWORDS – ResetCache and ResetCacheCount.
- Double click on ResetCache and set its value 1.
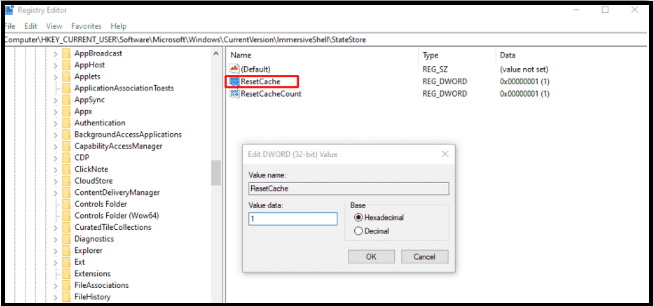
- Reboot your computer to make the changes effective.
How to Clear Outlook Cache in Windows 10
You must save all your running or ongoing work as well as close Outlook. Then follow the steps below: –
- Launch Run Dialog Box.
- Copy “%localappdata%\Microsoft\Outlook”, paste into the Run window and hit Enter.
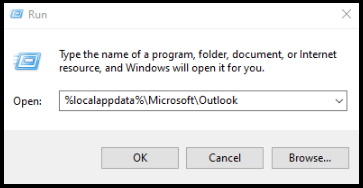
- Here You will see RoamCache folder in the running directory.
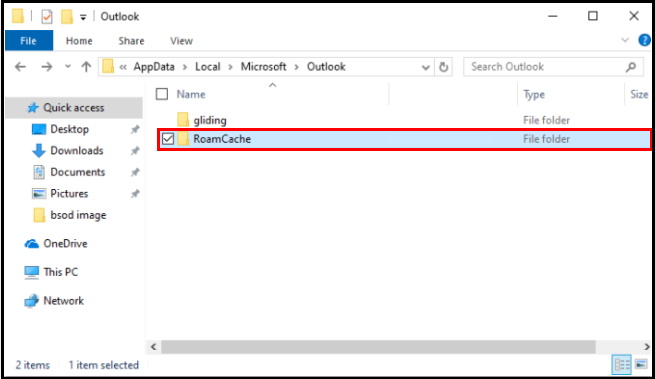
- Open RoamCache folder and take a look at the cache files.
- To wipe out all the cache of Outlook, select entire items existing here.
- Make a right click and then choose Delete.
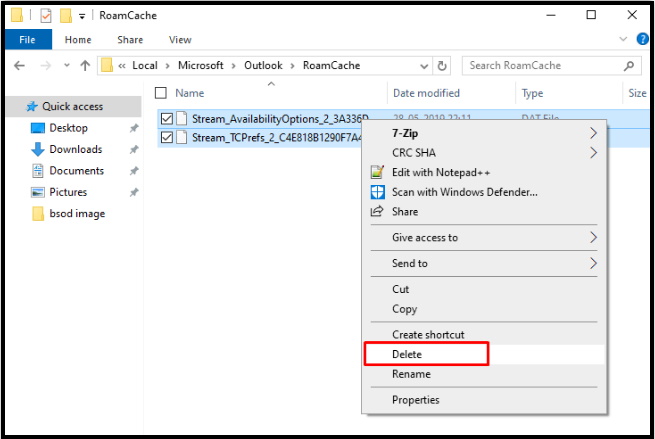
- Whenever you will launch the Outlook it will create fresh cache files in the “RoamCache” folder.
Erase Auto-Complete Cache in Outlook
By default Setting, Outlook provides autocomplete feature but it accumulates cache which slows down the speed of the email client. Fortunately, you can delete the list easily in a few clicks –
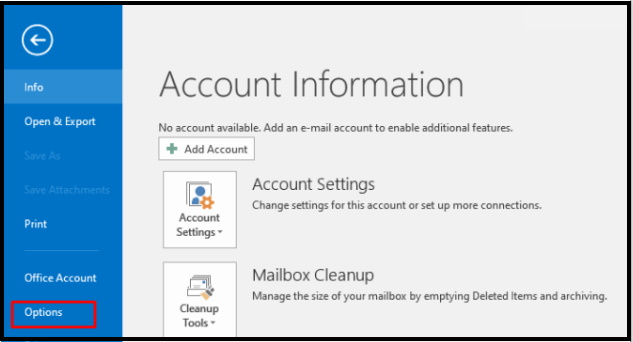
- Go to Files => Options and let the Outlook Options window appear.
- Now select Mail from the right side pane.
- Go to the right and scroll down until you reach Send messages section.
- Click on “Empty Auto-Complete List” to clear cache in Windows 10.
Clear some another available Cache in Windows 10
1. Clear Clipboard data
Whenever you copy any data in clipboard, it remains saved in cache folder. As a result, your System may be slow in performance. You must delete or clear it from the clipboard by following these steps: –
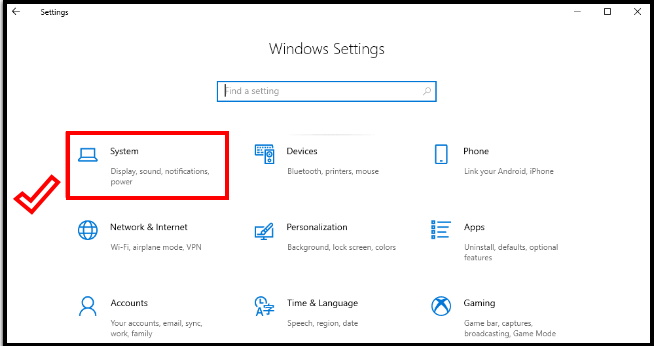
- Open Windows Settings.
- Select System.
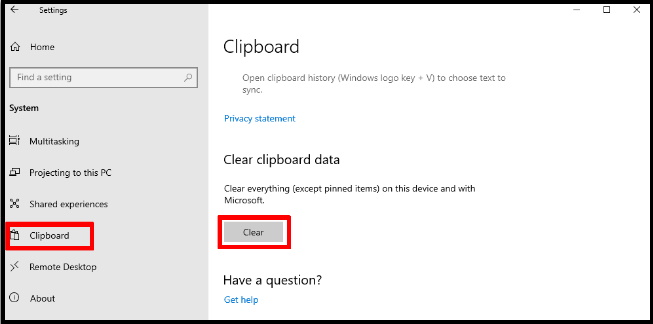
- Proceed to the left pane and click on Clipboard.
- Move to the adjacent right and scroll down and choose Clear.
2. Remove Diagnostic Data
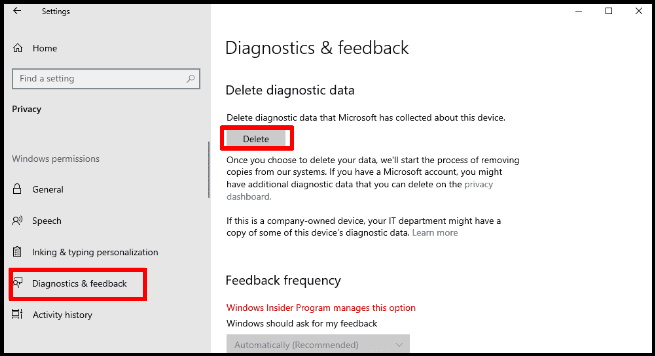
Microsoft collects diagnostic data and accumulates this on your System. To clear cache on Windows 10 you need to delete the collected copies from your device.
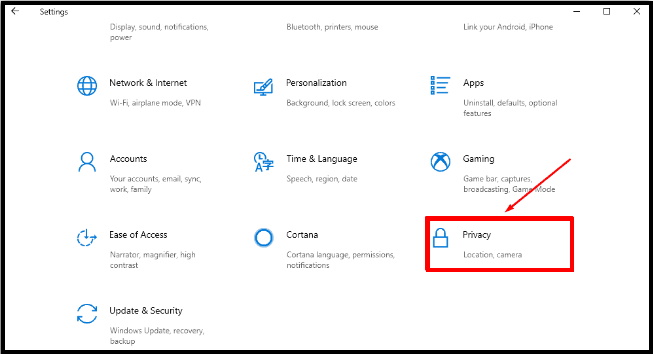
- Open Windows Settings.
- Select Privacy.
- Click on Diagnostic and Feedback from the left pane.
- From the right pane, Scroll down and click on the Delete button in the Delete diagnostic data section.
That’s all.
