How to Use and Customize Camera App in Windows 10. Microsoft provides an in-built app Camera in windows 10 that helps in capturing photo or videos, streaming videos, chatting etc. These all are possible with inbuilt device webcam in system. There are lot of functions and features available in this Camera app in windows 10, you must know about it so that you could operate your webcam through Camera App smoothly. Today in this article, we will discuss about its various features as well as customize its function.
How to Use and Customize Camera App in Windows 10
We will describe about How to Use and Customize Camera App in Windows 10 in brief in succeeding paras. Be continue with this article. At first we will see how to open or launch Camera app in Windows 10.
How to open Camera App in Windows 10
To open the Camera app, follow these steps: –
- Go to start option.
- Type Camera in it.
- A list of related article will display.
- Here select Camera app from the top result as best match.
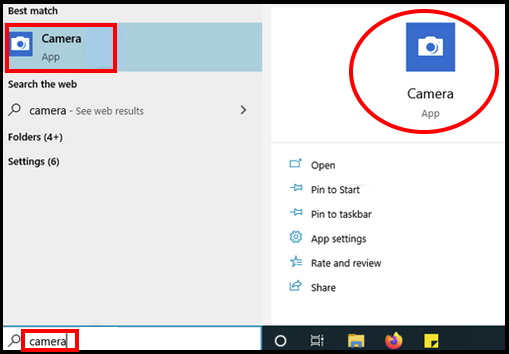
- If you are using Camera App first time in your windows 10 system, the application may ask you to allow it to use your webcam and your microphone, as well as your location. You should click on allow button to access all these devices and features.
- Sometimes there is a possibility of Camera app not appear in result, it means Camera app is missing in your windows 10 system. In this condition, You will have to obtain it from Microsoft Store. Follow these steps: –
- Open Microsoft Store.
- Search for camera app.
- Once display, select it and click on Get option.
Also Read: How to Fix “Webcam not working Properly” in Laptop in Windows 10
Use Camera App for Capturing image in Windows 10
Now we will see how to take photo through camera app in Windows 10. Follow these steps: –
- Open Camera App.
- Go to right edge of black screen.
- here you will find a couple of buttons and by default, the selected mode is the Take Photo.
- The size of Take Photo option is larger button than the others with a white background to make it different from others.
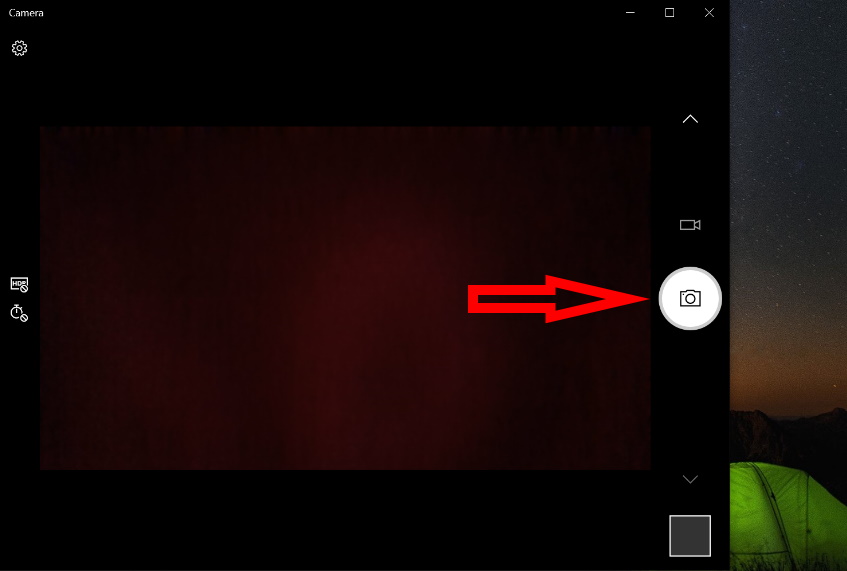
- Set the target of the subject and click on that icon.
- You can view the captured photo in Camera roll located at the bottom of the screen.
Record Video through Camera App in Windows 10
Now we will see how to record video through camera app. Follow these steps: –
- Make a click or tap the Take Video button from the right side of the app’s window above the Take photo icon.
- The Camera app shows a stopwatch on the bottom keeping the time of recording.
- To pause the video, click on Pause button also located at the right side of recording window.
- To resume video recording, click or tap Pause again.
- After completion of recording, click or tap the Stop button, also located at the right side.
Capture Photo of Documents through Camera App in Windows 10
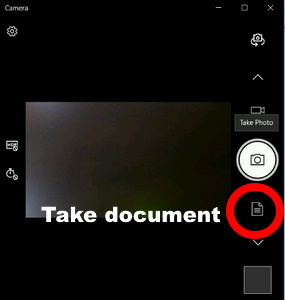
If you want to take photo of any documents, Microsoft provides a separate tool besides camera and recording tools. You can see a small icon of Take document button just below the camera icon.
- To scan a document with your webcam, point it towards the document.
- Press the Take Document button.
 How to Customize Camera App in Windows 10
Now we will see various features of camera app and try to customize it. These are as under: –
Set Timer to take Photos
The Camera app also allows you to set up a Photo timer so that you can delay the time of “Take Photo” for a while. This time of 2, 5 or 10 second starts after clicking on “Take Photo” option.
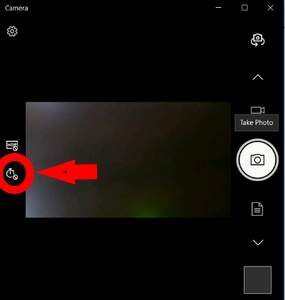
- To set timer, click on watch icon located at the Camera app screen repeatedly. The number of seconds delayed is shown in small numbers near the watch icon.
- At later stage, if you don’t want to set timer, press the same watch button until the Camera app is set to No timer.
Change Brightness of Picture through Camera App in Windows 10
The camera App permits you to change brightness of photo as per your requirement. Follow these steps to complete the procedure: –
- Make a click on Setting option located at Top of the the Camera App screen.
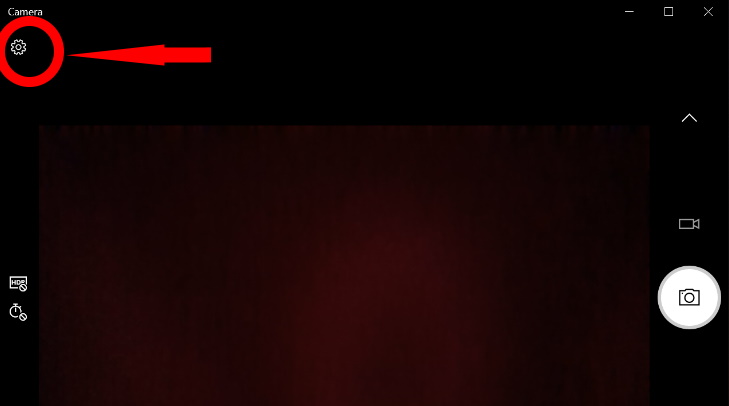
- From the Settings panel, turn on the Pro mode switch.
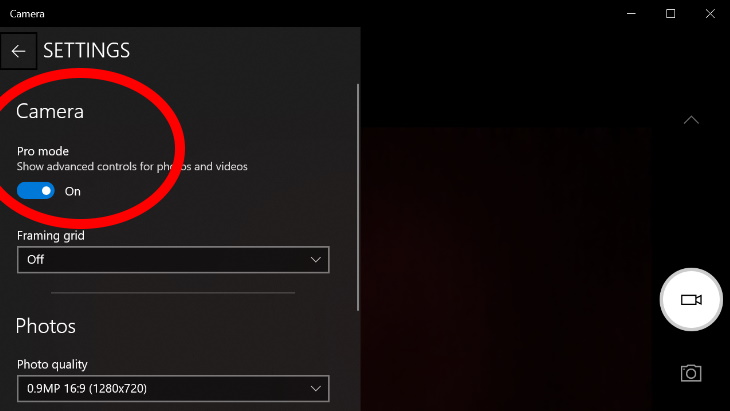
- Now go back to the main view of the Camera app.
- From the left side of the window, you can see new options available.
- These options are available in both photo and video mode.
- To adjust the Brightness, first click or tap on the setting that you want to change.
- A manual slider will appear on Camera screen.
- Now change the brightness of photo by moving slider upwards to brighten your photos and videos or downwards to darken them.
Set location to save your captured Photo or Video
The Camera app allows the users to set or change the location to save the captured photo or video. To apply this feature, follow these steps: –
- Go to Camera setting option.
- Scroll down to the setting option.
- Here you will find three options. These are-
- Change where photos and videos are saved,
- Choose whether camera can use location info
- Change privacy settings
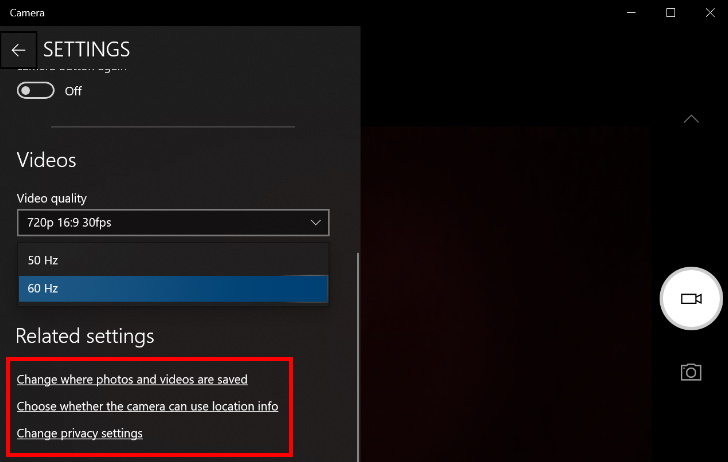
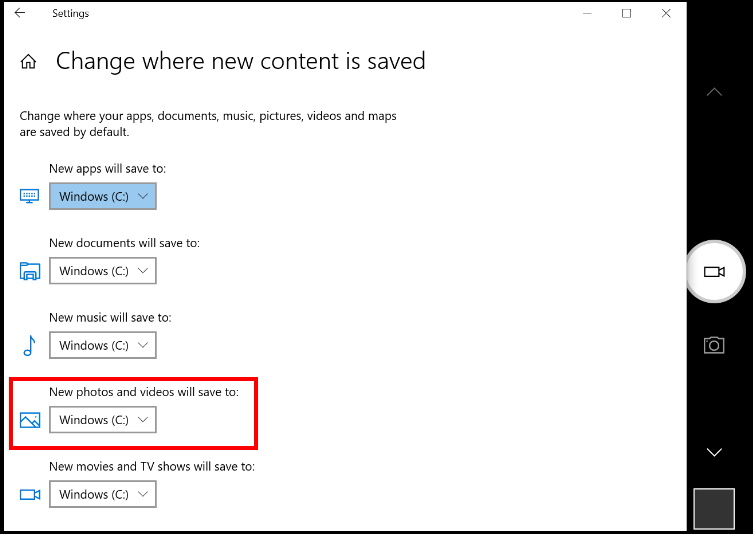
- To change the location to save photo or videos, tap on Change where photos and videos are saved.
- A new setting page with white window will open.
- Here a lot of saving option are available.
- You can change it as per your requirement.
- The second option is Choose whether camera can use location info.
- Through this option, you can turn the location services on or off on your Windows 10 device.
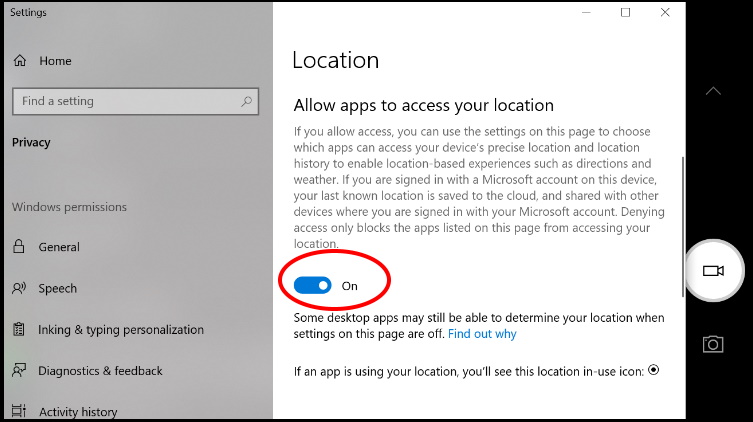
- The third option in this section of Camera app setting is Change privacy settings.
- Turn the toggle button to On to allow apps to access your location.
Apply Framing Grid with Camera App Setting in Windows 10
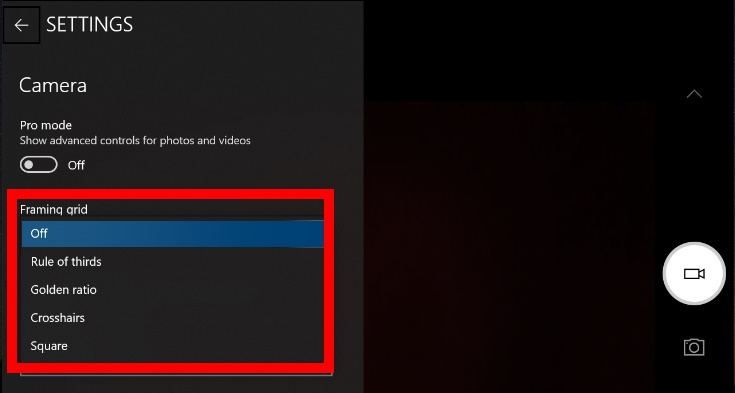
Camera app provides an important feature naming Framing Grid by which you can create a series of horizontal and vertical lines that divide the image according to various photo composition guidelines. Framing grid helps in making focus better while capturing pictures. Follow these steps to apply it: –
- Click on small down arrow against the option Framing Grid.
- Here you will see following option.
- Rule of Thirds
- Golden ratio
- Crosshairs
- Square
- Choose any one of them as per your choice.
Take more picture at one Click
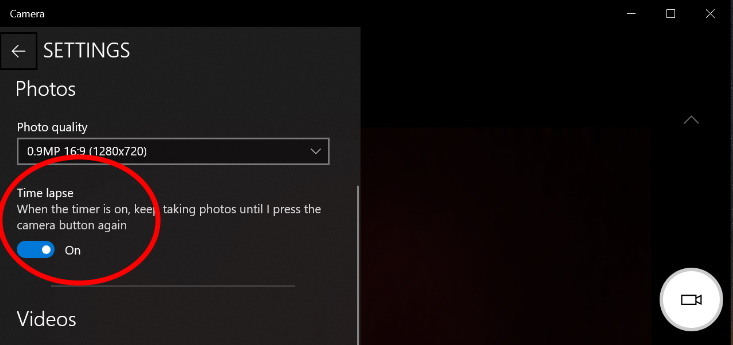
Time lapse is a feature of the Camera app in Windows 10 that allows you to take still photographs at the set time interval. You can capture images at every few seconds by clicking the Camera button just once. After choosing the timer, click the Camera button and the app will keep on capturing the images until you click it again. Follow these steps to enable Time lapse: –
- Once the Camera app opens up, click Settings in the top right corner.
- Navigate the setting Time lapse.
- To turn on Time Lapse, toggle ON the option Time lapse.
Set Picture size through Camera App in Windows 10
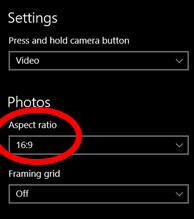
Camera app allows you to set a picture size of aspect ratio as per your choice. You may select aspect ratio through setting of Camera App: –
- Go to setting option of Camera App.
- Navigate the aspect ratio option.
- Click on down arrow and select the ratio as per your requirement.
Use Photo Burst through Camera App
Burst picture means multiple pictures at a time and it is possible through Camera App. Follow these steps to use Photo burst in windows 10: –
- Open Settings in Camera App.
- Click on drop down arrow under Press and hold camera button.
- Select Photo burst option from the middle.
- Now click and hold the Take photo button continuously.
- You will get all these photos all photos will and go to the Camera Roll folder and grab the collection of photos.
That’s all.
