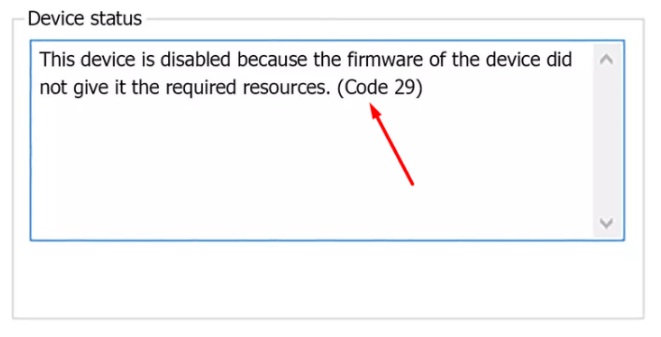
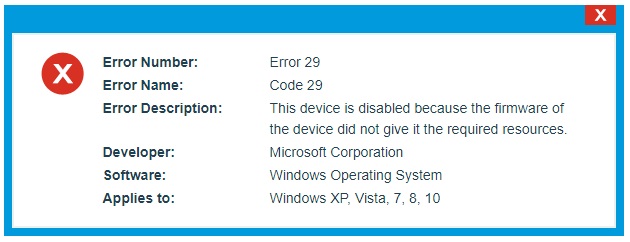
How to Resolve “This device is disabled” Code 29 in Windows 10/8/7/Vista/XP. “This device is disabled” or code-29 issue basically occurs when any of the hardware device is not enabled in the BIOS of your system. As we know, Drivers have many components supported by BIOS supports. If these fail to provide the required data to proceed, the code 29 appears.

Reason of “This device is disabled” (Code-29)
- Any defective hardware,
- Corrupted drivers or system files due to malware or virus attacks,
- An out dated device driver,
- Damaged Registry during (installation or uninstallation).

How to Resolve “This device is disabled” (Code-29) in Windows 10/8/7/Vista/XP
These are the possible solution to fix this issue: –
- Restart your System
- Remove Junk Files or Folders
- Perform System Restore
- Enable Hardware Device in BIOS Manually
- Re-install Windows Operating System
- Apply Windows System File Checker
- Install Latest Windows Update
Restart your System to Resolve “This device is disabled” (Code-29)
It always happens, thar windows restart is the most common solution to general problem. So you must restart your system to get rid of Code – 29.
Step-1: Make a Click on the Windows icon at the bottom left of your screen.
Step-2: Click the Power button.
Step-3: and then, click on Restart.
Remove Junk Files or Folders
It is the another method to resolve the issue “This device is disabled” (Code-29) in Windows 10/8/7/Vista/XP. You should try to remove junk files or folders from your system by following the steps below: –
- Click the Start button.
- Type “command” in the search box… DO NOT hit ENTER yet!
- While holding CTRL-Shift on your keyboard, hit ENTER.
- You will be prompted with a permission dialog box.
- Click Yes.
- A black box will open with a blinking cursor.
- Type “cleanmgr” and hit ENTER.
- Disk Cleanup will begin calculating how much occupied disk space you can reclaim.
- The Disk Cleanup dialog box will appear with series of check boxes you can select. In most cases, the “Temporary Files” category will occupy the most disk space.
- Check the boxes of the categories you want to clean and click OK.
Perform System Restore to Fix “This device is disabled” (Code-29)
Sometimes, when you make any changes to your system by installing and uninstalling any hardware, this issue begins. So you must perform system restore once.
- Click the Start button.
- In the search box, type “System Restore” and hit ENTER.
- In the results, click System Restore.
- Enter any administrator passwords (if prompted).
- Follow the steps in the Wizard to choose a restore point.
- Restore your computer.
Enable Hardware Device in BIOS Manually
Because, the issue “This device is disabled” (Code-29) related to BIOS. So you must enable it manually in your PC.
Follow the below mentioned simple steps: –
- Access the BIOS setting after Restart Windows 10 PC.
- Wait till a message appearing on screen to enter the setup. The message usually appears in 1-2 seconds.
- For next step, press the relevant key to enter the BIOS setup. Often it is F2, F10 or F12 but might vary for different manufacturers.
- Locate the disabled devices in the Advanced BIOS Settings section (use your keyboard keys to access different sections).
- Once it found, enable it.
- Now, exit the BIOS setup properly by using the “Save & Exit” option.
- Remember if you withdraw without saving, nothing will change and you will still get the error Code 29.
- When your system reboots after pursuing these steps, Error Code 29 – This device is disabled won’t be there.
Re-install Windows Operating System
If the problem still remains then it may be issue with your Windows OS. You should re-install your Windows Operating System. Here is the procedure for every windows separately: –
Windows 7 and Windows Vista
- Open Programs and Features by clicking the Start button.
- Then open Control Panel on the right side menu.
- Click Programs.
- Click Programs and Features.
- Locate Code 29-associated program (eg. Windows Operating System) under the Name column.
- Click on the Windows Operating System-associated entry.
- Click the Uninstall button on the top menu ribbon.
- Follow the on-screen directions to complete the uninstallation of your Error 29-associated program.
Windows Windows XP
- Open Programs and Features by clicking the Start button.
- Click Control Panel.
- Click Add or Remove Programs.
- Locate Code 29-associated program (eg. Windows Operating System) under the list of Currently Installed Programs.
- Click on the Windows Operating System-associated entry.
- Click the Remove button on the right side.
- Follow the on-screen directions to complete the uninstallation of your Error 29-associated program.
Windows 8
- Hover the cursor in the bottom left of the screen to produce the Start Menu image.
- Right-Click to bring up the Start Context Menu.
- Click Programs and Features.
- Locate Code 29-associated program (eg. Windows Operating System) under the Name column.
- Click on the Windows Operating System-associated entry.
- Click the Uninstall/Change on the top menu ribbon.
- Follow the on-screen directions to complete the uninstallation of your Error 29-associated program.
After successfully uninstalled your Code 29-associated program (eg. Windows Operating System), reinstall the program according to the Microsoft Corporation instructions.
Apply Windows System File Checker
- Click the Start button.
- Type “command” in the search box… DO NOT hit ENTER yet!
- While holding CTRL-Shift on your keyboard, hit ENTER.
- You will be prompted with a permission dialog box.
- Click Yes.
- A black box will open with a blinking cursor.
- Type “sfc /scannow” and hit ENTER.
- System File Checker will begin scanning for Error 29 and other system file problems (be patient – the system scan may take a while).
- Follow the on-screen commands.
Install Latest Windows Update
To check for Windows Updates (Windows XP, Vista, 7, 8, and 10):
- Click the Start button.
- Type “update” into the search box and hit ENTER.
- The Windows Update dialog box will appear.
- If updates are available, click the Install Updates button.
Hopefully, one of the above mentioned tips will resolve your issue regarding Code 29.
Thnx….
