How to reduce Internet Data usage or set your data limit in Windows 11 / 10. Are you facing a lot of consumption of Internet data due to network bandwidth even after over metered connection and limited data usage. However, you have unlimited data plan, also reduced background data usage, your device performs very slow. Here in this article, we will bring few ways through which you can easily reduce Internet data usage as well as Limit Bandwidth and Data Usage in Windows 11 / 10. You can also track internet data usage and Limit Internet Usage for both background and other data usage. How to Reduce How Much Data Your Windows 11 / 10 PC Uses. How to limit internet data consumption.
How to view Internet Data Usage in Windows 11 / 10
- Press Win+I shortcut to launch Settings App.
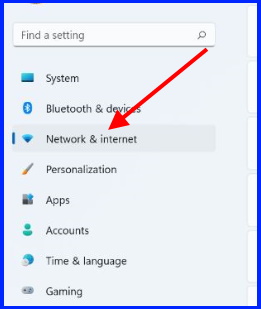
- Select Network & Internet.
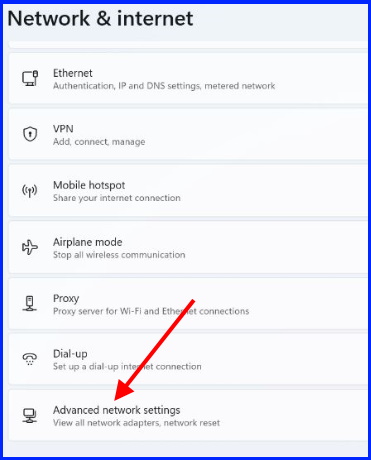
- Go to right side and click on Advance network settings.
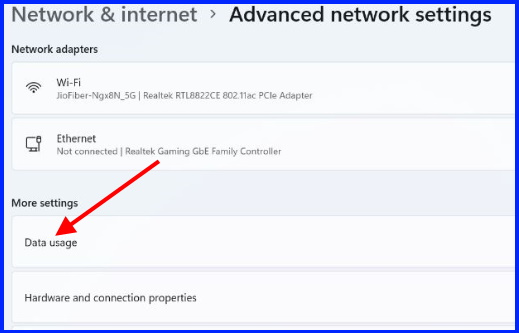
- Here click on Data usage.
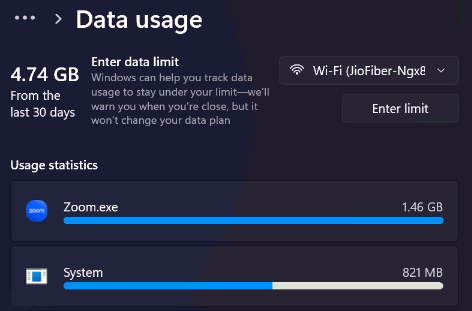
Here, you will see data usage in respect of various Apps for a period of 30 days from where you can manage Apps and their data usage by removing it.
How to Set Minimum Internet Data usage in Windows 11 / 10
Now we will reduce or set minimum internet usage through various methods.
Ways-1: Set Limitation to Data Usages
- Press Win+I shortcut to launch Settings App.
- Select Network & Internet.
- Go to right side and click on Advance network settings.
- Here click on Data usage.
- Click on Enter Limit.
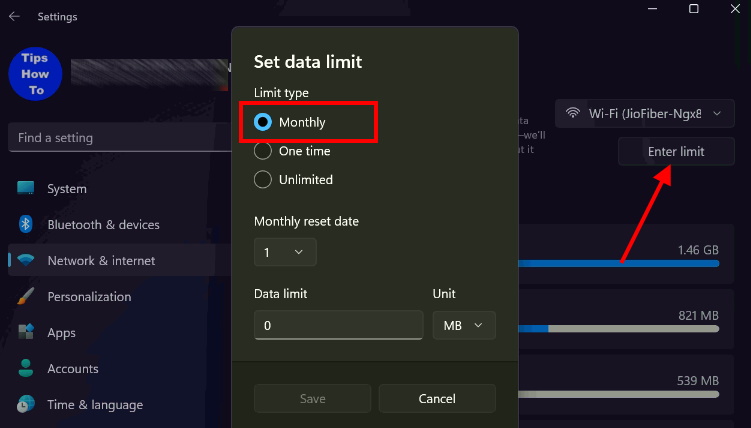
- Thereafter, go to Limit type and set it as Monthly.
- You can also choose limit type as per your choice.
- Then set the data limit as per your requirement.
- Finally click on Save.
Ways-2: Disable services that consume more Data in Windows 11/10
- Apply a right click on start button.
- Choose Task Manager.
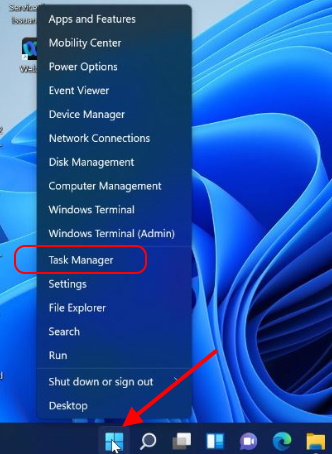
- Under Process tab, go to the services that consume a lot of bandwidth under Network tap.
You will see, DNS client services, BITS etc are consuming more data. You should disable such services through Services App.
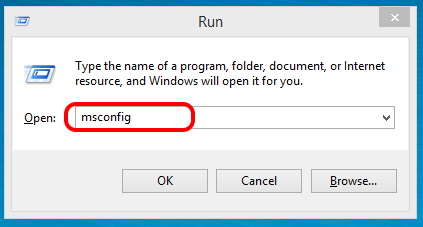
- Go to Run command and type msconfig.
- Press Ok button.
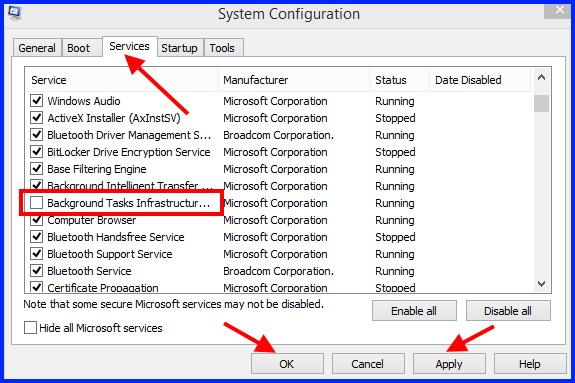
- System Configuration Window will open now.
- Look for Background Intelligent Transfer Service.
- Uncheck this option.
- Click on Apply and then Ok button.
- Restart your Windows system.
Ways-3: Set the connection as Metered connection to set Minimum Internet Data Usage
- Right click on start button and choose Settings.
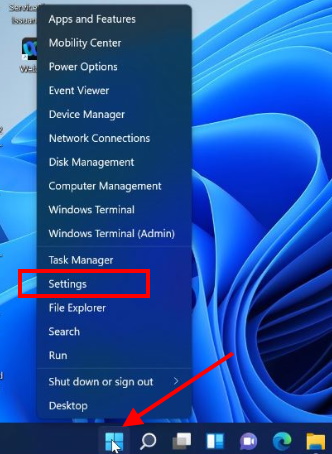
- Go to Network & Internet section from the left pane.
- Then, choose your network connection, such as Ethernet, Wifi or any other.
- Turn On against option Metered Connection.

Ways-4: Stop Background Apps activity to set Minimum Internet Data Usage
- Press Win+I to open Settings App in Windows 11 / 10.
- From the left pane, choose Apps.
- Then, go to right side and click on Apps & Features.
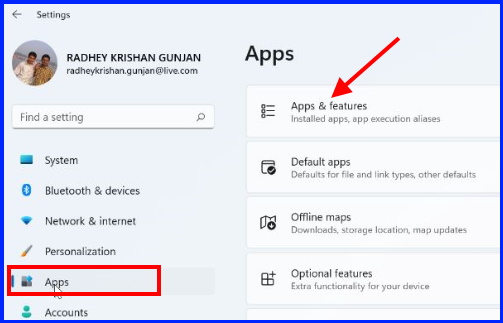
- Now click on three dot against App that consuming high network bandwidth.
- Choose Advanced option.
- Now Under Background app permission, set Never option under Let this app run in background.
- Same procedure will be applied for other Apps which are consuming a lot of network bandwidth.
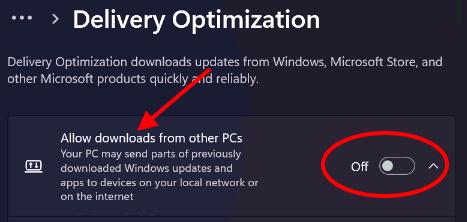
Ways-5: Turn Off Allow downloads from other PCs settings
- Click on Start button.
- Choose Settings.
- From the left pane, click on Windows update.
- Go to right side and choose Advanced options.
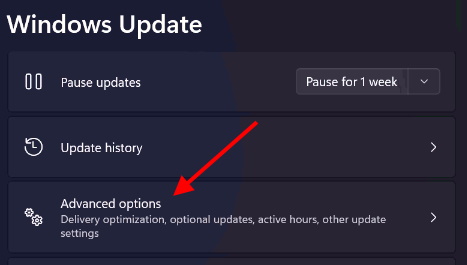
- Scroll down and select the option Delivery Optimization.
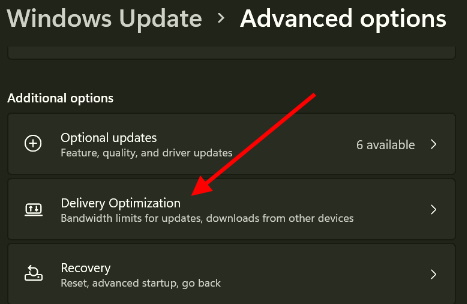
- Turn the toggle button Off against option Allow downloads from other PCs.
Ways-6: Limit the bandwidth usage of Delivery Optimization to set Minimum Internet Data usage in Windows 11 / 10
- Click on Start button.
- Choose Settings.
- From the left pane, click on Windows update.
- Go to right side and choose Advanced options.
- Scroll down and select the option Delivery Optimization.
- Now click on Advanced option.
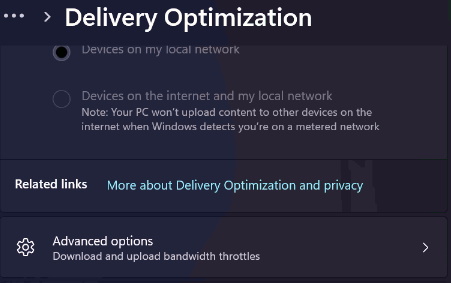
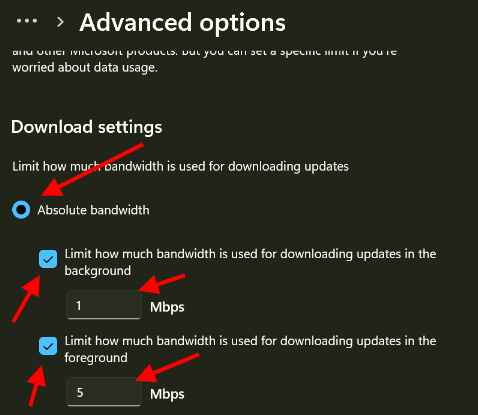
- Thereafter, make the check against box Absolute bandwidth.
- Set Limit how much bandwidth is used for downloading updates in the background to 1 Mbps.
- Set Limit how much bandwidth is used for downloading updates in the foreground to 5 Mbps.
- Scroll down and click on Monthly upload limit.
- Draw the slider and set it upto 5%.
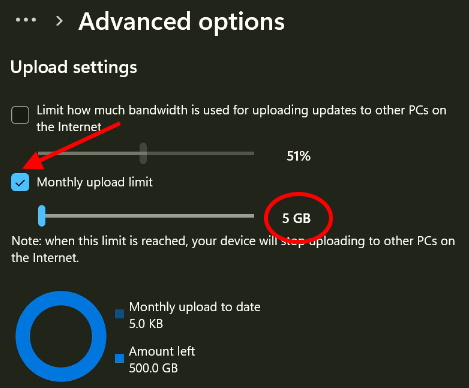
Through Delivery Optimization settings, you can easily manage internet data usage and save bandwidth.
Ways-7: Turn Off Windows automatic updates in Windows 11 / 10
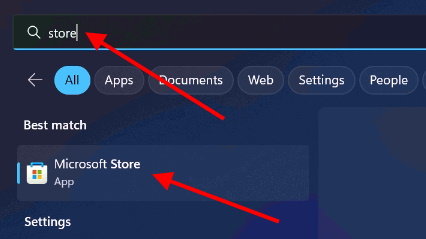
- Go to Windows search.
- Type Store.
- Open Microsoft store.
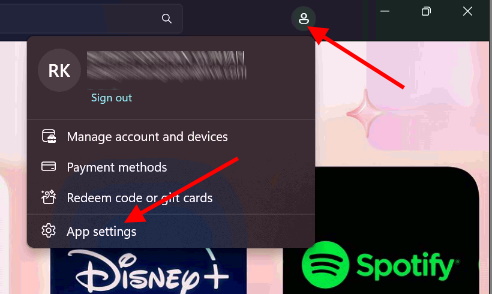
- Here, click on your user icon image and select App settings.
- Turn the toggle button Off against option App updates.
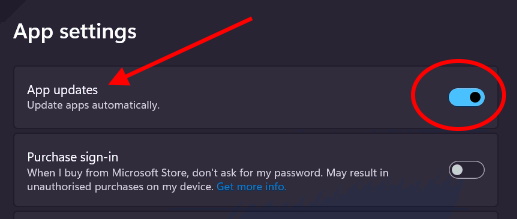
Now App downloaded from Microsoft store app will no longer automatically updated.
Ways-8: Turn Off OneDrive opening on Startup
- Right click on Start button and choose Task Manager.
- Go to Startup Apps.
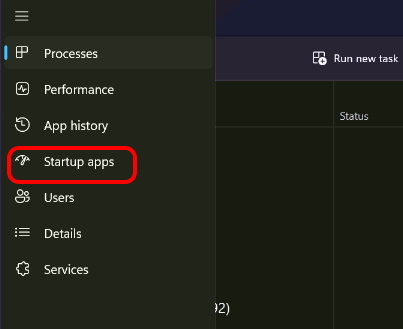
- Find out the OneDrive app.
- Select the option Disable.
- OneDrive app will no longer start on startup.
Ways-9: Stop Windows update automatically to reduce Internet Data usage in Windows 11 / 10
- Press Win+I shortcut key to open Settings App in Windows 11/10.
- Click Windows update.
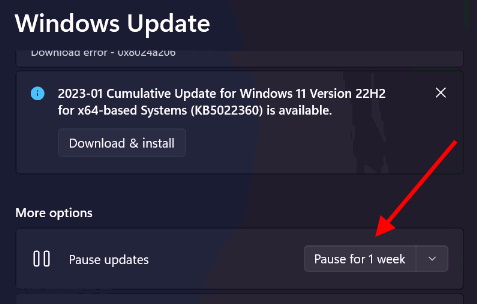
- Go to right side and select Pause for 01 week under more option.
- Thereafter click on Advanced options.
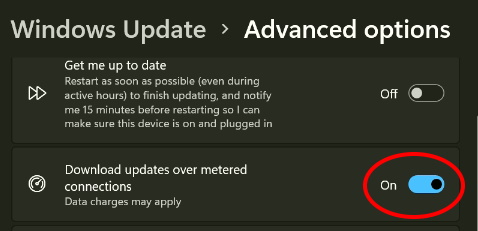
- Turn Off the option Download updates over metered connections.
Ways-10: Disable automatic Map App Update
- Right click on start button and select Settings.
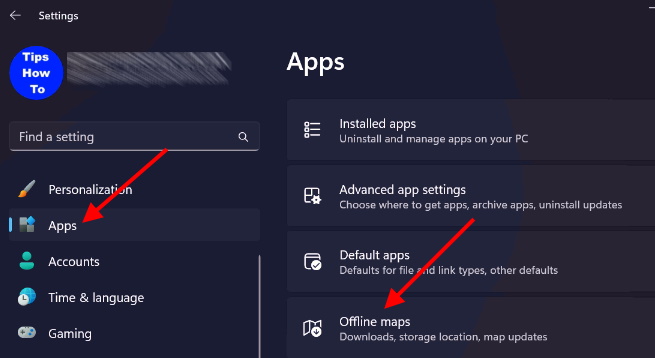
- Choose Apps.
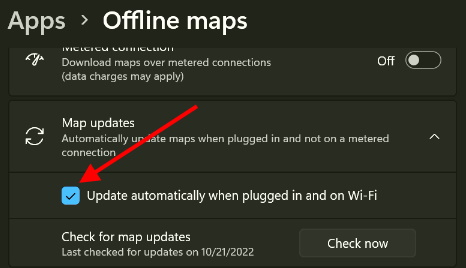
- Click on Offline apps from the right pane.
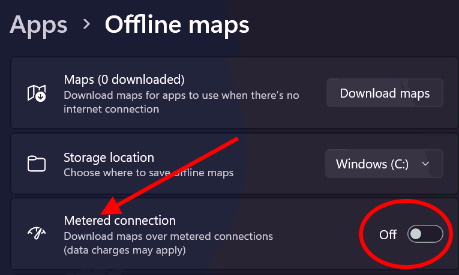
- Turn the toggle button off against option Metered connection.
- Also make the Uncheck against option Update automatically when plugged in and on Wi-Fi.
Ways-11: Disable System Synchronization to reduce Internet Data usage in Windows 11 / 10
- Press Win+I Shortcut key.
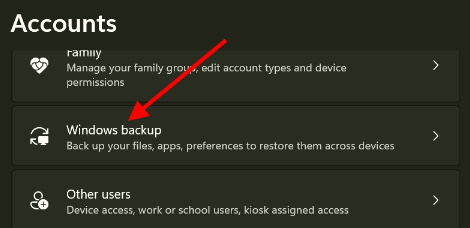
- In settings window, click on Accounts from the left pane.
- From the right side click on Windows backup.
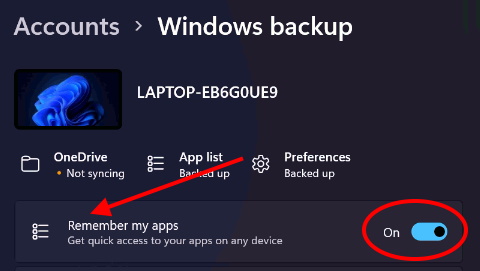
- Turn Off the toggle against option Remember my Apps.
You can also download this PC Repair tool to Locate and Fix any PC issue:
Step 1 – Download the Restoro PC Repair Tool
Step 2 – Click on Start Scan to find and Fix any PC issue automatically.
That’s all.
