How to Restore as Default Firewall settings in Windows 10. A question generally arise that What does windows Firewall do? Now a days, to protect your system from virus as well as hackers is the most important task which you must remember. Microsoft has many features in windows 10 which help to keep safe our system from unauthorized sites, virus and hackers. ‘Firewall and network protection’ is one of them. It acts like a wall between your system and outside disturbing elements.
This Firewall protection has its own setting policy by which it defend our system from unauthorized software. It prevents to installing such software which is harmful for your system. Some applications are restricted to install in your system by Firewall setting. But sometimes users install these software after making changes in Firewall and network protection manually.
And a result, you will have to face the network issues, problems in accessing and running some applications, printing, sharing files, emails or many more.
In this article, we will discuss about Restore as Default Firewall settings in Windows 10.Restore as Default Firewall settings in Windows 10.
Also Read : How to Enable Windows Defender Ransomware protection in Windows 10
Tips to Restore as Default Firewall settings in Windows 10
You can restore or reset the windows firewall settings to defaults by using any of the four methods.
Through Windows settings Restore Default Firewall Setting in Windows 10
Step1: Press Windows and I keys conjointly to open Setting.
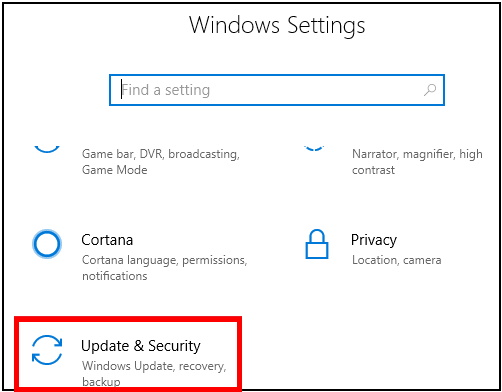
Step2: Go to Update & security.
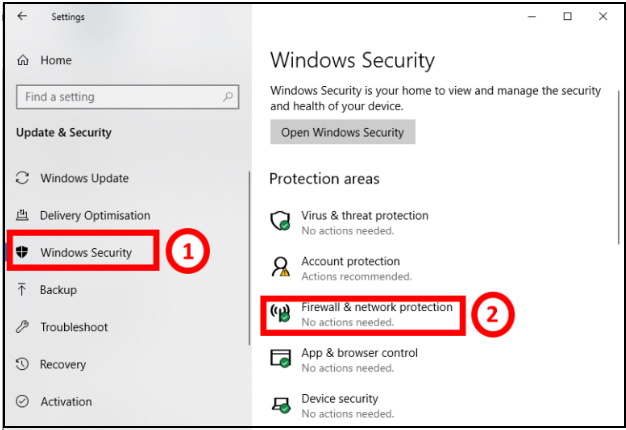
Step 3. Now Click on the ‘Windows Security’ option from the left menu and subsequently click on the ‘Firewall and Network Protection’ option from the right side of menu. See the screenshot below.
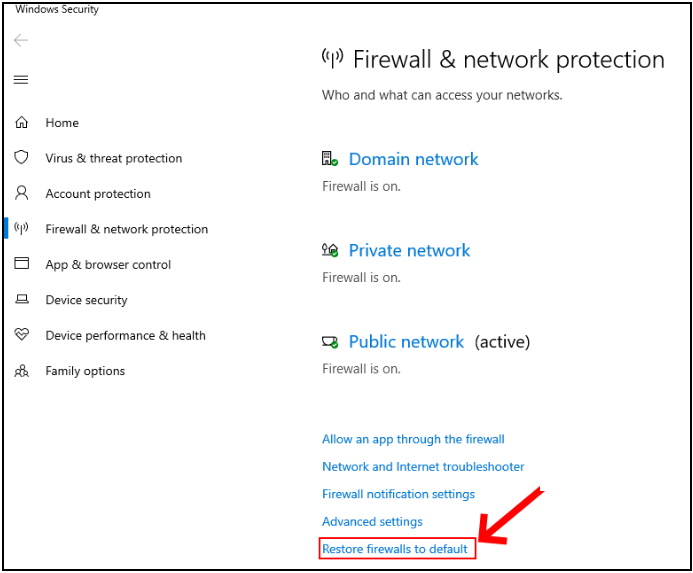
Step 4. A new box will appear on your screen. From which, Make a click on ‘Restore Firewall to Default’ from right side menu.
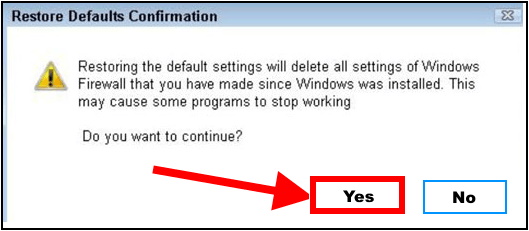
Step5. A confirmation box will display on screen asking your confirmation. Click ‘Yes’ and the firewall settings will be restored as default.
By Using Control Panel Restore Default Firewall Setting in Windows 10
Step#1. Open Control Panel.
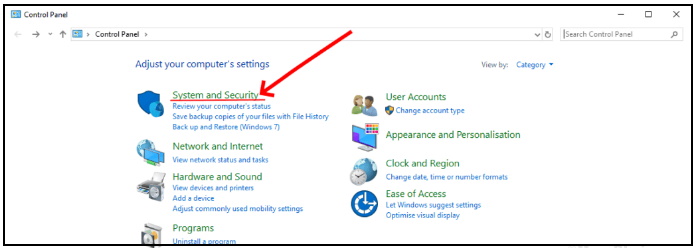
Step#2. Make a click on System and Security from the control panel menu appeared on your screen.
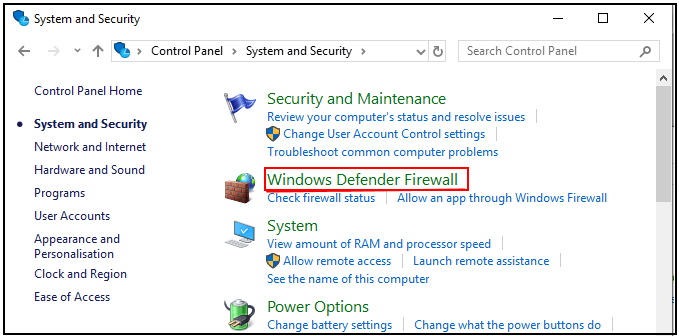
Step#3. From the right side of menu, click on Windows Firewall Defender.
Step#4. Click on ‘Restore Defaults Option’ from the left side of Menu.
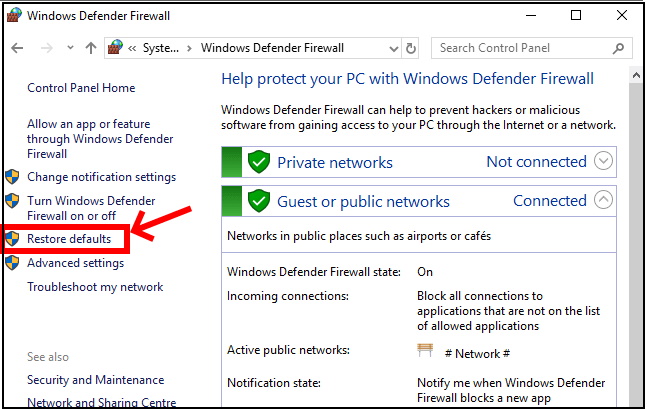
Step#5. At last a confirmation dialog box will appear on your screen duly asking your confirmation. Click ‘Yes’ to continue for restoring the firewall settings to default. You will be asked to reconfirm for resetting.

Using Command Prompt
- Launch Run dialog box by hitting Window+R key conjointly.
- Type cmd in the run box.
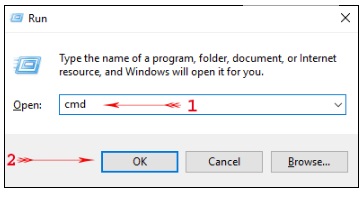
- Click on Ok Button.
- You will see a box, type this command: netsh advfirewall reset.
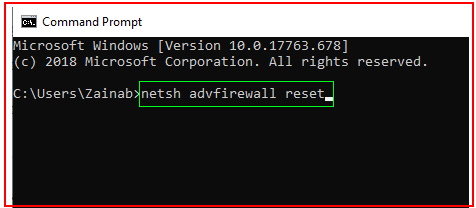
- Make a Click on the Enter button from the keyboard and your firewall settings will be restored to default.
Restore the Windows Firewall settings to defaults Through PowerShell
Step@1. Search for PowerShell in the search box and then right-click on the app and tap on ‘run as administrator’.
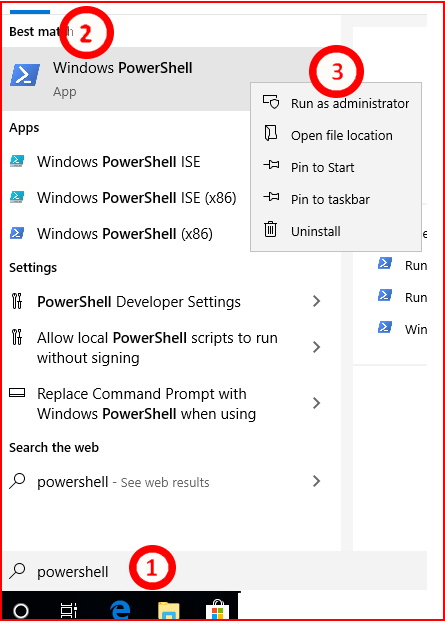
Step@2. Then a box will appear in which type the command:
(New-Object-ComObject HNetCfg.FwPolicy2).RestoreLocalFirewallDefaults()

Step 3. Press the Enter button from the keyboard and set aside for a while to let the windows restore the settings to default
Thnx a lot.
Please don’t forget to make your valuable comment.

1 thought on “Tips : Restore as Default Firewall settings in Windows 10”