How to Fix LAN Adapter Drivers not working properly in Windows 10. While creating connection over Local Area network through Wi-Fi, users have to face LAN Adapter Drivers not working properly in Windows 10. This problem basically due to adapter driver error or may be error in VPN software. Accordingly a message appears on your screen duly quoting There might be a problem with the driver for the Local Area connection error. If you re also facing such issue, we are here alongwith its possible solution. Be continue with this article.
How to Fix LAN Adapter Drivers not working properly in Windows 10
These are the various solutions to fix this issue. You may apply any one of them as per your convenience.
Go through the Windows Setting
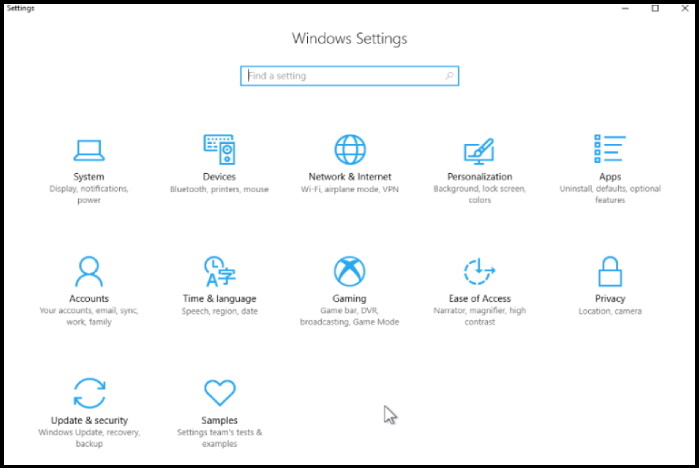
- Open Windows Setting.
- Select Network and Internet option.
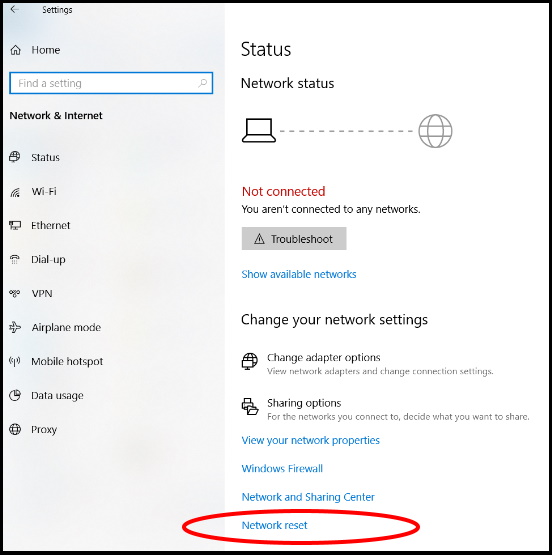
- From the right side of window page, scroll down and go to the end.
- Here you will find the option Network Reset.
- Make a click on it.
- A confirmation message will pop up on your screen
- Click on Yes to confirm.
- Make a click on Reset Now option.
- Follow on-screen instruction to complete the process.
Update the Network Driver to Fix LAN Adapter Drivers not working properly in Windows 10
As it is clear the problem of network connection due to driver related issue, so you must update the driver automatically as well as Manually. Follow these steps to complete the process: –
- Open Device Manager.
- Navigate the option Network Adapter from the list available.
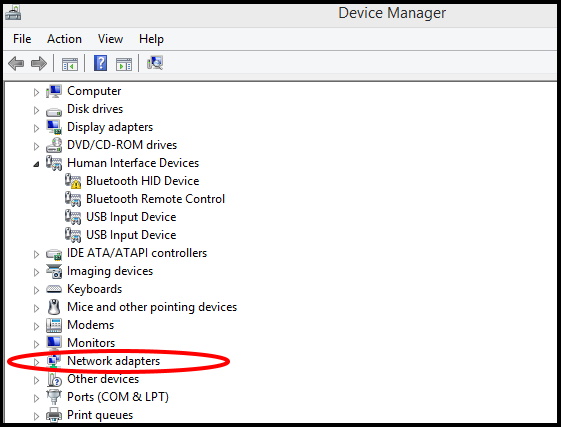
- Make a click on it to expand it.
- Now go to each driver and apply a right click on it and select update driver option from the drop down menu.
- Thereafter go to your LAN driver.
- Make a right click on it.
- Select Uninstall from the drop down menu.
- Restart your windows 10 system once un-installation process is complete.
- After reboot, re-open the Device Manager.
- Make a click on the Action tab from the top menu bar.
- Select Scan for hardware changes and after the process completes, choose Install missing drivers automatically.
Set Startup type to Automatic through Services
- Press Win + R Shortcut key conjointly.
- Run Dialog Box will open.
- Type services.msc in it.
- Press Enter or Ok button.
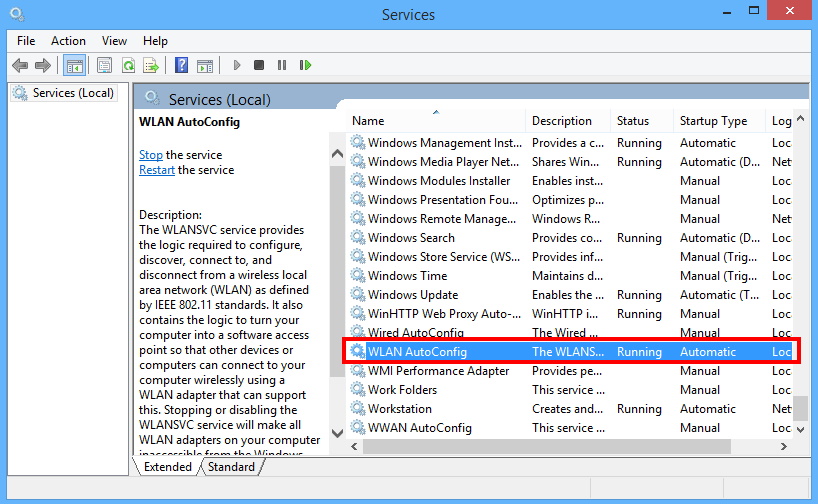
- Services Window will open now.
- Navigate the option WLAN AutoConfig from the right side of list of services.
- Make a double click on it to open its properties.
- WLAN AutoConfig Properties window will open now.
- Here go to the startup type section.
- Make a click on small arrow and select Automatic from the drop down menu.
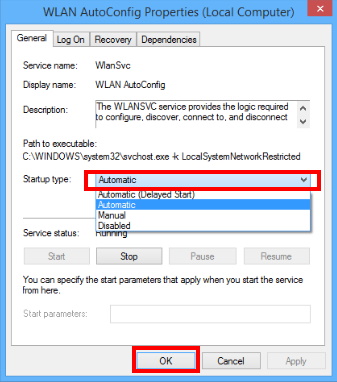
- At the end, click on Ok button to save the changes.
- Restart your computer and check if the issue was solved.
That’s all.
