How to Install Windows 10 update without enough free space. Not enough space to update windows 10 is a common message appears on your screen, when you are using laptop, tablet or using such device having less free space. If your system doesn’t having required free space on your drive, you can’t upgrade with a newer version of windows 10. But today, in this article, we will discuss How to Install Windows 10 update without enough free space.
However, windows 10 reserved storage feature provide additional percentage of space when you get struck during Windows update. But windows 10 reserved storage have also some limitation, beyond this, it can’t assist you in avoiding difficulties of free space during windows update.
How to Install Windows 10 update without enough free space
If you want to install a new version of windows 10 in your system, but your system having less storage space. In this case you will have to connect an external drive having enough free space.
System requirements for installing a new version of windows 10
- A new computer to create a Bootable Drive.
- Two new USB flash drives having not less than 16 GB space.
- Your system should have two Ports.
- In case of Micro-USB Port, USB-On-The-Go(OTG) cable must be available to create a standard USB connector.
- In case of only one USB Port, a USB hub having two different ports required.
How to create a Windows 10 Installation Flash Drive
Firstly you should have a flash drive with the latest installation files of windows 10. You can also use Microsoft media creation tool to create an installation media. Follow these steps: –
- Apply USB Flash drive in the new computer.
- No go to the Windows download page.
- Make a click on the Download tool now under the Create Windows 10 Installation media section.
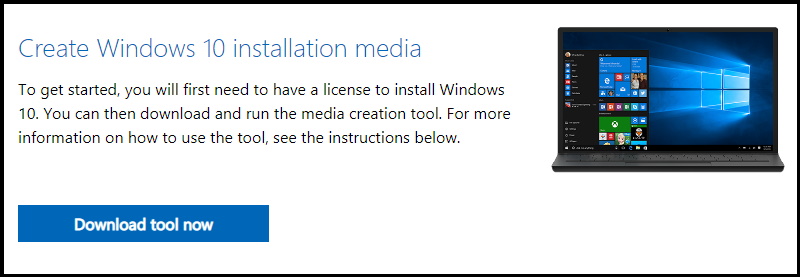
- Thereafter apply a double click on the media creation tool….exe file to open the tool.
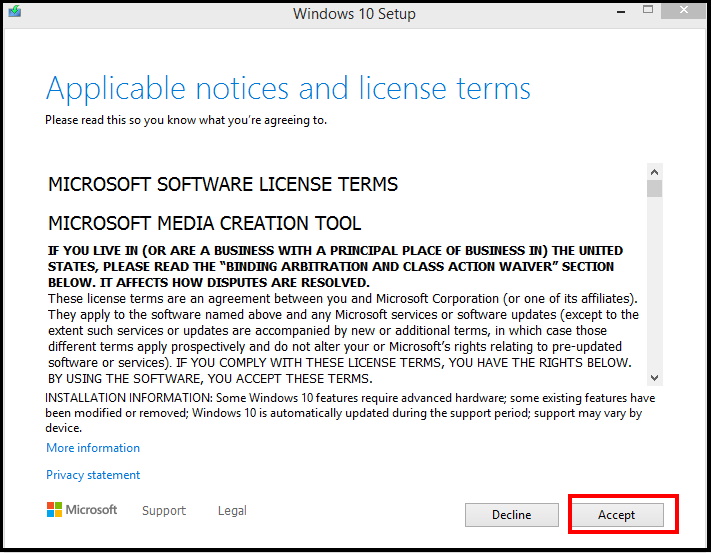
- Agree to the terms and condition by clicking on Accept button.
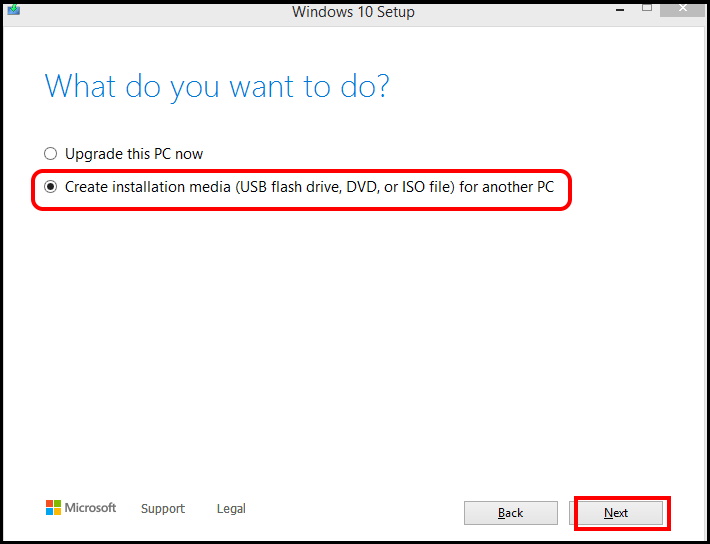
- Now select the option Create installation media (USB flash drive, DVD or ISO file) for another PC.
- Thereafter click on the Next button.
- Now Select the language, architecture, and edition of Windows that you want.
- Again click on Next button.
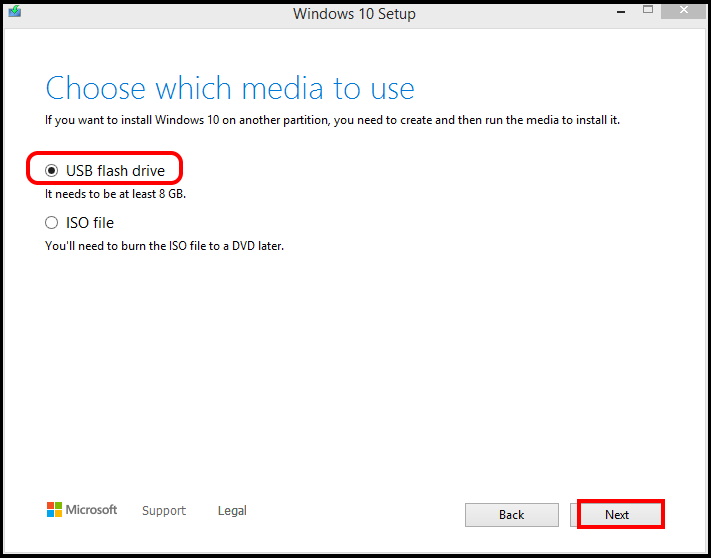
- Here choose the option USB Flash Drive.
- Click on Next button.
- Now select the option USB Flash Drive or Refresh Flash Drive option which one is available.
- Click on Next button.
- At the end click on Finish button.
Once the process is complete, the media creation toll will download the files as well as create an installer, which you can use to upgrade your Windows 10 version with less storage space.
How to Install a new version of Windows 10 by using USB Flash Drive
You can also install a new version of windows 10 by using flash drive by following these steps: –
- At first connect the USB OTG cable or USB hub to the new computer.
- Also connect both the USB flash Drive with the Windows 10 installation files and the other new USB flash drive.
- Now press Win + E shortcut key to open File Explorer in Windows 10.
- Go to the option This PC.
- Make a click on it to open.
- From the top menu bar, under Device and Drives section, open the USB Flash Drive alongwith installation files.
- Thereafter navigate the setup.exe files.
- Apply a double click on it to open.
- Click on Next button.
- Thereafter click on Accept button.
- Now go to the section, Windows needs space to update.
- Here you will find the option External storage device under drop down menu.
- You should select the option empty USB Flash Drive.
- Click on the Next button.
- Now click on the open button against all the option such as Recycle bin, downloads, storage use to free the space.
- You can also clear more space from here.
- After obtaining more free space, refresh your system.
- Click on Next button.
- Thereafter click on Install button.
- Follow on-screen instruction to complete the installation process.
Apply Shrink Current setup to Install Windows 10 update without enough free space
If you feel, your device requires some extra space to complete the installation process of new version of Windows 10, you should use a command line tool named Compact OS. This tool will help you to compress and reduce the footprint of the Windows 10 installation files with limited storage sense.
Before further proceeding to applying shrinking method, you should create a full backup of your system. Because your one silly mistake can harm to your windows 10 installation media.
Now we will shrink the size of Windows 10 setup file by following these steps: –
- Open Run command by pressing Win + R shortcut key.
- Type cmd in it.
- Press Ok button.
- You may press Enter key to open it quickly.
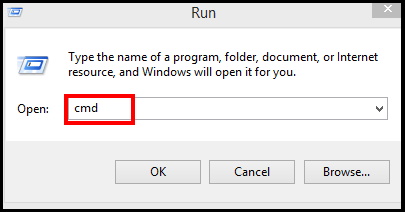
- Make a right click on Command prompt option and choose the option Run as administrator.
- Now type the following command to to shrink or compress the windows 10 installation files followed by Enter key: –
- compact.exe /compactOS:always
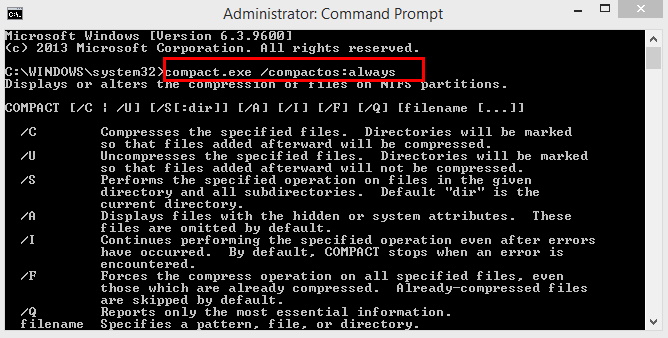
Once the process is complete, you have enough free space approx 2 GB without changing your performance of your system.
In future if you don’t need to compress or shrink Windows 10 installation files, you may go to previous stage where your files were free. To access the previous stage, type the following command in Command Prompt window and press Enter key: –
compact.exe /compactOS:never
That’s all.
