How to Delete Cortana Search History in Windows 10. Cortana is the latest search engine of Windows 10 by which you can type or use voice searches to find the information you want in your Windows 10 PC. Whatever you search through Cortana, windows generally saves all your browsing in your PC as well as your Bing account. You can also use the Browsing data to make your recent search more familiar. But most of the users don’t like to save all their browsing data due to Privacy. If they are not aware of clearing Cortana Search History, They make disable Cortana Search in their Windows 10 PC. But it is possible to delete the search history of Cortana rather than disabling Cortana in Windows 10. Here, in this article, we will see How to Delete Cortana Search History in Windows 10.
How to Disable Cortana Appearance While Startup in Windows 10
How to Delete Cortana Search History in Windows 10
Cortana is an useful feature of Windows 10. But if you don’t want to store search history, you can clear the information that Cortana stores under browsing history.
Important Point: From Windows 10 1903 May 2019 Update Cortana search history can now be deleted only from the Microsoft Bing account.
So we can see both the methods. The first one is before the installation of Windows update for version 1903 and second one is for post windows update May 2019. Here’s how to clear Cortana’s search history on your PC.
To remove or delete the Cortana Search History, follow these steps: –
- Click on the Windows icon on your desktop.
- Make a click on the Settings option in the menu located above the Power button.
- You can simply open Windows Settings App by pressing Win + I shortcut key altogether.
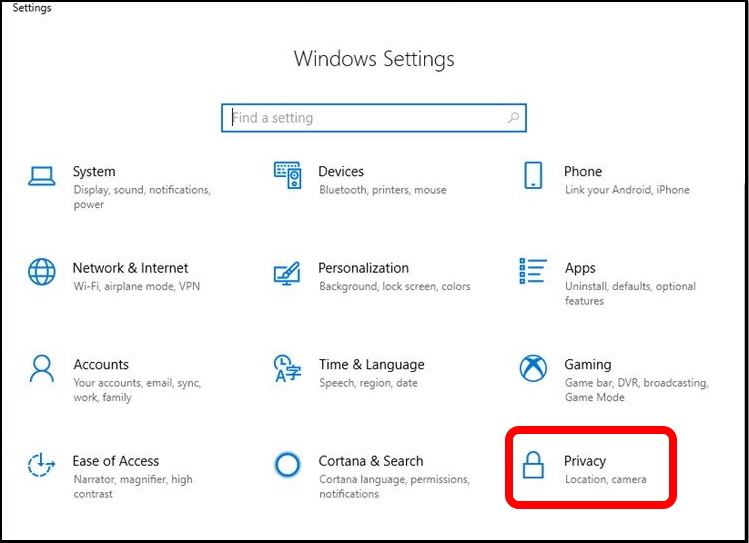
- Choose the option Privacy.

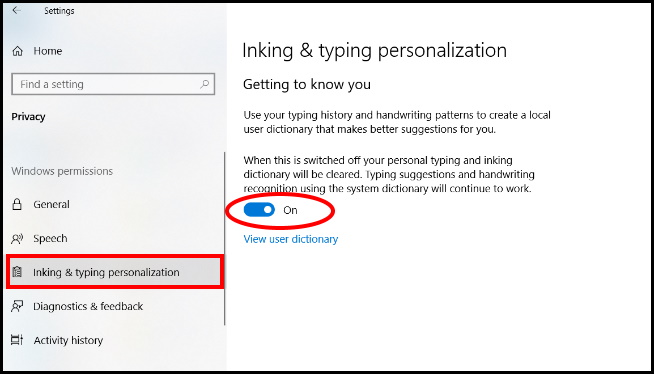
- From the left pane of Setting window, select the option Linking & typing personalization.
- Turn off the toggle button under the option Getting to know you.
- This will turn off dictation and will clear info on your device that windows uses to make better suggestions for you.

- This method also clears Cortana’s search history as well as prevent Cortana from gathering any more information about you.
- If you want to get enable, simply turn on the toggle button under Get to know me option.
Clear Cortana Search History from Microsoft Bing Account in Windows 10
- Open Windows Settings App by pressing Win + I shortcut key altogether.
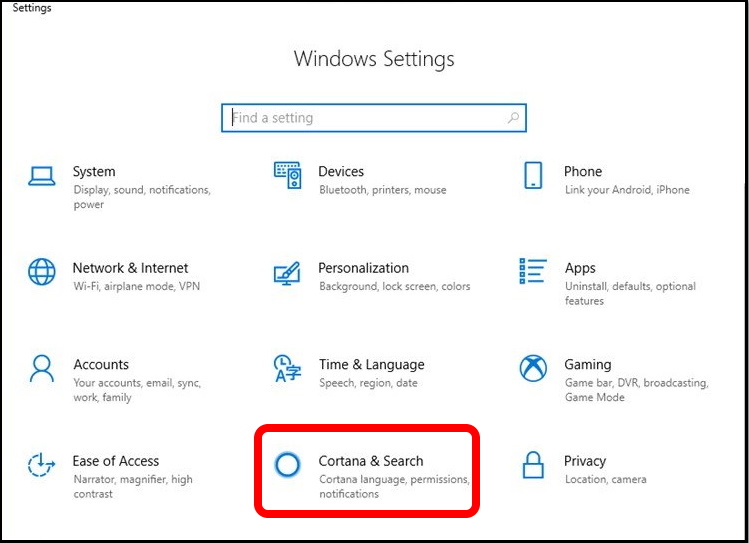
- Choose the option Cortana & Search.

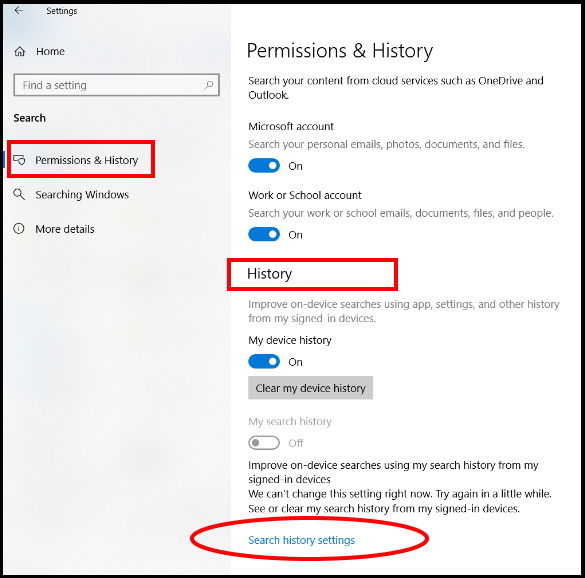
- Make a click on the Permissions & History option from the left side of setting window.
- Thereafter on the right side of the page, scroll down to the History section.
- Under History section, find My search history and then click on the Search history settings option.
- You will further proceed to the Microsoft Bing account on Microsoft Edge.

- You will be directed to the Search History page in the Microsoft Bing Account.

- Thereafter go to the bottom left of the page. Here you will find the section Manage your search history.
- Make a click on the Go to Dashboard button below it.
- You are now directed to the Privacy section of the Dashboard.
- Here click on the My activity tab.
- From the left pane, You will find the option Explore your data.
- Here click on the option Voice.
- Now you will see all of the Cortana search histories to date at the right side.
- Just click on the Clear button under each activity to delete activities individually or click on the Clear activity button on the upper right to delete all of the Cortana search histories at once.
That’s all.

1 thought on “How to Delete Cortana Search History in Windows 10”