How to Create and Check Homegroup Windows 10. For sharing files or folders, picture, media etc from one computer to another computer connected with LAN (Local Area Network), Windows Homegroup network feature is used. First you have to create homegroup, because same group feature should available on both the systems. In another word, you may say it “Creation of Network” between two windows system. The role of Homegroup feature in windows system is very important specially for small businesses to transfer or communicate data after interlinking windows systems as well as other devices also. Before further proceeding to the main theme of this article, we should know about availability of Homegroup in your windows 10 system.
Check Availability of Homegroup Windows 10 System
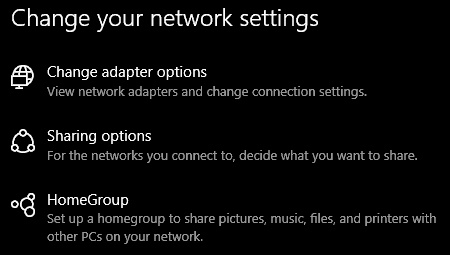
As we have discussed earlier, for sharing files or folders over Network, homegroup feature must be in your system. Now we will check its availability in windows 10 system. Follow these steps: –
- Make a click on Start option.
- Go to setting.
- Here select Network & Internet option.
- At status, you will find Homegroup.
How to Create a Homegroup Windows 10
At first, make ensure that your both system is connected, if not, add or connect the both PCs either through LAN Cable or wireless. Your system should be connected through Network via wireless or LAN Cable.
- Open Control Panel.
- Select Network and Sharing center option.

- Click on the HomeGroup link from left bottom of the Network and sharing centre window.
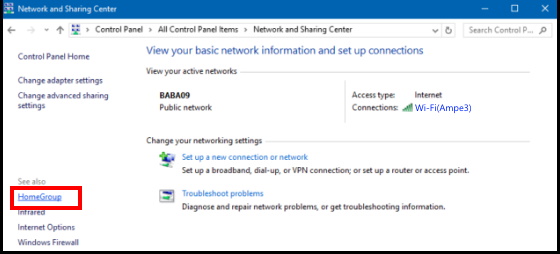
- Now HomeGroup window will appear on your screen.
- Click on Create a homegroup button.
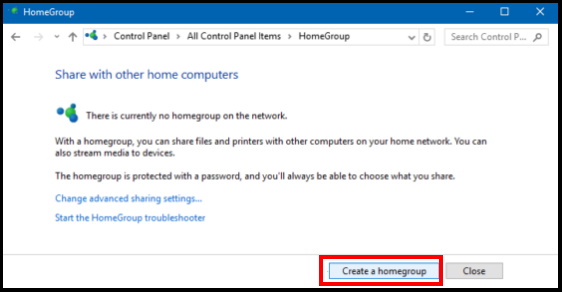
- Create a Homegroup wizard will appear on the screen.
- Now Click on Next button.
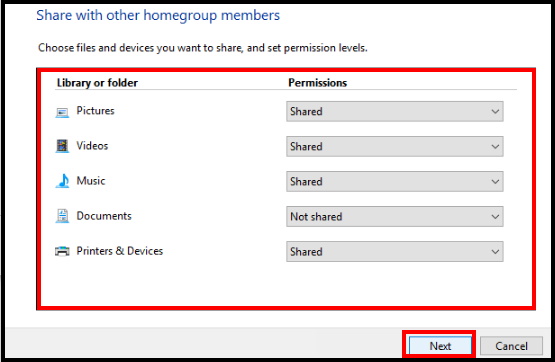
- Further, You see the list of files and devices that you would like to share within the homegroup.
- From the drop down menu beside every item set the level of permission of each item.
- Click Next once you complete the permission.
- Here, you will see an auto-generated password.
- Note this password. This password will also applicable for the another computer which you want to add or share data.
- There is also a facility available to change the password on later.
- Now, click on the Finish button.
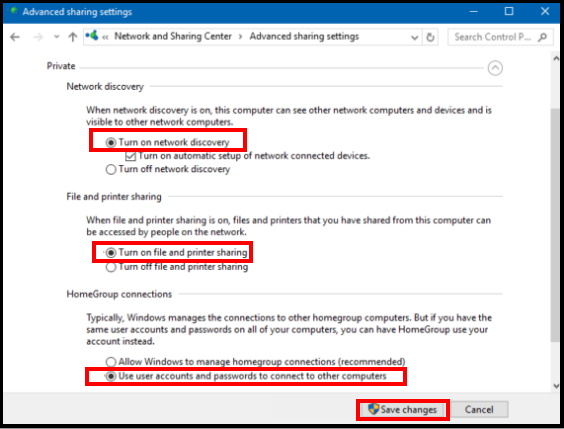
Turn on Network Discovery in Windows 10.
One network discovery option is also a feature that helps to communicate data from one computer to another, It should be turned on. YIf not, it will difficult to share or connect the PCs. Follow these steps to turn on the network discovery in Windows 10: –
- Open Homegroup window again.
- Here select Change Advanced Sharing Settings.
- Find out the Private (current profile) section.
- Select the option which says to Turn on network discovery.
- Then select the option of Turn on file and printer sharing so that you can be able to share files and printers within the homegroup.
How to Share Printer on another Computer in Windows 10
That’s all.

1 thought on “Tips : How to Create and Check Homegroup in Windows 10”