How to add Wireless printer in Windows 11 and Windows 10. Finally Windows 11 has been launched and fully satisfied to user’s expectations. Users are frequently upgrading their existing Windows 10 to Windows 11 or install a fresh Windows 11 Operating System to their laptop or computer. To find wireless printer or with wire in Windows 11 is also a main issue which every user want to know. Here in this article, we will add a Printer to Windows 11 by three methods.
How to add Wireless printer in Windows 11 / 10
Although, there is little difference in adding a wireless and with wire printer to Windows 11 / 10 system. We can connect wireless printer in Windows 11 by three methods. But before further proceeding, you should ensure the following: –
(a) Your printer should compatible with Windows 11 system. To check compatibility, go through the manual of printer such as Cannon Wireless printer setup manual, HP wireless printer setup manual.
(b) Ensure cartridge properly inserted and installed in printer.
(c) Plugged in and Turn on the Wireless printing.
(d) Accurate power supply to the printer.
(e) Connect Printer with Windows 11 system through Wi-Fi network.
How to add Printer using IP address in Windows 10
Method-1: Through Control Panel
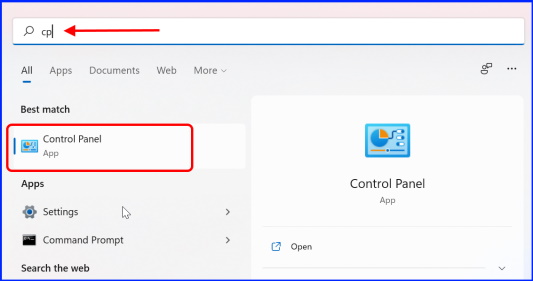
- Go to Windows Search.
- Type cp in search field.
- Control Panel will appear as top result.
- Open control panel.
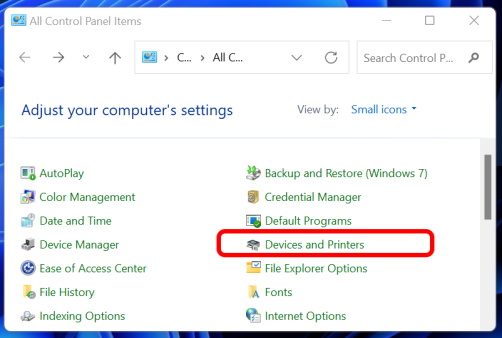
- Here Click on Devices and Printers.
- Thereafter click on Add a Printer option.
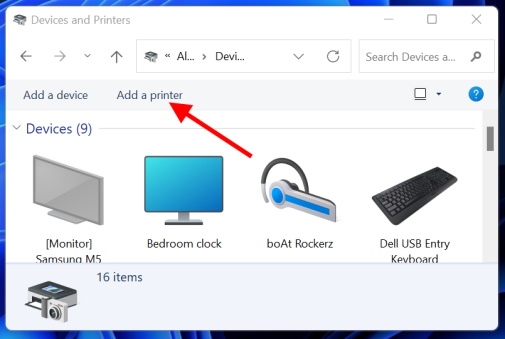
- The printer which you connected through Wi-Fi network will appear here.
- Select the printer and Click on the Next button to install and connect network printer in Windows 11 / 10.
- Finally click on Finish button.
Method-2: Connect Wireless Printer Manually in Windows 11 / 10
- Apply a right click on Start Menu button from the Taskbar.
- Choose the Settings widget.
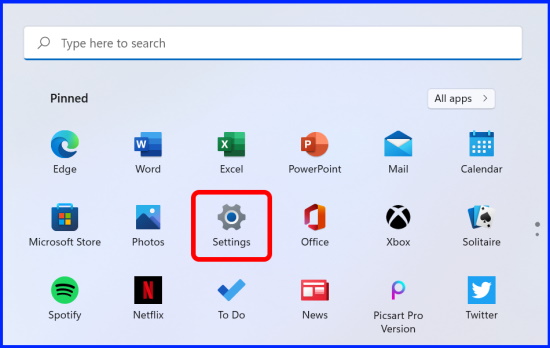
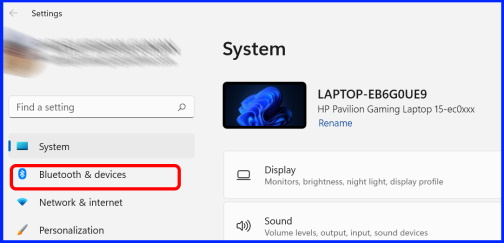
- From the left pane, select Bluetooth & Devices.
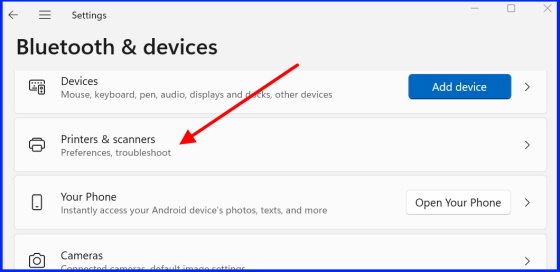
- Thereafter click on Printers & Scanners option under Bluetooth & devices section.
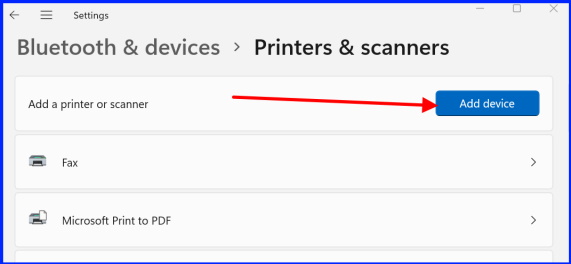
- Here click on Add device button under Add a printer or scanner.
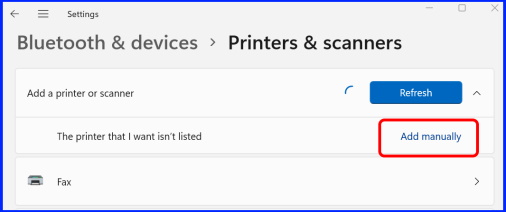
- Then click on Add manually button.
- Choose the radio button against option Add a Bluetooth, wireless or network discoverable printer.
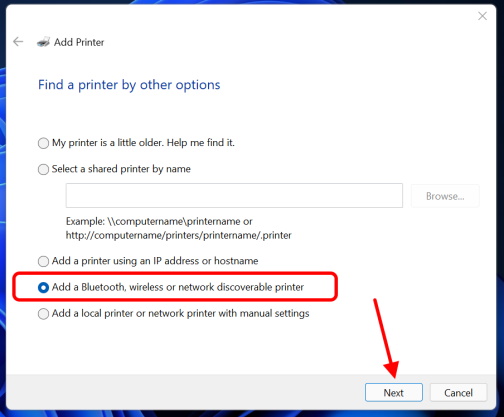
- Then choose the wireless printer under Add a device window.
- Thereafter click on Next button.
- Follow on-screen instruction to complete the process.
Method-3: Add Wireless Printer Automatically in Windows 11
- Apply a right click on Start Menu button from the Taskbar.
- Choose the Settings widget.
- From the left pane, select Bluetooth & Devices.
- Here click on Add device button under Add a printer or scanner.
- It will discover the connected Printer to the Windows 11 system and add them automatically.
Wireless Printer Setup
How to Set Default Printer in Windows 11
- Right click on Start button and choose Run option.
- Type Control Printers in it and Press Enter key.
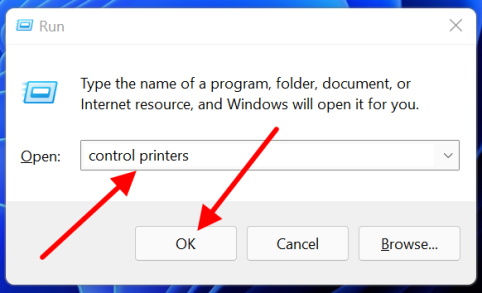
- Devices and Printers window will open now.
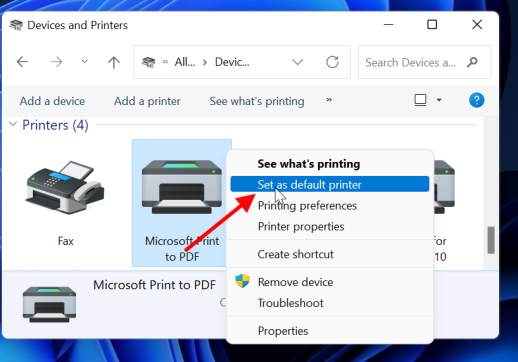
- Here apply a right click on that printer which you want to set as default printer.
- Choose the option Set as default printer from the drop down menu.
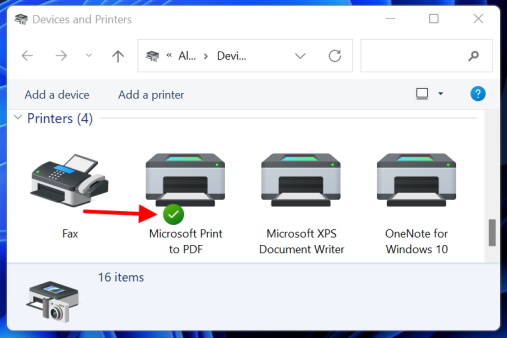
- After that, you will see a green tick on the default printer in windows 11.
How to Remove a Printer in Windows 11
- Apply a right click on Start Menu button from the Taskbar.
- Choose the Settings widget.
- From the left pane, select Bluetooth & Devices.
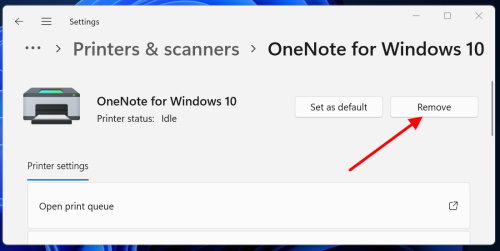
- Thereafter click on Printer & Scanners.
- Here you will see your default printer or added printer.
- Choose the Printer which you want to remove.
- Click on Remove button.
People also look for: –
- Add a printer to this computer
- Install printer
- Connect printer
- Connect to printer
- Connect printer to wifi.
- Printer setup
- How to connect HP printer to wifi.
- Set up printer
- Wireless printer setup
That’s all.
