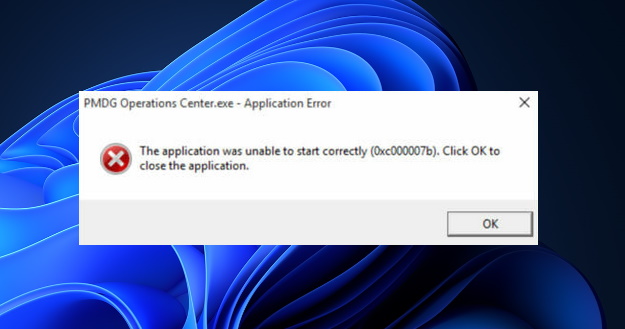
How to Fix Application Error code 0xc00007b in Windows 11. Microsoft has launched Windows 11 and most of the users have activated Windows 11 or upgraded Windows 11 from existing Windows 10 operating system. There are lot of error codes are appearing and accordingly their fixes are available. Error code 0xc00007b is one of them which many users have to face while open Apps in Windows 11. Basically this error is an application error having message “The application was unable to start correctly“.
Causes of Error code 0xc00007b Windows 11
Although the error message box appears on windows 11 screen doesn’t having description of application error code 0xc00007b. But as per users report the following may be a possible cause of this error code in Windows 11: –
- Missing Windows 11 update
- Compatibility issue of Applications
- Missing any Windows features
- Incorrect installation of Apps
How to Fix Application Error code 0xc00007b in Windows 11
Now we will resolve this issue by various workarounds as described in succeeding paras. To resolve this app error code, you should update windows 11 operating system, launch the app in administrative mode, reinstall app windows 11 and other windows features. Here are the various ways to resolve this issue.
Tips-1: Restart Windows 11 Computer
Restarting system resolves many errors at first instance without putting extra effort. You should try it first. Follow these steps: –
- Right click on start button.
- Hover the cursor at Shutdown option.
- Choose Restart from the context menu.
Tips-2: Install Windows 11 Update
Microsoft releases regular windows update to address various windows related issues. There is a possibility of any missing updates that may be helpful in launching apps windows 11. So you must install windows 11 latest updates by following these steps: –
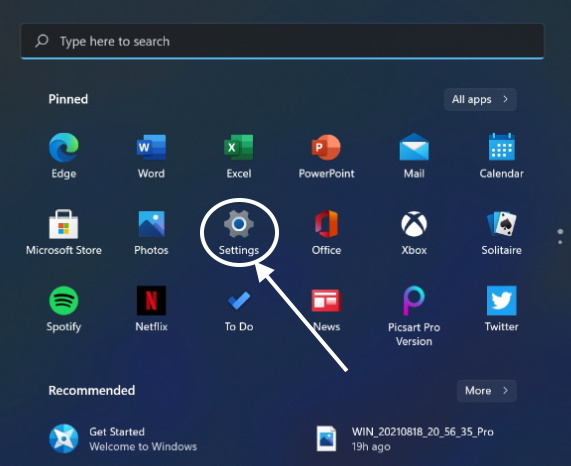
- Click on Start button.
- Choose Settings widget.
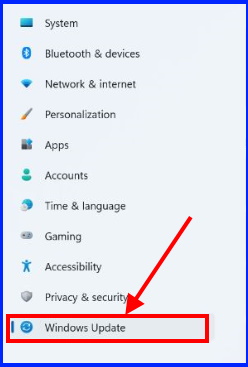
- Scroll down and click Windows update from the bottom.
- Thereafter go to right side and click Check for updates option.
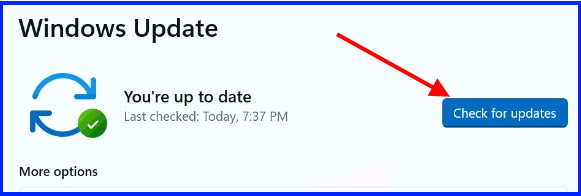
If your system is already updated, it will show You’re up to date. If not, available updates will appear here.
- Click Download now button.
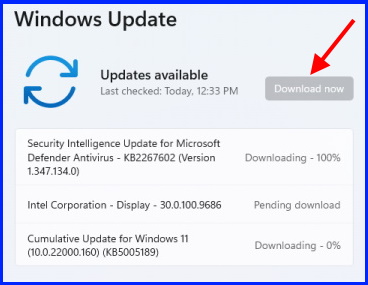
- Follow on-screen instruction to install windows 11 updates.
Tips-3:Reinstall Microsoft C++ Redistributables to fix Application Error code 0xc00007b in Windows 11
Microsoft C++ Redistributables acts an important role to function application. Any specific files required by applications installed through C++ Redistributables . Sometimes it may be corrupt or outdated. In this case, you should uninstall and reinstall Microsoft C++ Redistributables. Go through these steps: –
- Go to start and apply a right click on it.
- Select Run.
- Thereafter type appwiz.cpl and press Ok button.
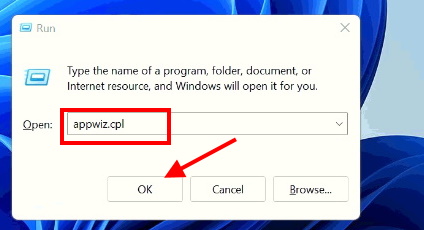
- Program and features windows will open now.
- Here go to the list of C++ Redistributables installed in Windows 11 system.
- Apply a right click on it.
- Choose Uninstall.
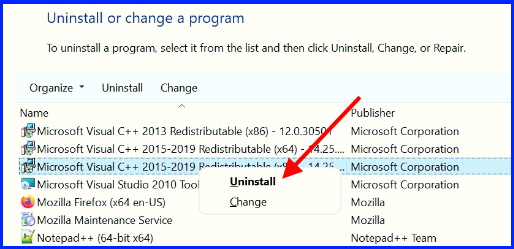
- Uninstall all such programs one by one.
- Once the process is complete, go to the Microsoft Visual C++ Redistributables latest supported downloads page.
- Here find out all the programs which you have uninstalled earlier.
- Install it one by one.
Tips-4: Change App compatibility to Fix Application Error code 0xc00007b in Windows 11
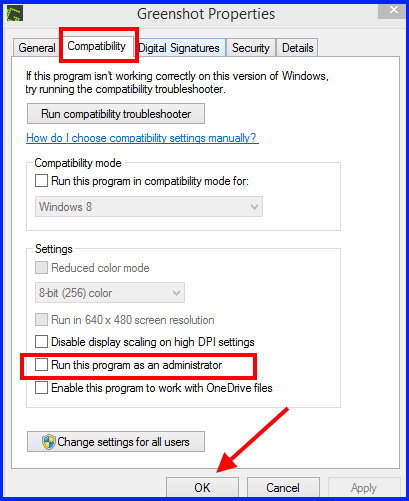
Few certain applications work in administrative mode. Normal opening raises such app error code. You should try to launch app with administrative privileges. Follow these steps: –
- Press Win + E shortcut to launch File Explorer Windows 11 / 10.
- Go to C drive.
- Open Program files.
- Navigate the App which is receiving Error code 0xc00007b.
- Apply a right click on it.
- Choose Properties.
- Scroll down and make a check against box Run this program as an administrator.
Tips-5: Uninstall App which receiving Error code 0xc00007b in Windows 11
- Press Win+I shortcut to open Settings Windows 11.
- From the left pane, click Apps.
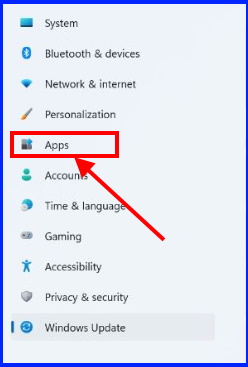
- Thereafter click on Apps & features option from the right pane.
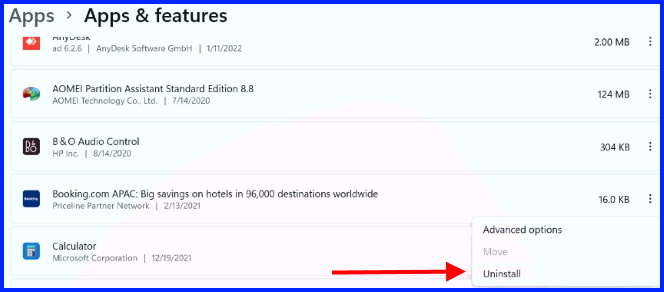
- Go to the App failed to open or receiving error.
- Click on three dot and choose Uninstall.
- Shutdown windows 11 computer and again restart.
- Now download App again and install it.
Tips-6: Enable .Net Framework in Windows 11
- Go to start and apply a right click on it.
- Select Run.
- Thereafter type optionalfeatures and press Ok button.

- Windows feature will open now.
- Here make a check against .NET framework 3.5 feature to enable it.

- It will take time to install its features.
- Restart your system and check for error.
That’s all.
