How to Disable Password protected Sharing Windows 11 / 10. You can Share files or folders over network in Windows 11 or windows 10. But these files or folders are password protected by default and other users must know the credential to access these files or folders. Only those people can access shared files having an user account and also use same password. If you want to share files with everyone, you will have to disable password protection to your shared folders. Everyone can view your shared elements, if you disable the settings.
How to Disable Password protected Sharing Windows 11 / 10
There are three ways to disable password protected sharing Windows 11 or windows 10. The first one is through Registry editor, the second one is through local users and the third one is via Control panel. You can apply any one of them.
How to Protect a Folder with Password in Windows 11
Ways-1: Through Local users or groups
You can Disable Password protected Sharing Windows 11 / 10 through Local Users Group.
- Apply a right click on start button.
- Select the option Run.
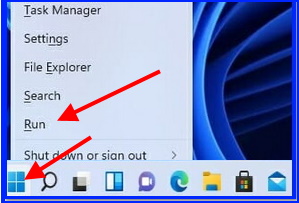
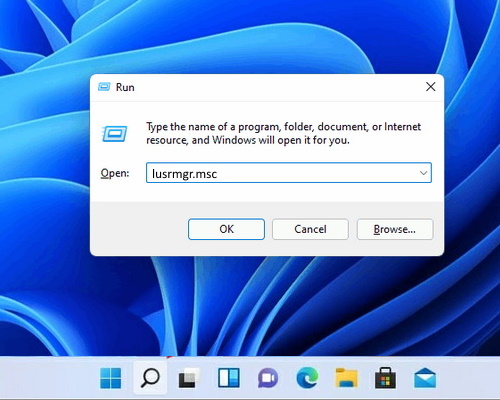
- Run command box is open now.
- Type lusrmgr.msc in it and press Enter key.
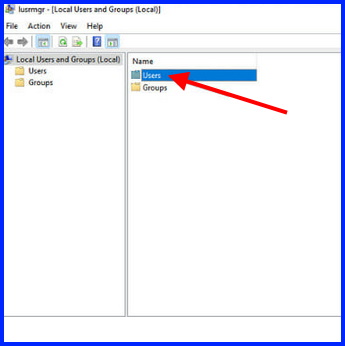
- Local user group window will open.
- Click on the option Users from the right side of Window.
- Thereafter apply a right click on the option Guest.
- Choose Properties from the drop down menu.
- In new window, make the check against box Password never expires.
- Also uncheck all other boxes.
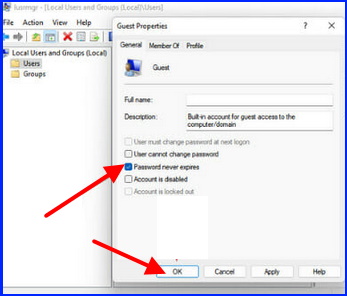
- At the end, click on the Ok button to save the changes.
- Restart your Windows system.
Ways-2: Disable Password protected Sharing Windows 11 through Control Panel
You can turn off password protected sharing Windows 11 through Control Panel.
- Go to windows search and type control in it.
- Open control panel in Windows 11.
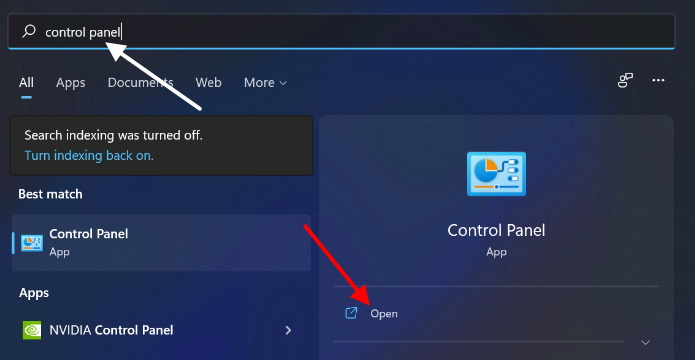
- Choose the option Network and Internet.
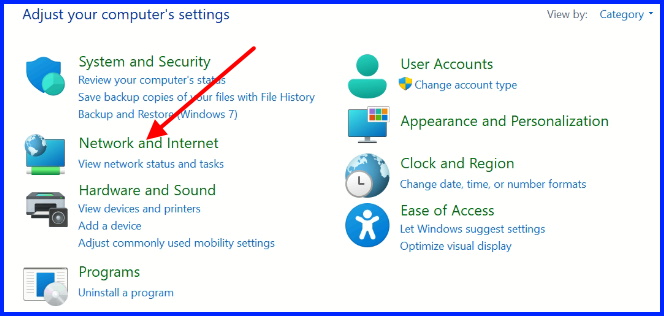
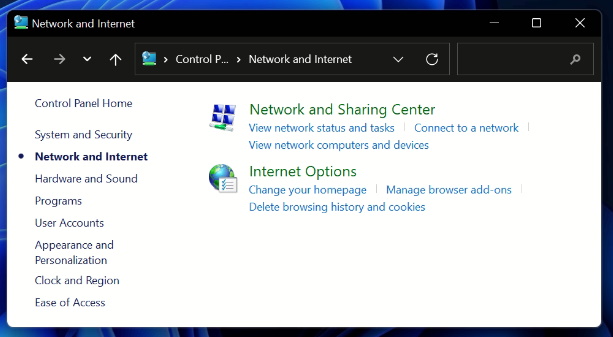
- Thereafter select Network and Sharing Center.
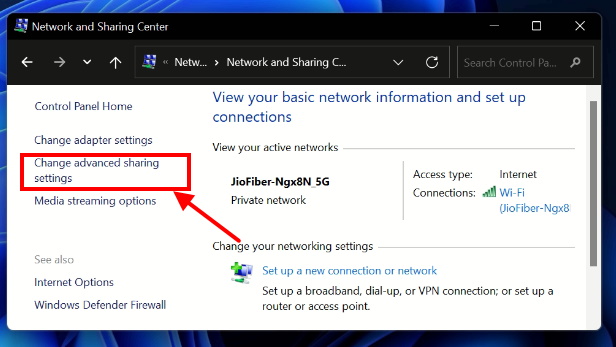
- After that, from the left side, click on Change advanced sharing settings.
- Now from the bottom of the page, click on All Network.
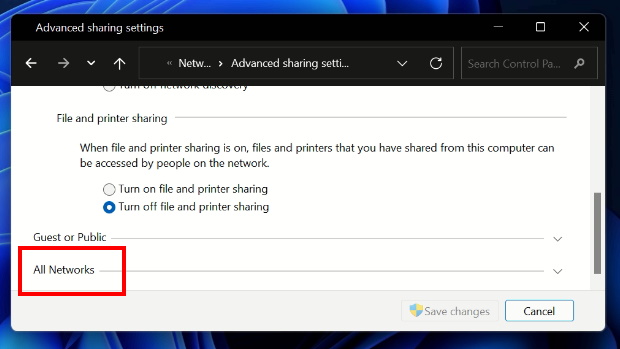
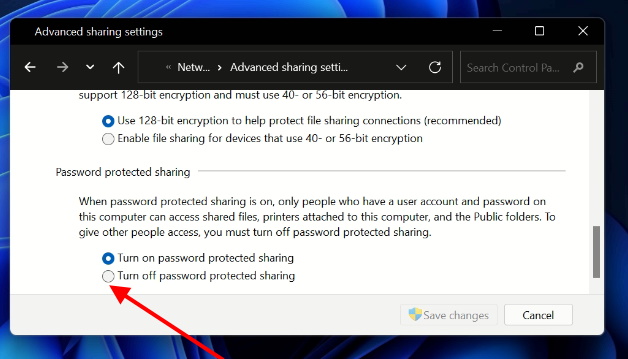
- Here you will find two options: –
- Turn on password protected sharing
- Turn off password protected sharing
- Click on second option to disable password protected sharing Windows 11.
Ways-3: Go through Registry Editor
Although, to change in Registry of your windows system is not recommended, because it is little risky. Your silly wrong entry may lead to major issue with your windows 10 or 11 system, So be more careful while editing registry settings.
You must keep a full backup of Registry before further proceedings.
To disable password protected sharing through registry editor, follow these steps: –
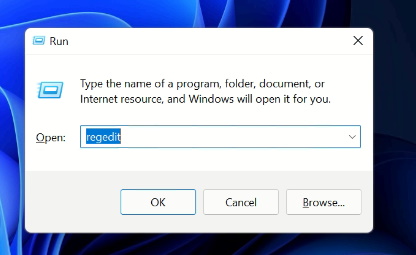
- Launch Run dialog box by pressing Win + R shortcut key.
- Type regedit in it and press Ok button.
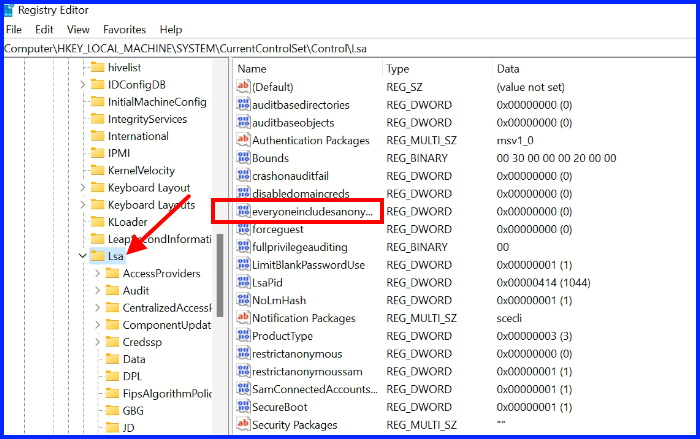
- In Registry window, navigate the following path: –
- HKEY_LOCAL_MACHINE\SYSTEM\CurrentControlSet\Control\LSA
- From the right side, apply a double click on the option everyoneincludeanonymous value.
- Enter 1 as Value data
- Press Ok button.
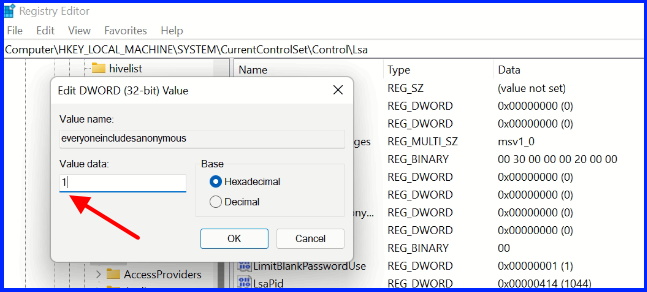
- Now navigate the following path in Registry window: –
- HKEY_LOCAL_MACHINE\SYSTEM\CurrentControlSet\Services\LanmanServer\Parameters
- Then, go to right side and double click on the value RestrictNullSessAccess.
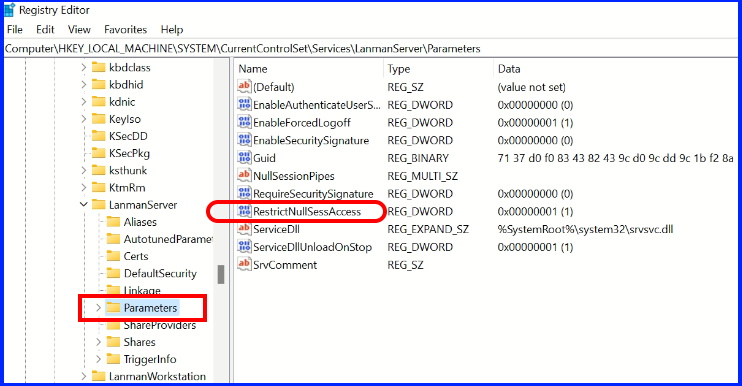
- Put the value 0 under value data field.
- Press Ok.
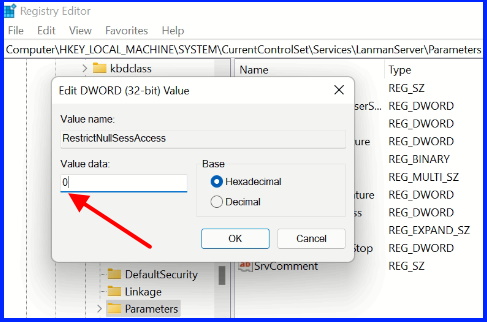
- Close the window.
- Now everyone can view your shared data.
People also search for: –
- How to turn off password protected sharing Windows 10
- turn off password protected sharing Windows 10 registry key
- How to turn off password protected sharing Windows 11
- Turn off password protected pdf
- Disable password protected file sharing.
You can also download this PC Repair tool to Locate and Fix any PC issue:
Step 1 – Download the Restoro PC Repair Tool
Step 2 – Click on Start Scan to find and Fix any PC issue automatically.
That’s all.

This does not work.
have u applied methods correctly…?