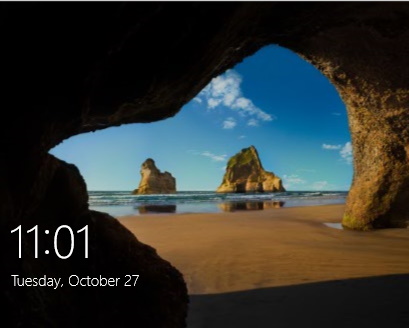
How to Disable Automatic Lock Screen settings in Windows 10. Windows auto screen lock timeout welcomes you with beautiful awesome pictures at first sight. This feature not only good looking but also provide security to your system. Each time Windows 10 lock screen after sleep activated. You have to enter password to unlock Windows 10. In few cases, This feature is beneficial for you, but in some cases, when you are in a hurry, auto lock screen bothers you. Many users don’t like to enter user name and password each time after sleep Windows 10. In this article, we will see how to disable Windows 10 lock screen password by various methods.
How to Disable Automatic Lock Screen in Windows 10
Here are the various ways by which you can disable lock screen. After that your system will never ask to enter password on wakeup from sleep or unlock your windows 10 system. Lock screen will no longer be available, even after you keep your computer Sleep or Hibernate.
Tips-1: Through Windows Settings
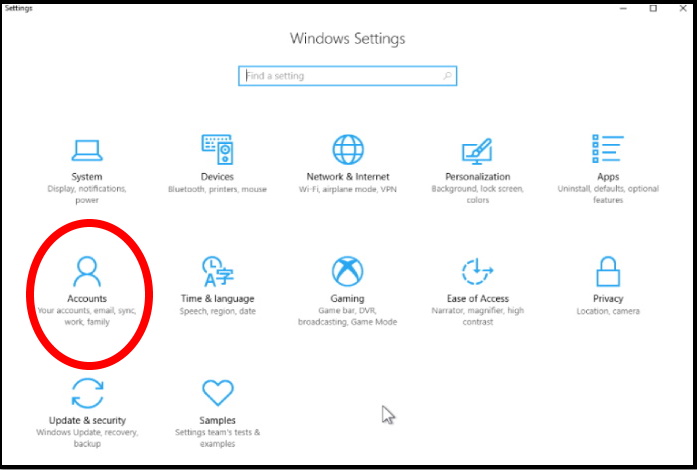
- Press Win + I shortcut key conjointly.
- Windows Setting will open.
- Here choose the option Accounts.
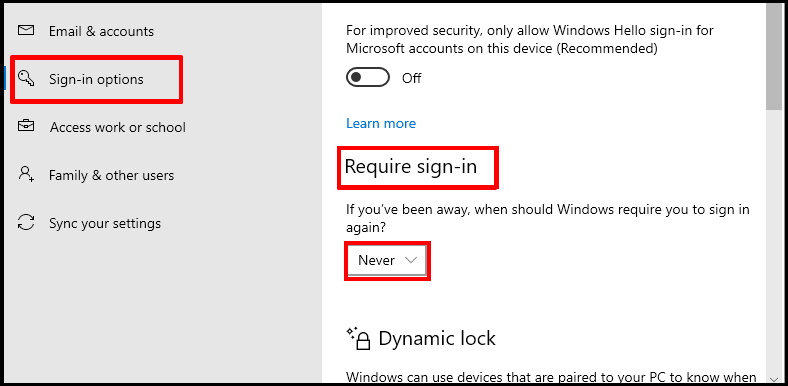
- Now from the left side of page, select Sign-in options.
- Consequently at the right side of page, go to the Require Sign-in Section.
- If you have been away, when should Windows require you to sign in again?
- Choose the option Never from the drop down menu.
Tips-2: Disable Automatic Lock Screen through Control Panel
- Open Run dialog box by pressing Win + R shortcut key altogether.
- Type netplwiz in it and press Ok.
- A User account window is open now.
- Here uncheck against the option Users must enter a user name and password to use this computer.
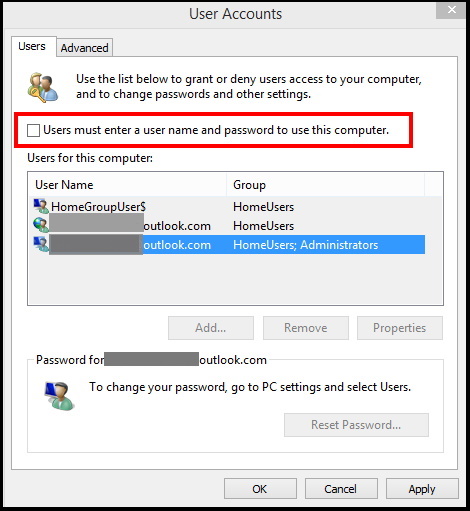
- Thereafter press on Apply and Ok button.
Tips-3: Through Screen Saver Setting
- Go to the search option.
- Type lock screen.
- Make a click on the result.
- Now from the left side, click on Lock screen.
- From the right side, click on Screen saver settings.
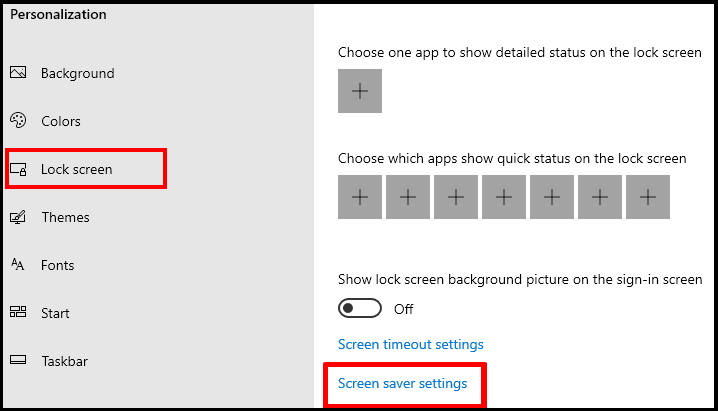
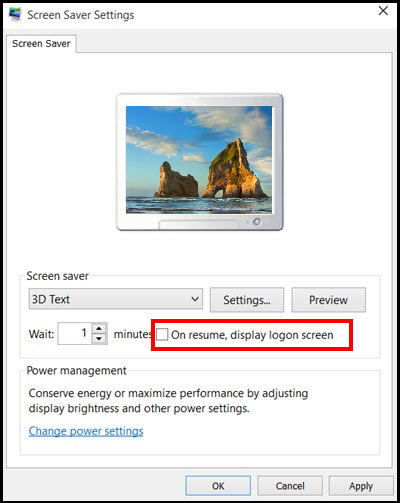
- Screen saver settings window is open.
- Here uncheck the box against option On resume, display logon screen.
Tips-4: Go through Registry Editor
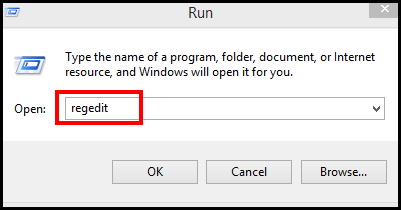
- Press Win + R shortcut key together.
- Run command will open.
- Type regedit in it and press Enter.
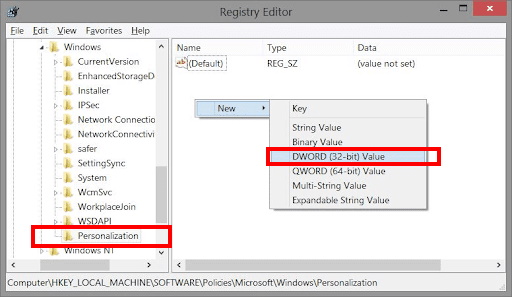
- Registry editor window is open.
- Here navigate the following path in Registry Window: –
- HKEY_LOCAL_MACHINE \ SOFTWARE \ Policies \ Microsoft \ Windows \ Personalization
- Right click on blank space of right side of window to create a new DWORD value.
- Select the option DWORD (32-bit) value from the context menu.
- Rename it as NoLockScreen.
- Apply a double click on it.
- Put the value data 1 in Edit DWORD Value window.
- Thereafter click on Ok button to save the changes.
Now look for this path: –
-
- HKEY_LOCAL_MACHINE\SOFTWARE\Microsoft\Windows\CurrentVersion\Authentication\LogonUI\SessionData
- Apply a double click on AllowLockScreen.
- Put the value 0 in in 0 in Value data field to disable or turn off Windows 10 Lock Screen.
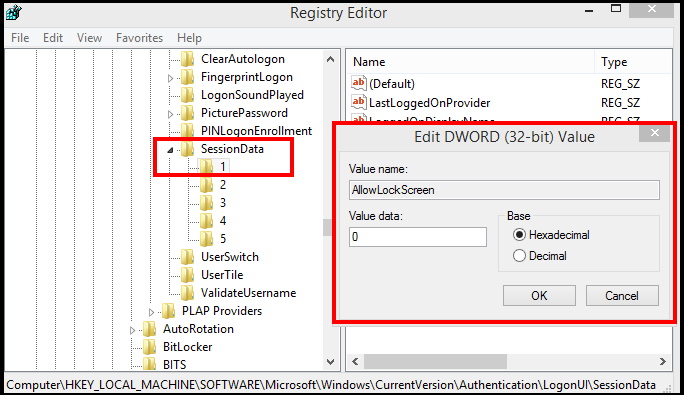
- Close the Registry Editor window.
- Restart the windows 10 system.
Tips-5: Disable Automatic Lock Screen through Group Policy Editor
If you are using Windows 10 Pro edition, you can disable automatic lock screen through Local Group Policy Editor. Follow these steps: –
- Type gpedit.msc in Run Command box.
- Press Enter.
- Local Group Policy Editor window will open.
- Now navigate the following path: –
- Computer Configuration \ Administrative Templates \ Control Panel \ Personalization
- Thereafter go to right side and apply a double click on Do not display the lock screen.
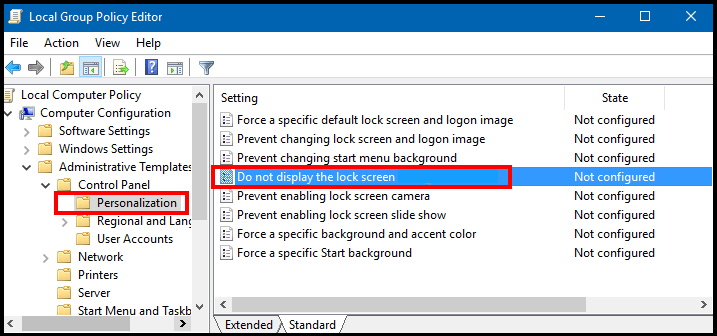
- Here choose the option Enabled.
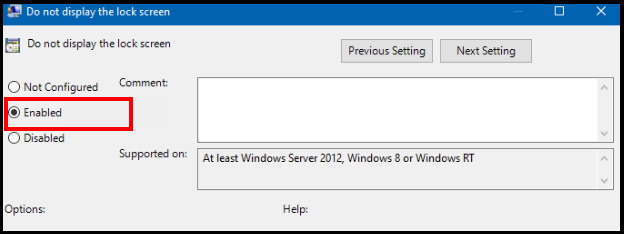
- Press Apply and then Ok button to save the changes.
- Reboot your system.
That’s all.
