You must know all about Camera App in Windows 8. Camera app is an in-built feature of windows 8 system which is used for photography as well as recording. Microsoft has launched many important features in Camera app in field of clarity and quality of camera or webcam. As new features introduced in camera app, You must know all about Camera App in Windows 8. In this article, we will discuss about how to use camera app as well as customize this app in Windows 8.
How to Use Camera App in Windows 8
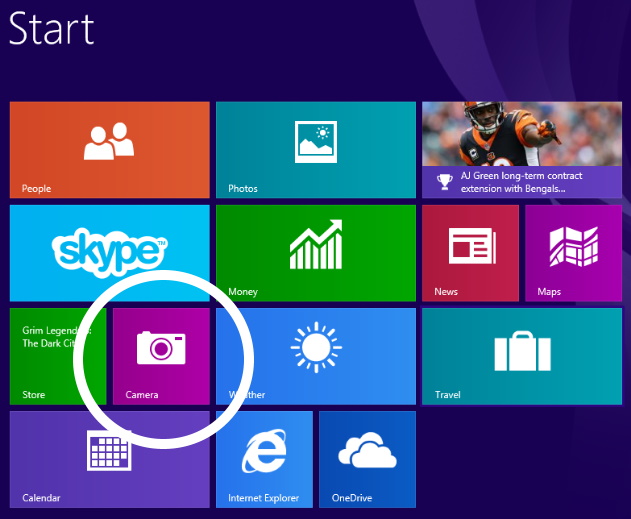
- Go to Start option to launch metro screen.
- Select Camera from here.

- A popup window will appear duly asking permission for using your webcam and microphone.
- Click on Allow button.

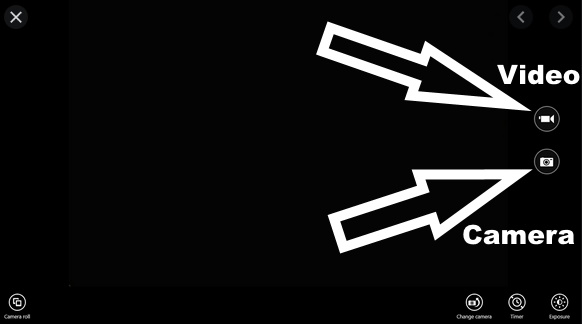
- Here you will see two icons at right side of black screen. The first one is for capturing picture and another one is for recording video.
- Now point your laptop towards your subject and click the Camera button.

- The photo will capture and it will be saved in the camera roll folder under pictures folder in Windows 8 documents.
- Apply right click on the picture to open it in new window, delete it or edit it. If you take multiple pictures, use the arrows that appear when you move your mouse to the sides of the screen to scroll through the photos.
- Click the video button to record video.
- Again click the video button to stop recording.
Features of Camera App in Windows 8
A lot of features are available in Camera app. These are as under: –
1. Open the Captured photo in Photo App
You may open your captured photo in photo app by applying double click on it. In the Photos app, double-click a photo library to display files in it. Make a double-click on a photo to view it. The following functions are available after applying right click on the photo: –
- If you want to delete the photo, select delete button.
- You may edit the photo by applying right click on the photo and go to open with option to use another program, such as Paint.net to edit the photo.
- If you want to set the photo as your wallpaper, lock screen, background image etc, click on Set As button.
- You may create or view a slide show of all your album photo by clicking on Slide Show button.
- The image can be rotated at any degree, use the Rotate button.
- Use the Crop button to display handles you can drag to crop to a portion of the Image.
- Click the Edit button to make changes to the photo.
2. Easy Photo sharing option available
You may share your photo by following these steps: –
- Click the Photos app tile on the Start screen. Locate a photo you want to share and then press Win+C.
- Click the Share charm for more sharing options in Photos.
- Click on Mail.
3. Play a slide show of Photo Album
You can use Photos to play a slide show, which continues until you stop it.
- You should make a click on the Photos tile on the Start screen.
- Then click a photo album or library to open it.
- Make a right-click on the album and choose Slide Show button.
- To end the slide show, Click anywhere on the screen.
That’s all.
