How to Install Administrative Templates (.admx) for Group Policy Editor in Windows 11. Although Local Group Policy Editor has also been not included in Windows 11 Home edition same as Windows 10 Home edition. Being an administrative feature, Group Policy Editor supports only the Pro and Enterprises version of Windows 10 and Windows 11. But you can download or install Group Policy Editor in Windows 11. Windows 11 October 2021 21H2 update also include the ADMX templates download for Windows 11 or administrative templates (.admx) for windows 10 20h2.
As we know, Group Policy Editor is a useful configuration tool provided by Microsoft in almost all new generation computers. Through GPE, you can customize or configure Taskbar, Start menu as well as Windows Sandbox feature in Windows 11. Recently, Microsoft has introduced .admx Administrative templates to the existing Group Policy Editor with a large variety of settings. ADMX template download is available with Microsoft Download Center and the latest admin templates compatible with with Windows 11, 10, and 7. You can download .admx template Windows 11 for Local Group Policy Editor.
How to Download and Install Administrative Templates for Group Policy Editor in Windows 11
At first, you should download .admx Administrative templates for Windows 11. here is the process: –
- Go to the ADMX Download web page.
- ADMX Templates for Windows 11 October 2021 update 21H2 page will open.
- Make a click on the Download button.

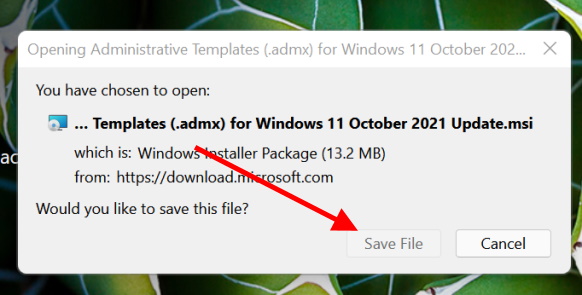
- A new small window will pop up.
- Here Click on Save file option.
- Select a folder where the downloaded file will save.

- Now go to File Explorer by pressing Win logo + E shortcut key.
- Here find out the folder containing .admx Templates which you saved earlier.
- Apply a double click on the .admx file.
- It will open the set up wizard of Administrative templates for Windows 11 October 2021 update.msi file.
- Click on the Next button.
- Thereafter make the check against Term & Condition accepting box.
- Click on the Next button.
- Keep the same folder location where downloaded files saved earlier.
- Click on the Install option.
- Let the process be complete, once finish the process, click on Finish button.
- Don’t forget to Restart your Windows 11 System.
That’s all.
