How to Schedule Automatic Scan in Avast antivirus 2022 in Windows 10 / 11: Avast always try to provide better security of system as well as users. For better security, Avast launches new security features in his every updates. Recently it has come with new settings for Schedule Scan in Avast free antivirus 2022 Version in recent days. In this topic we will discuss about how to Schedule automatic scan in Avast 2022. What is new in this version?
Why Avast 2022…?
Typically most of the antivirus vendors are recommending to run a full system scan regularly once a week. This may be quite complicated as the full scan usually takes around 30 minutes. Of course you can still work during the scan process, but the whole computer is usually running slowly.
However Avast has a solution called scan scheduling. You can schedule an automatic scan which will be performed daily, weekly or monthly.
Scheduling the automatic scan you can keep your computer clean without wasting your precious time. Scanning and cleaning is fully automatic, so you don’t even need to be at your PC during the process. You can setup which actions will be performed when the scan finds a virus.
How Avast antivirus 2022 works
Avast free antivirus having full control of your system that also check your windows 10 system at a fixed time interval. It works online and provide better security for your windows 10 system. As we know viruses attack any time on your system and you should scan your system on a regular time interval. You can set Avast antivirus version on daily, weekly, fortnightly basis as per your requirements.
How to Schedule Automatic Scan with Avast antivirus 2022 in Windows 10 / 11
Here are the procedure to scan your windows 10 system with Avast scanner: –
- Go to Notification area of your Windows 10 system from Desktop Taskbar.
- Make a click on Avast located on taskbar.
- Then click on the option Protection from left side of window.
- Thereafter go to Virus Scans feature and then click on Custom Scans.
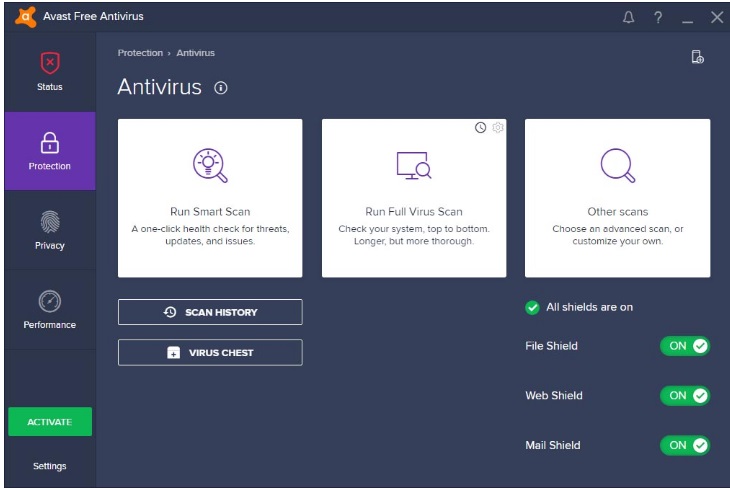
- Click on the option Create a new scan.
- After that, choose Scheduling and proceed to the right side.
- Make the Check against box Schedule this scan under Scan scheduler.
- Now select Schedule Type from the drop down menu such as, Once, Daily, Weekly and Monthly.
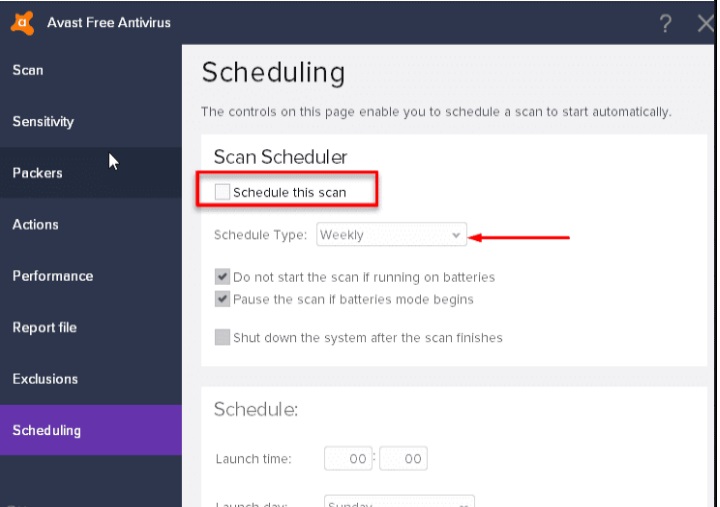
- Finally click on the Ok button to save the changes.
Also Read : Simple Method to Optimize Windows 10 Performance
How to Setup Automatic Actions During the Scan
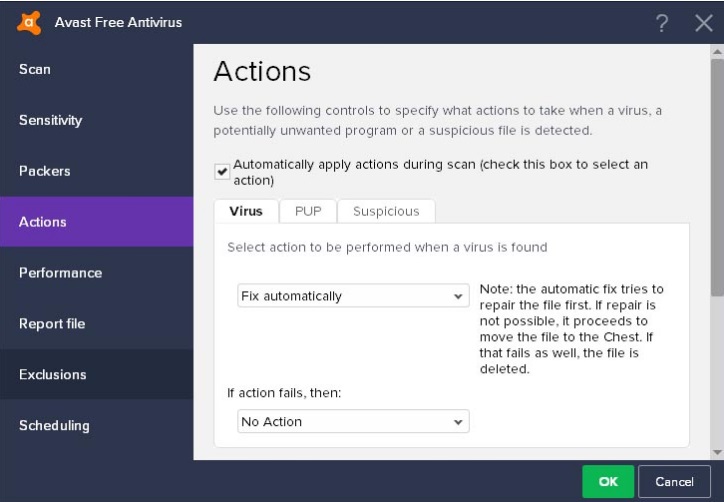
When your scan is scheduled successfully, you should move to another section i.e ‘Actions‘ to setup the automatic actions when the threat is found. First of all you need to select the option ‘Automatically apply actions during scan (check this box to select an action)‘.
Then select type of action.
- Fix automatically
- Move to Chest
- Delete
How to Check the Scan History (Log)
Now it is important to check the schedule time which you did put on during scheduling, when the scheduled time passes you should check the scan log to see if some viruses were found. For this, you should open your Avast interface and go to ‘Protection‘ » ‘Antivirus‘ and click on ‘Scan history‘ in the bottom part of the window.
Here you will find all scanned files/folders amount of tested data and most importantly the number of infected files under Avast Scan history.
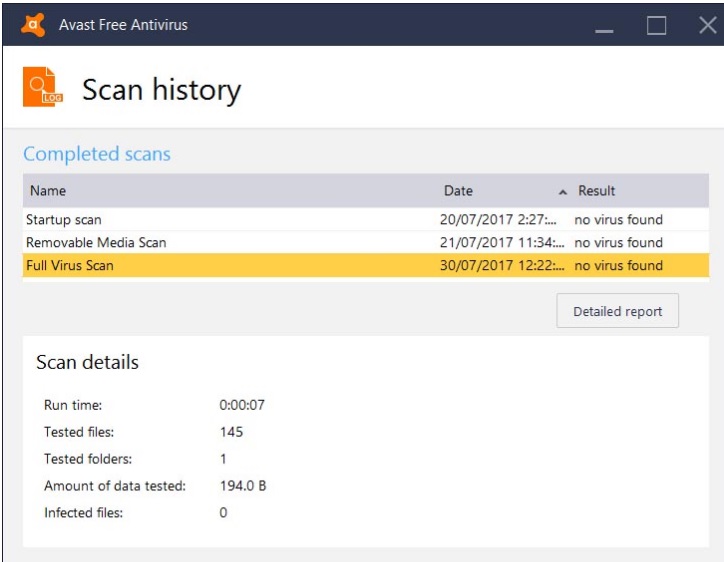
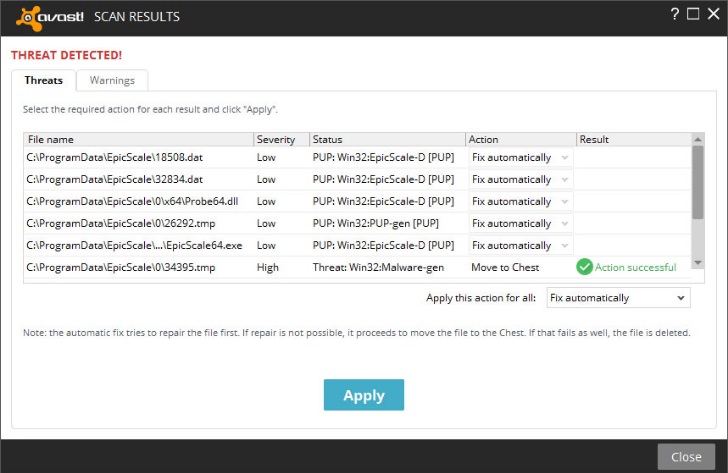
If you want a detailed report about threats then you may go to this section i.e threat detect. Here you will see all types of threats and action also under Avast scan result or Avast scan log.
Hope you will take advantages of this topic “How to Schedule Automatic Scan in Avast 19.1 Version”. Make comment in Comment box.
Thnx….

1 thought on “How to Schedule Automatic Scan in Avast Antivirus 2022 in Windows 10 / 11”