How to Find and Set Default speaker or set default Audio device in Windows 10. Windows 10 users keep various audio devices their system. Each time, when you try to open audio devices such as speaker, Bluetooth sound device headphone etc, a list of speaker and other audio devices appear and accordingly you have to choose the audio device, you want to use to play the audio. But Windows 10 offers you to set any audio device as your default speaker, so that, next time when you play an audio, operating system automatically choose the default audio and start to play the audio. Other devices remain mute.
How to Find and Set Default Audio device in Windows 10
Here, in this article, we are going to discuss, How to Find and Set Default output device in Windows 10. There are basically two ways in windows 10 system, by which you can find and set your default Speaker. The first one is through Setting app and the another one is by using Control Panel.
Set Default Speaker through Windows Setting
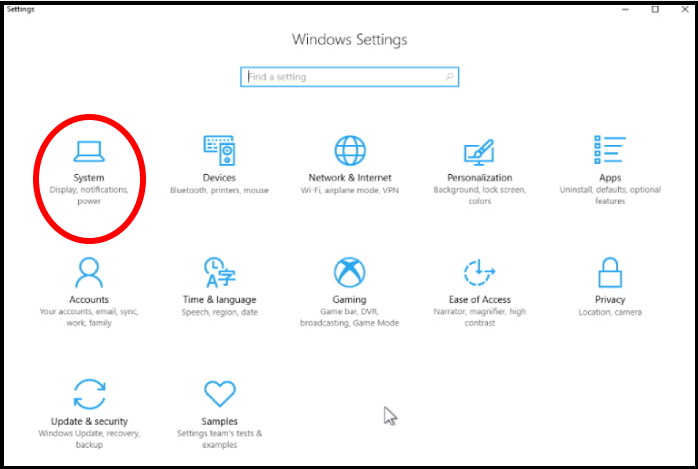
- Open Windows Setting by pressing Win + I shortcut key.
- Choose the System option.

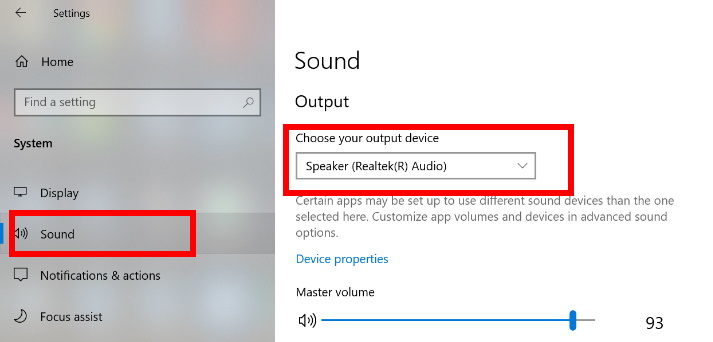
- Now from the left pane of setting window, select the option Sound.
- Thereafter, go to the right side and choose your output device.

Now, system will select this device i.e Speaker automatically, as soon as you try to play a audio. You needn’t to choose device on each time to play a audio device such as speaker.
Through Control Panel
You can also set default speaker in Windows 10 through Control Panel.
- Go to Start.
- Type cp in it
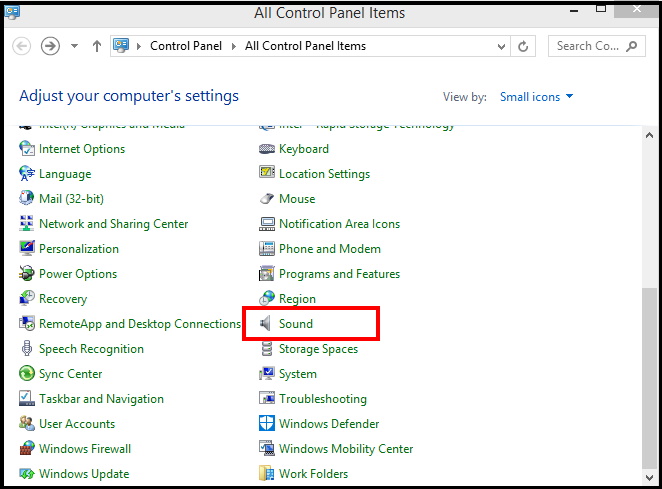
- Select Control Panel from the top as Best Match.
- Now select the option Sound.

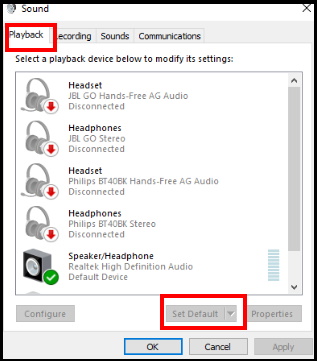
- A new window will popup.
- Here select the option playback from the top menu bar.
- Now choose the speaker or other audio device from the list which you want to set as Default speaker.
- Make a click on Set default from the bottom.

That’s all.
