How to Remove Dism.exe Error 1392 from Windows 10 PC. The error Dism.exe basically connected with corrupted or missing file directory from your windows 10 system. If your any of system file become missing or corrupt, your operating system wouldn’t work properly. Also this issue can lead to further data loss, data missing, hardware failure and broken system file. So you should repair it as soon as possible. Dism.exe Error 1392 can also raise startup issue, downloading problem as well as installing of Apps and various Windows latest updates. In this article, we will discuss How to Remove or fix Dism.exe Error 1392 from Windows 10 PC.
How to Remove Dism.exe Error 1392 from Windows 10 PC
These are the various ways to fix the issue regarding Dism.exe error 1392 in Windows 10. You may apply any of them as per your convenience: –
Tips-1: Disable Third Party Antivirus Temporarily
Although third party antivirus is beneficial or necessity for your windows system. But sometimes, it restrict to function few apps and accordingly appear various types of error. So third party anti malware programs may be a reason of generating Dism.exe error 1392 in Windows 10. You should temporarily disable it by the following steps –
- Press Win + I hotkeys to open Windows Settings.
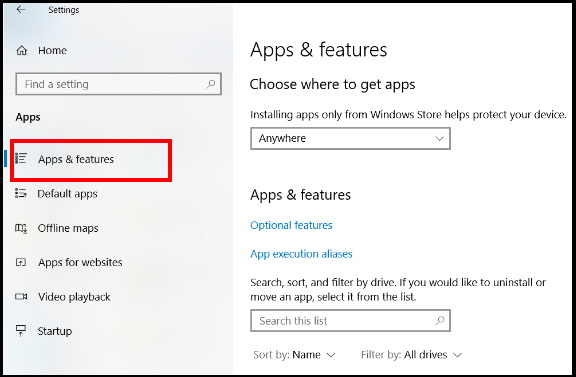
- Select the option Apps from here.
- A new window box will open now.
- Select Apps & features from the left pane.

- Here you will find a list of Applications installed in your system.
- Navigate the third party Antivirus from the list and press the Uninstall button.
- If UAC prompts asking your permission, provide consent by clicking on Yes.
- You should follow on-screen instruction.
Tips-2: Perform a System scan to Remove Dism.exe Error 1392 from Windows 10
Dism.exe Error 1392 appears when any of your system file get corrupt. You should scan your system through Command Prompt.
- Open Run Command by pressing Win+R shortcut key conjointly.
- Type CMD in it and press Enter.
- Command Prompt window will open now.
- Apply a right-click and select Run as Administrator.
- Type sfc/scannow.
- Press Enter.

- Don’t forget to restart your system.
- You may use CCleaner to clean junk files from your windows 10 system.
Tips-3: Apply Clean Boot
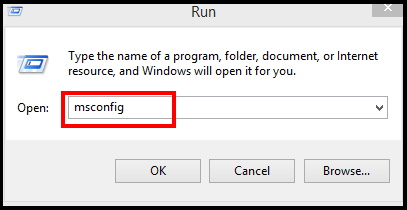
- Go through Run Command.
- Write msconfig in it and press Ok button.

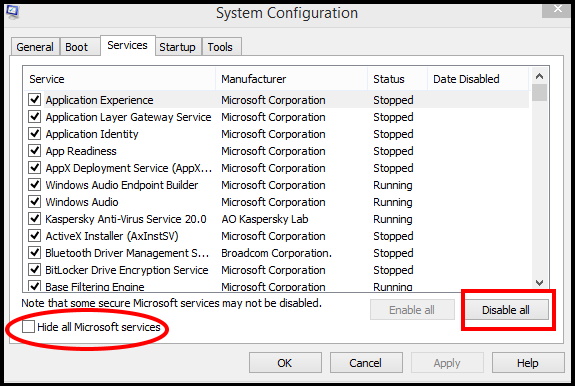
- Now System Configuration window will open.
- From the top menu bar, go to the Services Tab.
- At the End of the page, you will find the option Hide all Microsoft services.
- Mark the tick check against it.
- Thereafter click on Disable all option.

- Then Reboot your system to save the changes you made earlier.
Tips-4: Change Setting of Windows Defender Services
- Apply a right click on start menu.
- Select Run option from the context menu.
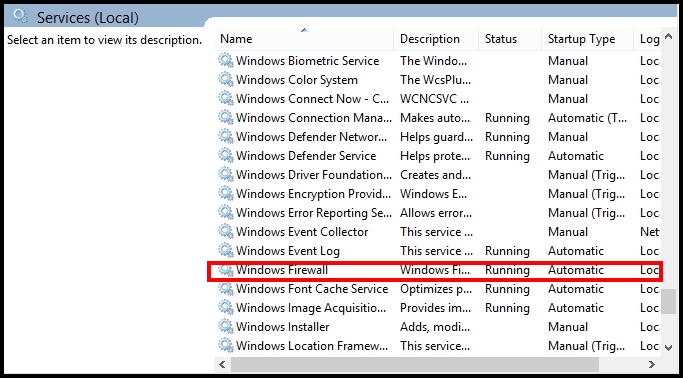
- Type services.msc and press enter to open Services window.
- Here find out the option Windows defender.

- Make a right click on it and select Properties.
- Now go to the section Startup type.
- Set it as Automatic.
- Thereafter click on Apply then click OK and restart your computer.
Tips-5: Apply a Full San of Windows 10 System in Safe Mode
- Press Shift+F8 shortcut keys conjointly to open Recovery window.
- Here you have to click on See advanced repair options.
- Click Troubleshoot options in next window.
- Now a new window of Troubleshoot appears on the screen.
- Click on the Advanced options.
- In the Advanced Options window, choose Windows Startup Settings.
- And now click the Restart button from the bottom.
- The machine demonstrates Advanced Boot Settings comprising diverse choices while the startup is loading.
- Press Safe Mode button which leads to the rebooting of the machine.
- Run a full scan using another antivirus software.
Tips-6: Apply System Restore to Remove Dism.exe error in Windows 10
If you have made any changes in your windows 10 system by installing or un-installing any app and so on, it may be reason to appear Dism.exe error 1392 and failed to detect by Windows Defender as well as Third party Antivirus. When you perform system restore, you will go back to previous point where there is no any error. Follow these steps: –
- Right-click on the Start button and choose Run option.
- Type rstrui in the empty box.
- Then click on OK Button.
- Wait a while till the System Restore wizard appear.
- On the running window, hit the Next option to generate your device’s Restore.
- Thereafter Perform a click on the checkbox before Show more restore points.
- Select the latest one and click Next to go ahead.
- On the next page, hit Finish to let start this process.
Tips-7: Delete temp Files / Cache in Windows 10
- Open your Internet Browsing site.
- From the right top corner, make a click on Setting option.
- Select Internet Options. (Here we will try for Internet Explorer Browser. It may be different for different Browser)
- Here click on the General tab.
- Thereafter click on the option Browsing history.
- Select Delete.
- Remove the check against option Preserve favorites website data.
- Delete temporary files, delete cookies, history, passwords, etc.
- Now go to the Temporary Internet Files and History settings.
- Thereafter make a click on View Files to open the folder where cookies are stored.
- In the open folder, press CTRL+A, CTRL+D, then press enter to delete the cookies.
- Exit and restart your computer.
- Now scan your system with Windows Defender or through any third Party tools.
That’s all.
