How to manage Microsoft OneDrive in Windows 10. OneDrive is a cloud storage device similar to a hard drive installed in Windows 10 system. But one feature makes it different from hard drive, that is, you can use or access it virtually on internet also. You can keep all your important data such as files or folders in OneDrive.
There are lot of features, Microsoft has introduced in it. Some of them are as under: –
- You can synchronize files with Cloud as well as a local folder.
- Microsoft OneDrive makes easy to share files, photos, and even entire folders with colleagues, co-workers and any other partner in a official capacity.
- You can find your files or folders from multiple devices at a time through using client software.
- OneDrive enable you to store all your necessary documents securely in one place and then access them virtually from various other platform.
How to Disable or Remove OneDrive from Windows 10 / 11
How to manage Microsoft OneDrive in Windows 10
The following are the main content of this article: –
- How to create account for OneDrive
- How to set up OneDrive in Windows 10
- Upload files to OneDrive
- Easily access Files or Folders in OneDrive
- Identify Files and Folders Status in OneDrive
- Know your OneDrive status with Icon Color
- What is Files On-Demand and How to use
- How to Use Files On-Demand in OneDrive
- How to share files or Folders in OneDrive
- Remove the Link or Stop sharing option in OneDrive
- How to set up Personal Vault in OneDrive
How to create account for OneDrive
This is the first process to utilize or use OneDrive in windows 10. Microsoft account is must for using OneDrive cloud service in windows 10. If you want to use it, you should have either a @outlook.com, @hotmail.com, or @live.com email address, or Xbox Live or Skype account. With these account, you can utilize the OneDrive service in windows 10. If you have not any such account, you will have to create a new Microsoft account. To create a new Microsoft Account, follow these steps: –
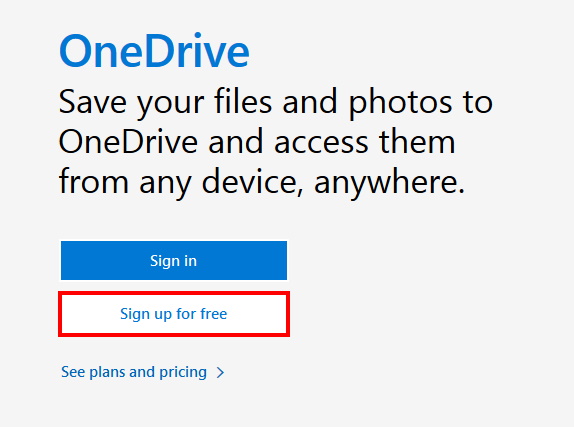
- Go to OneDrive page.
- Here make a click on the Sign up for free option.
- Click on the option Get a new email address.
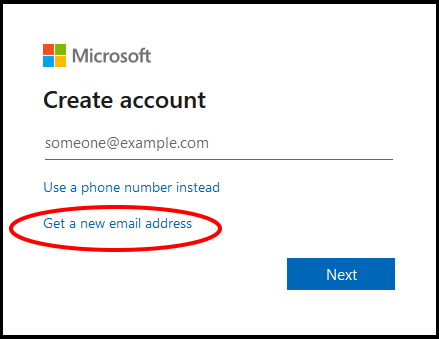
- Create a new email address.
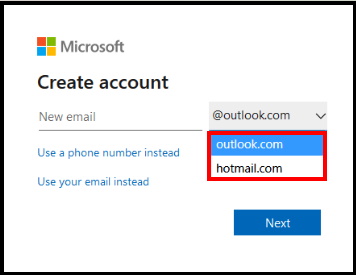
- Here for create a new account, Click on small arrow icon.
- You will find two option, outlook.com and hotmail.com.
- you will have to choose any one option from the drop down menu.
- Select the @outlook.com option.
- Then click on the Next button.
- Now follow on-screen instruction to complete the process.
- Fill up all the required details.
- After completion of the process, you have successfully created a new account.
- Go with that account to login in Microsoft account.
How to set up Microsoft OneDrive in Windows 10
After creating Microsoft Account, the second step is to set up OneDrive in windows 10. Go through the following steps: –
- Go to Start option.
- Type OneDrive in the search field.
- Choose OneDrive from the op displayed result.
If OneDrive not displayed under search result, it means OneDrive is not available in your syste. In this condition, you will have to download it from Microsoft page.
- Confirm your Microsoft account address.
- Click the Sign in option.
- Confirm your account password.
- Again click on the Sign in button.
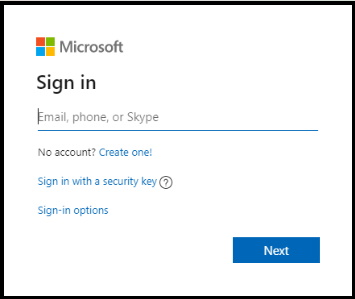
- Thereafter, click on the Next button.
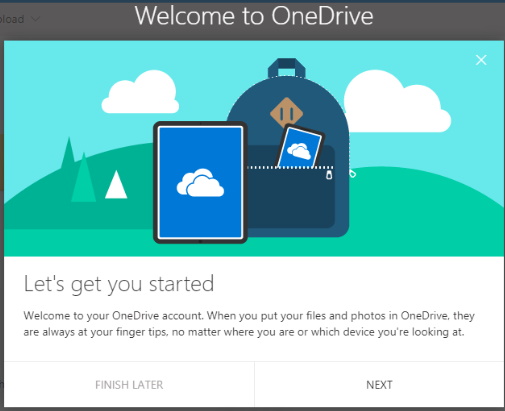
- Now click on the Skip or Continue button.
- Select Not now button.
- Click the Next button.
- Follow on screen instruction to continue with OneDrive.
Now you can easily transfer or upload files to OneDrive.
Upload files to Microsoft OneDrive
- Open File Explorer.
- From the left side of window click on OneDrive.
- Open the folder which you want to upload on OneDrive.
- Drag and drop or simply copy each file and folder you want to upload to the OneDrive folder.
- Now the client will automatically sync all the copies folder to the account in the background.
There is no requirement of transfer of files or folders to OneDrive manually. You should always save the files you’re working on directly to the OneDrive folder.
Easily access Files or Folders in Microsoft OneDrive
Suppose, you have large numbers of files or folders in OneDrive. Some of them are most important. You can make them available easily in File Explorer. Follow these steps: –
- Go to the Notification panel.
- Make a click on the OneDrive icon.
- Select Help & Settings menu from the appearing page.
- Select the Settings option.
- Here go to Account tab from the top menu bar.
- Make a click on the Choose folders button.
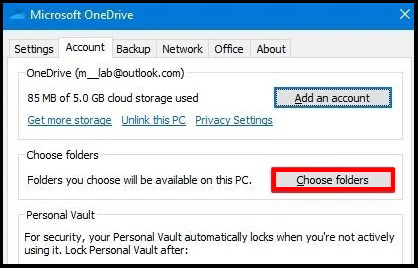
Here you should choose that folder which you don’t want to appear in the File Explorer.
At last click on the OK button.
Note:
- Now only those folders are available here which you have selected as files on-demand.
- If you’re backing up the Desktop, Documents, and Pictures folders, you won’t be able to clear those options. In this situation, Before removing such files or folders you will have to stop the OneDrive backup for those folders.
Identify Files and Folders Status in OneDrive
Inr File explorer, when you open OneDrive, all your files and folders will display here in various aspects. Under status column, you can see certain different colour of your files and folders. These different colors having different meaning. Let’s see one by one: –
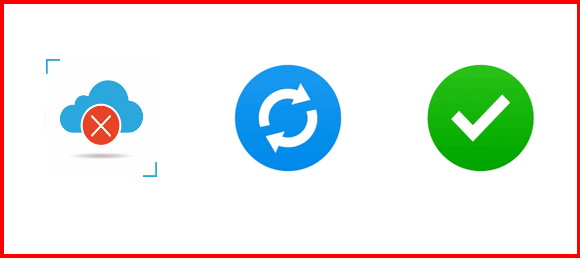
Solid green with white checkmark icon
This color of icon indicates that the option Always keep on this device is enabled. It means these files are most important and also available offline as per your requirement.
Icon surrounded with a circle
It indicates that the files are at present in syncing mode. Means sync is in progress.
White icon with blue border
White icon with blue color surrounded means, the files are only available over a network connection. This type of cloud never utilize your hard drive. If you want to stop downloading over network, simply apply a double click on it. It will then open in a App.
Cross (X) icon surrounded with solid Red color
If a cross sign with red color appears, it means there is an issue with your sync. Your files or folders in onedrive may not sync properly.
A white checkmark within the solid green circle
It indicates that file is available offline, you can open them without an internet connection, and they’re taking up local storage space on the hard drive.
Know your OneDrive status with Icon Color

Gray cloud icon — OneDrive is functioning without signed in any Account.
Red with white X icon — OneDrive is running, but its not syncing. Your OneDrive is not syncing properly.
White cloud icon — Your OneDrive is out of any issue andalso sync properly and up-to-date.
Blue cloud icon — Indicates an “OneDrive for Business” account is configured. The sync is up-to-date and no any issue exists.
Cloud icon with arrows forming a circle — OneDrive is actively downloading or uploading files to the cloud.
What is Files On-Demand and How to use
Files On-demand is also an important feature in OneDrive. Through Files On-Demand, you may access your entire storage of files in File Explorer. There is no any requirement to download them in your Windows 10 System. Simply you may say, Files On-Demand only download little information to make the content visible. It permits you to quickly sync hundreds of gigabytes without using space on your computer.
Although, Files On-Demand feature is available in Windows 10 by default, even if it is not available in your system, enable it by following these steps: –
- Go to Notification Panel of your windows 10 system.
- Make a click on the OneDrive button from the notification area.
- Click the Help & Settings menu.
- Then Select the Settings option.
- Go to top menu bar, click on the Settings tab.
- Under the Files On-Demand section, Make the check on the Save space and download files as you use them option.
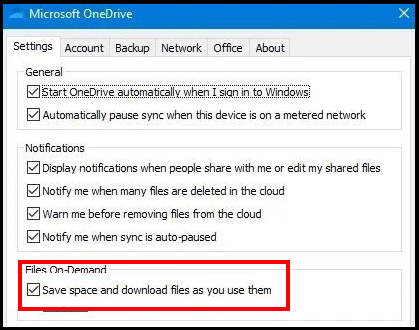
- At last click on the OK button.
- Now OneDrive Files On-Demand is enable on your windows 10 device.
How to Use Files On-Demand in OneDrive
- Launch OneDrive.
- Open any OneDrive folder.
- Apply right-click on the file or folder.
- Here you will find two option under drop down menu:
- Free up space
- Always keep on this device
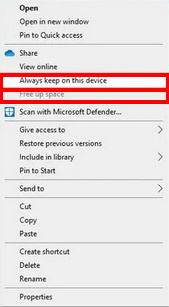
- You should choose any one from the two options.
- If you choose Free up space, it means that file will only available with an internet connection while saving hard drive space.
- If you select Always keep on this device, the content is always available offline, but it’ll use hard drive space.
How to share files or Folders in Microsoft OneDrive
As we have discussed earlier under first paragraph of this article about characteristic of OneDrive. To share a file or folder through OneDrive is also possible and very easy. You can manage OneDrive to share files or folders with your co-worker, friends and as per your choice. You needn’t to copy the files or using any USB Drive to share it with friends. OneDrive allows you to share any files virtually by creating a secure link that others can use to access the content, which you can also revoke at any time. Follow below mentioned steps to complete: –
- Open OneDrive folder.
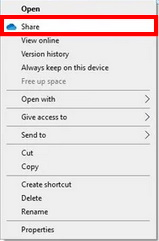
- Make a right-click the folder and select the Share option from the drop down menu.
- You should clear the Allow editing option if you only want someone else to view the file.
- Click the Apply button.
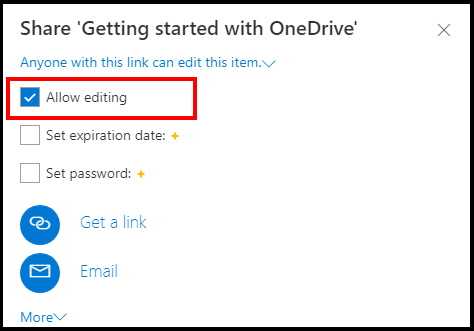
- Put the email address if you want to send the link to another person. Or click the Copy Link option to copy the link to the clipboard.
- After that click on the Send button.
- After you complete the steps, the recipient will receive the link to access the shared files.
Remove the Link or Stop sharing option in OneDrive
If you want to stop sharing files or folders, follow these ateps: –
- Go to OneDrive folder.
- Apply a right-click on the shared file or folder.
- Select the Share option again.
- Here you will find the three-dotted button in the top-right corner.
- Make a click on it.
- Select the Manage Access option.
- Click the Remove link (X) button.
How to set up Personal Vault in Microsoft OneDrive
Microsoft OneDrive Personal Vault provides security to your files or folders. Personal Vault protect your sensitive data such as confidential PIN, data, documents etc with various aspects. You may set your Personal Vault in One Drive to keep your sensitive data safe. Follow these methods: –
- Open OneDrive from the notification area.
- Click the Help & Settings menu.
- Then, click the Unlock Personal Vault menu.
- Now click on the Next button.
- Thereafter click on the Allow button.
- Follow on-screen instruction to complete the procedure.
That’s all.

1 thought on “Tips: All about Microsoft OneDrive in Windows 10”