How to customize Start menu in Windows 10. Start Menu in windows 10 is an interesting and essential feature from where you can access files, app, setting etc. Microsoft always add different features through windows latest update in start menu to familiarize the users. The most attracting feature of start menu is its default layout, which users always like and easy to access windows 10 components. You may customize start menu or change its layout, size, color as well as its view as per your choice. You can change various settings of All apps list as per your requirement.
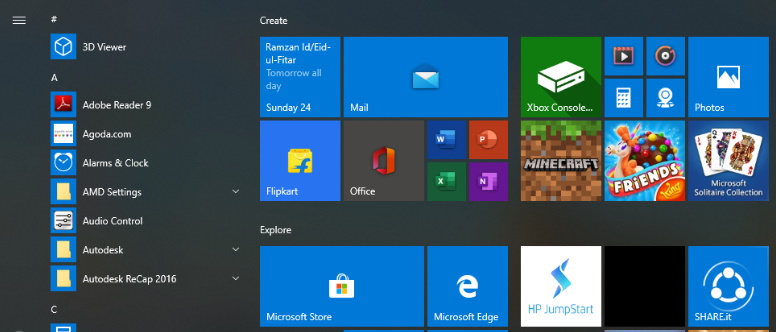
Start Menu is basically located at the bottom of the left corner of your windows 10 system. Here you will find All Apps feature placed in alphabetically order so that you can find or access all features very easily.
The left pane of the menu reveals An ‘All apps’ button which can be noticed at the bottom. This is a vital feature and exhibits you a huge list of all the programs settled in alphabetical order installed on the computer.
How to customize Start menu in Windows 10
In this article, we will see how to make changes in its various feature such as size, view, color etc. You may add features in start menu in Windows 10. Be continue with this article, let’s start.
Make Start Menu as Full Screen View in Windows 10
If you want to change the view of start menu in Windows 10 as full screen, it is possible. Just go through the following steps: –
- Go to Windows Setting.
- Choose Personalization.
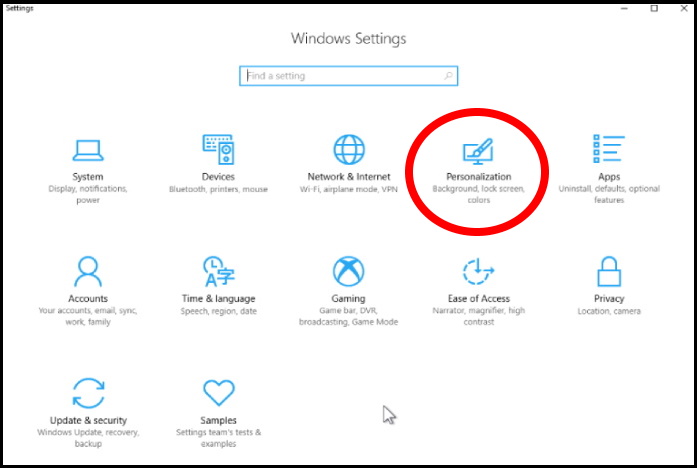
- From the left pane of setting page, Click on Start option.
- Now from the right side of option, turn on the Use Start full-screen toggle switch.
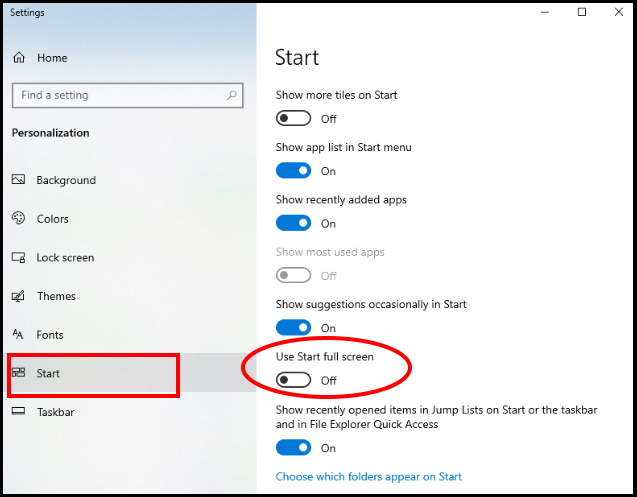
This will enable the start menu as full screen mode.
Change Start Menu size Windows 10
Generally, Start Menu windows open on half of your screen in which all the tiles are not visible. You may increase or decrease the size of Start menu window by two methods. Apply any one of them as per your convenience.
1. Resize Start Menu Manually
To resize the Start menu on Windows 10 manually, use these steps:
- Go to Start menu and click on it to open.
- It will open over the desktop screen.
- Make a click and draw the top edge upwards with the mouse to increase the size of start menu window.
- Apply the same action to the right side of edge.
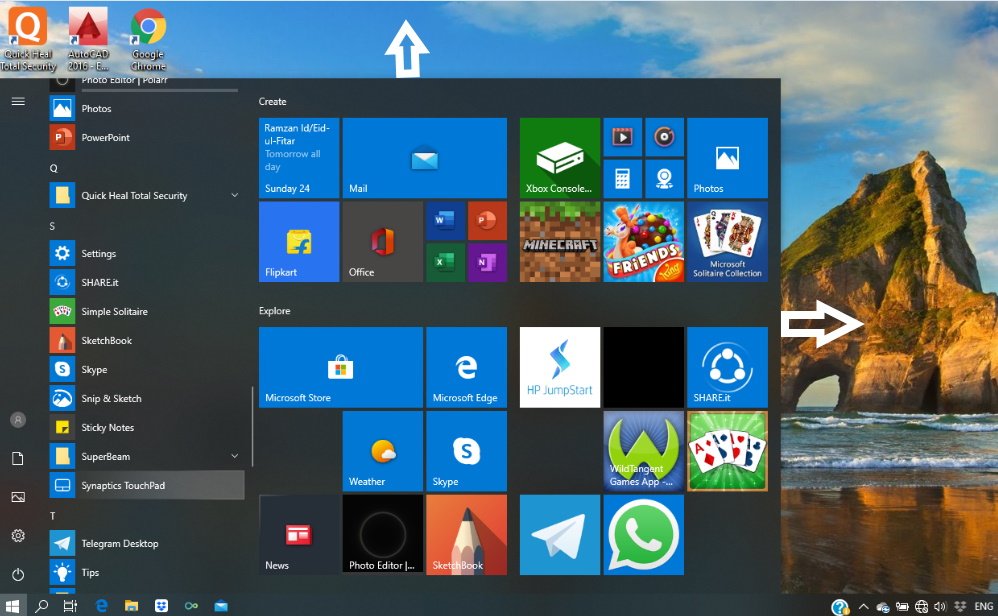
2. Resize the Start Menu window through Shortcut key
You may change the size of start menu through windows shortcut keys. These keys will increase the size: –
- Open Start Menu.
- Now press the following key multiple times as per your requirement to increase or stretch the size: –
- Ctrl + Up arrow keys – to change the height of start menu window
- Ctrl + Right arrow key – to change the width of start menu window
Show More Tiles in Start Menu in Windows 10
This is also an another way to increase the size of Start Menu Windows. If start menu windows comprises more tiles, it will automatically increase. show change the setting as show more tiles option by following these steps: –
- Open Windows Setting by pressing Win + I shortcut key conjointly.
- Go to Start Section.
- Select Personalization and further proceed to right side of setting window.
- Turn the toggle button On against Show more tiles option.
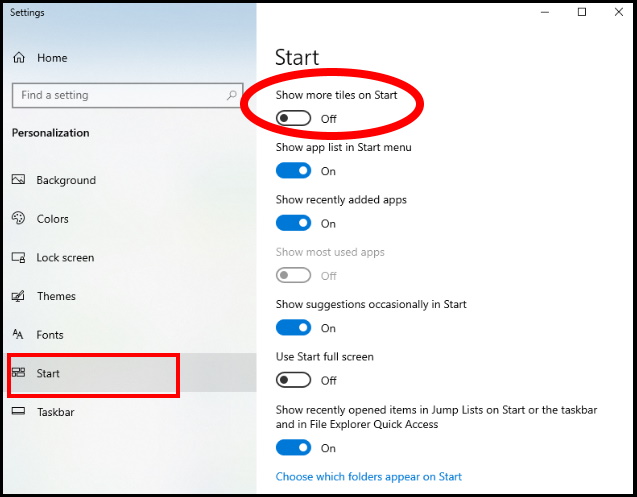
After the Show more tiles on Start option on, you may see that the tile column has expanded by the width of one medium-sized tile.
Change Start Menu color in Windows 10
It is also possible to change the Color of the start menu. You can choose or set the color as per your choice through Windows Setting.
- Again go to the setting app.
- Select Personalization.
- Now select Colors option from the left menu list.
- Here you will see the option Choose your color from the right side of setting page.
- Under the Choose your color section, from the drop-down menu and select the Dark or Custom option with the Dark option for the Choose your default Windows mode setting.
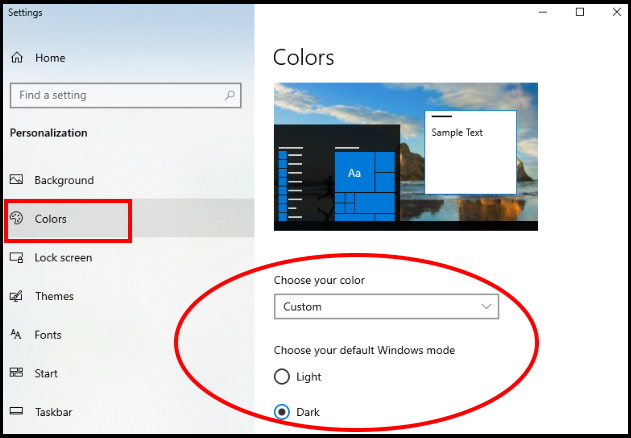
- Now go to the Show accent color on the following surfaces section.
- Make the check on the Start, taskbar, and action center option.
- Here you will find Windows colors picker.
- Select any color for the Start menu and other elements.
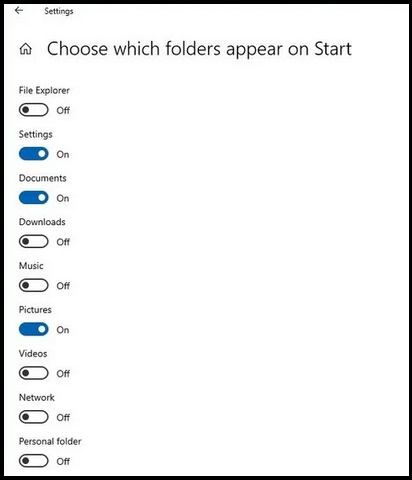
Add or Remove System Folder
As we know, you can also keep system files or folders in start menu window as per your selection. You can add or remove system files from start menu window. Follow these steps: –
- Launch Windows Settings.
- Click on Personalization.
- Click on Start.
- Make a click on the Choose which folders appear in Start option.
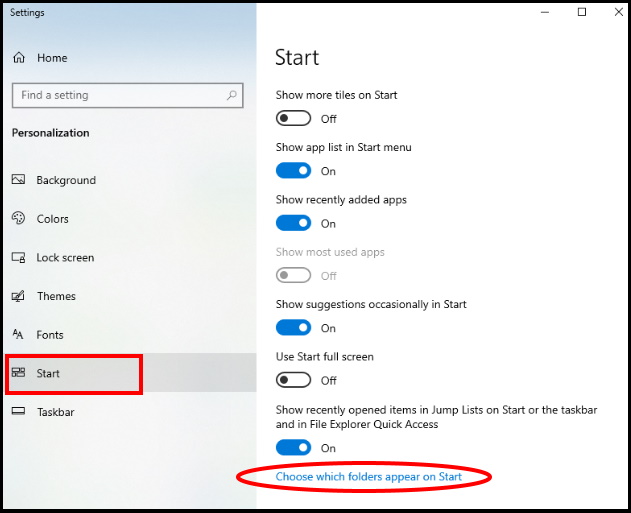
- Select the system folders which you want to show in start menu.
How to Manage App list appearance in Start Menu
How many apps installed in your system, it appears on your windows start menu by default. All your apps menu are visible on this place. Either your recently installed, most used, or suggested apps. If all of then will appear on opening of Start menu, you will feel some difficulties to navigate your required app. So you should manage its appearance. Follow these steps: –
- Go to Windows setting and choose Personalization.
- From the left pane, select Start.
- Now at the right side of setting page, you will find three option: –
- Show app list in Start menu
- Show recently added apps
- *Show most used apps
- Choose any one of them as per your convenience and turn the toggle button On.
How to Pin and Unpin Start menu tiles
You can add or remove apps tiles from the start menu in Windows 10. For this, you should choose Pin or Unpin App. To Pin and Unpin App tiles, follow these steps: –
- Open Start.
- Right-click any app from the app list.
- Select the Pin to Start option.
- Again to unpin, apply same process on tiles and choose Unpin to start option.

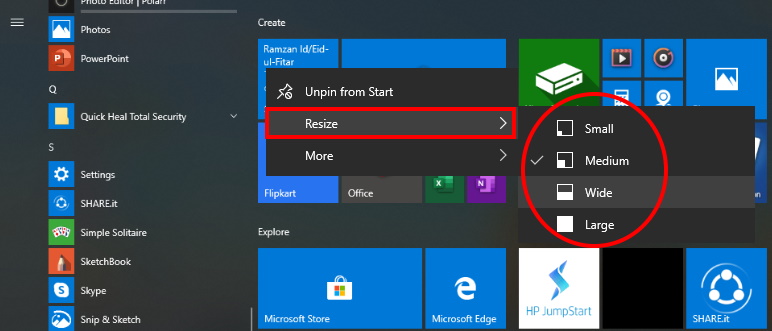
How to Change size of App Tiles in Start Menu in Windows 10
Size of app tiles is more important for better experience of start menu in windows 10. You can change their size, arrange them in groups, and group them into folders to increase the space in the menu.
- Open Start.
- Right-click an app tile from the right side.
- Choose the Resize sub menu and choose one of the available sizes:
- Small.
- Medium.
- Wide.
- Large.
Remove Suggested Apps from App List
App suggestion an another feature of Start Menu in Windows 10. But some users don’t want to appear app suggestion from App List. As soon as, you launch the start menu, a list of recommendation of apps appear on your screen. You may remove it or disable this feature through setting app. Follow these steps to complete the task: –
- To disable this feature open Windows Settings app.
- Choose Personalization option from menu tiles.
- Click on Start from the left menu list.
- Here, you will see the option, Show suggestions occasionally in Start.
- Turn the toggle button Off to disable this feature.
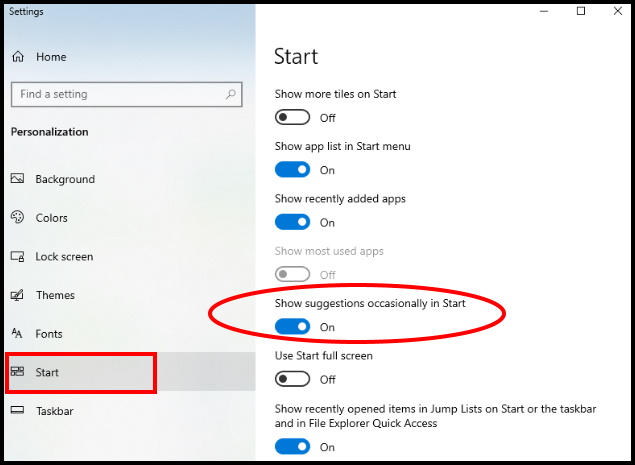
App suggestion will no longer be available and appear on your windows screen.
Turn Off Live Tiles Updates
You may turn off or disable live tiles updates. Go through the following steps: –
- Go to the Start.
- Apply Right-click on any app tile from the right side.
- Hover the mouse pointer to more option.
- A submenu will open.
- Here select Turn Live Tile off option.
How to create groups in Start menu in Windows 10
Microsoft allow to arrange start menu tiles into a group. You may create a group for specific menu as per your choice. To create groups on the Start menu, use these steps:
- Open Start.
- Drag and drop an app tile on an blank space of start menu window.
- You may drag and drop more app tiles to the section as per your requirement.
- Also Put a name of the group from the header of the group.
That’s all.

