How to Fix Task Manager showing incorrect CPU Usage in Windows 11 / 10. Users always check and measure system resources usage through Task manager graph. They are fully dependent on Task Manager to identify the usage of various aspects of Windows 11/10. But, Sometimes users having report that their Task Manager not displaying correct percentage of CPU usage. This may be due to any recently installed updates or incorrect power settings. However, this problem comes to notice when they installed Windows 11 22H2 updates. Certain settings in your system can resolve this issue. Basically this error is not noticable for most of the users. But CPU usage 90-100% is not correct always. In this article we will discuss various aspects to resolve the issue regarding incorrect CPU usage in Task Manager.
Initial Workaround
- At first, you must check and ensure the following: –
- Install Windows 11 latest updates / Windows 10 latest updates
- Disable third party antivirus for a while to check the error.
- Your system must fulfill the Minimum System requirements to install Windows 11.
How to Fix Task Manager showing incorrect CPU Usage in Windows 11 / 10
If you have already applied the above mentioned initial workaround, and problem is still, go to these methods to resolve the issue regarding incorrect CPU usage in Task Manager.
1st Method: Apply Memory Diagnostic tools
If you are facing incorrect CPU usage due to any memory related issue, you should run Memory Diagnostic Tool to resolve this issue. Go through these steps: –
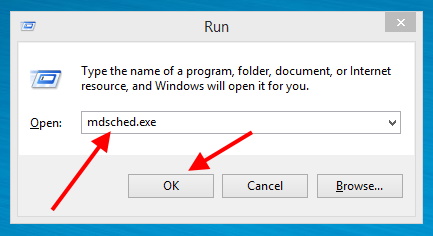
- Press Win + R shortcut key to launch Run command box.
- Type mdsched.exe command in search field.
- Press Ok button to continue.
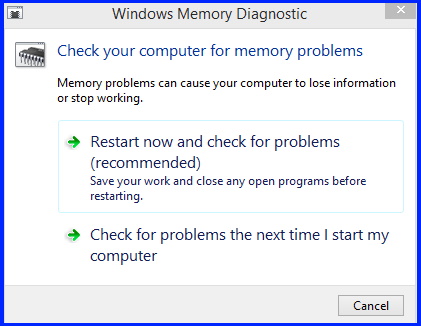
- Windows Memory Diagnostic will open now.
- Here select the first option and follow on-screen instruction.
Check whether the issue resolved or not.
2nd Method:Modify Power Settings to fix Incorrect CPU Usage in Windows 11 / 10
- Right click on start button and choose Settings from the context menu.
- You may press Win + I shortcut to launch Settings app in Windows 11 / 10.
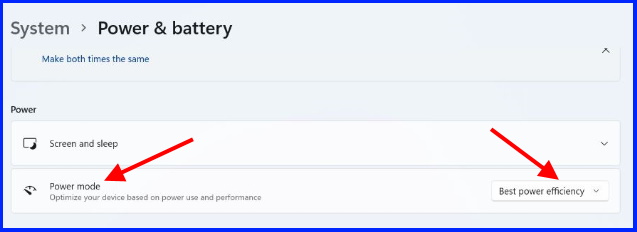
- Under System settings, choose Power & Battery option.
- Scroll down and go to the Power mode section.
- Click on small arrow and select the option Best Power efficiency or Best Performance.
- Restart your Windows system.
3rd Method: Perform Clean Boot
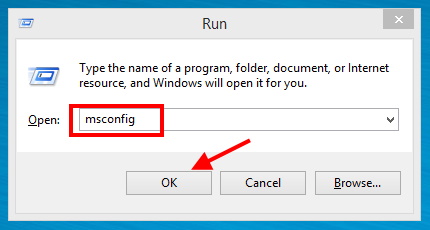
- Open Run dialog box and enter the command msconfig.
- Press Ok.
- System Configuration window will open now.
- Here go to the services tab from the top menu bar.
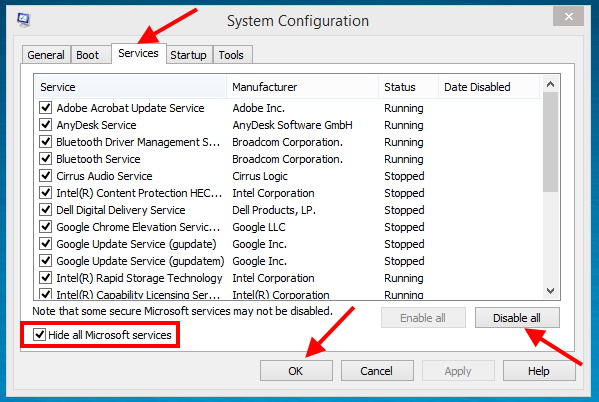
- Finally click on Ok button and Restart your system.
4th Method: Turn off C-State Efficacy Mode to Fix Incorrect CPU usage in Task Manager Windows 11 / 10
You may resolve this issue by entering BIOS Mode. Follow these steps: –
- Turn Off your PC.
- Turn the power button on and simultaneously press Function key as per your system motherboard requirement to enter BIOS mode.
- Here you will find the option System Utilities / Advance CPU Settings, it will differ in different system.
- Click on System Configuration / Platform configuration option.
- Navigate the option Power and Performance.
- Here you will find the option Global C-State Control / C-State efficacy mode.
- Turn it Off or Disable followed by save button.
- Restart your Windows 11 / 10 system.
5t Method: Reset Windows 11 system
If none of the above method get effective to fix this issue, you should Reset your system and perform clean install window. Follow these steps: –
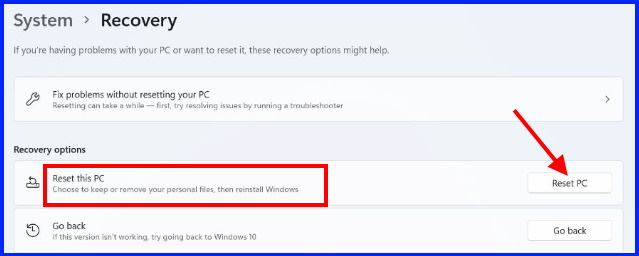
- Press Win + I to open Windows Settings app.
- Under system settings, go to the Recovery section.
- Click on Reset PC.
- Follow on-screen instruction.
You can also download this PC Repair tool to Locate and Fix any PC issue:
Step 1 – Download the Restoro PC Repair Tool
Step 2 – Click on Start Scan to find and Fix any PC issue automatically.
That’s all.
